Cherries in the Snow – Easy Winter Dessert Recipe
Cherries in the Snow is a dessert that truly embodies the magic of the holidays. It’s a dish that whispers of cozy evenings, crackling fires, and the sweet anticnon-alcoholic ipation of festive gatherings. Imagin extracte the vibrant ruby jewels of cherries nestled within a cloud of ethereal white – it’s a visual feast before you even take your first bite. Why do we fall so hard for Cherries in the Snow year after year? It’s the exquisite balance of tart and sweet, the surprisingly simple elegance that belies its rich flavor, and the sheer comfort it brings. This isn’t just a dessert; it’s a nostalgic embrace, a cherished tradition that brings families together and creates lasting memories. What makes this particular recipe so special is its inherent adaptability, allowing you to infuse it with your own personal touch, while still capturing the quintessential charm of Cherries in the Snow.
Get Ready to Fall in Love
Our Favorite Cherries in the Snow Recipe
Cherries in the Snow
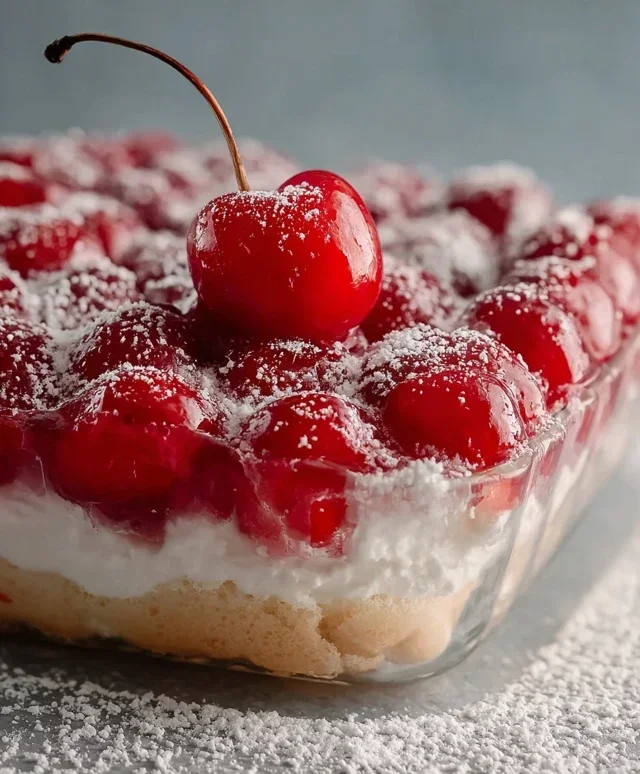
Cherries in the Snow is a delightful, no-bake dessert that’s as visually appealing as it is delicious. It’s a classic for a reason, bringin extractg together creamy, dreamy layers with the sweet-tart burst of cherry filling. This dessert is incredibly easy to assemble, making it perfect for potlucks, holidays, or when you simply crave a sweet treat without a lot of fuss. The snowy white layers of cream cheese and whipped topping are beautifully contrasted by the vibrant ruby-red cherry pie filling, creating a stunning presentation that’s sure to impress. Let’s get started and create this beautiful dessert!
Ingredients:
Assembly Instructions:
This recipe relies on simple layering and chilling to achieve its signature look and taste. The beauty of Cherries in the Snow is that there’s no baking involved beyond preparing your angel food cake, or if you’re using a store-bought one, the work is already done!
Step 1: Prepare the Creamy Base
The foundation of our “snow” is a rich and creamy mixture. In a medium-sized bowl, combine the 8 ounces of room temperature cream cheese with the 1/2 cup of powdered sugar. It’s important that the cream cheese is at room temperature; this will make it much easier to beat until smooth and lump-free. If it’s too cold, you’ll end up with a lumpy base, which isn’t ideal for our smooth, snowy layers. Using an electric mixer (handheld or stand mixer) on medium speed, beat the cream cheese and powdered sugar together until the mixture is light, fluffy, and completely smooth. This usually takes about 2-3 minutes. Once you have this creamy base, gradually add the 1/2 cup of 2% milk while continuing to beat. Beat until everything is well combined and the mixture has a smooth, pourable consistency. This liquid addition will help thin out the cream cheese mixture slightly, making it easier to spread and incorporate with the whipped topping later.
Step 2: Incorporate the Whipped Topping
Now it’s time to lighten up our cream cheese mixture and create the airy “snow” texture. Gently fold in the 12 ounces of thawed Cool Whip whipped topping into the cream cheese mixture. It’s crucial to thaw the Cool Whip completely. If it’s still frozen, it won’t incorporate properly and will leave icy pockets in your dessert. Use a spatula and fold carefully to avoid deflating the whipped topping too much. You want to gently combine the two until no streaks of cream cheese are visible, but maintain as much airiness as possible. This will result in a light, fluffy, and smooth white layer that forms the bulk of our snowy landscape. Overmixing here can make the final dessert denser than desired.
Step 3: Prepare the Angel Food Cake
The angel food cake provides the structure for our dessert. You can use a store-bought angel food cake for ultimate convenience, or bake your own from a mix or your favorite recipe. Once the cake is baked and completely cooled, you’ll want to slice it into bite-sized cubes. Aim for pieces that are about 1-inch in size. You can do this by slicing the cake into two or three horizontal layers and then cutting those layers into cubes, or simply by tearing the cake into irregular chunks. These pieces don’t need to be perfect; in fact, slightly irregular shapes can add to the rustic charm of the dessert. Ensure the cake is fully cooled before cubing, as a warm cake will crum extractble too much.
Step 4: Layering the Dessert
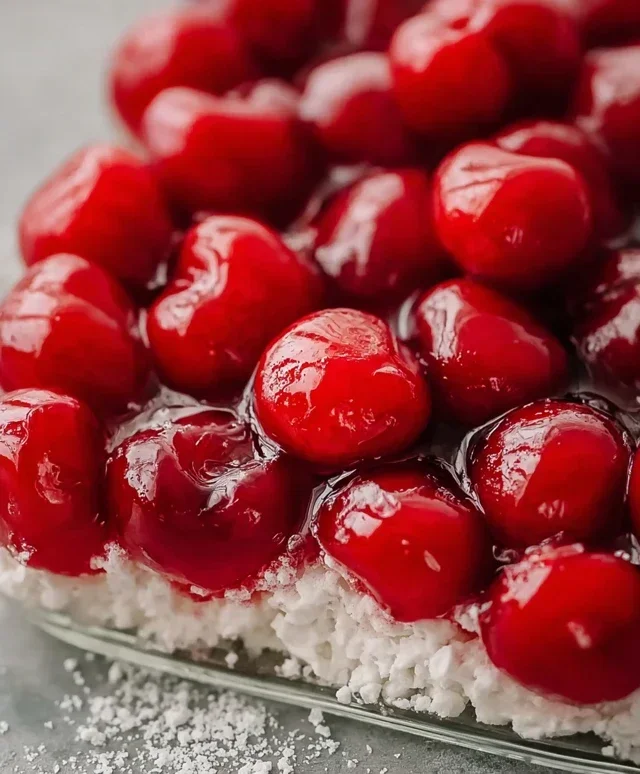
This is where the magic of “Cherries in the Snow” truly comes to life. You’ll need a clear glass serving dish, such as a trifle bowl or a 9×13 inch baking dish, so you can see the beautiful layers. Begin extract by placing half of the cubed angel food cake on the bottom of your serving dish. Gently spread half of the cream cheese and whipped topping mixture evenly over the cake cubes. Next, spoon half of the two cans of cherry pie filling over the creamy layer. Don’t worry if it doesn’t cover perfectly; the spreading and settling will happen as it chills. Repeat these layers with the remaining angel food cake, followed by the remaining cream cheese mixture, and finally, the rest of the cherry pie filling. Ensure the top layer of cherry pie filling is spread as evenly as possible for a beautiful presentation.
Step 5: Chilling and Serving
Once all the layers are assembled, it’s essential to allow the dessert to chill in the refrigerator. Cover the dish tightly with plastic wrap. This chilling period is crucial for several reasons. Firstly, it allows the flavors to meld together, creating a more cohesive and delicious taste. Secondly, it allows the angel food cake to absorb some of the moisture from the cream cheese mixture and cherry filling, which softens it beautifully and prevents it from being dry. The chilling also allows the dessert to set, making it easier to serve clean slices. I recommend chilling for at least 4 hours, but overnight is even better if you can resist the temptation! When you’re ready to serve, simply scoop generous portions into bowls. The contrast of the white, fluffy layers and the vibrant red cherry filling is a true delight for the eyes and the palate. Enjoy this refreshing and beautiful dessert!
Conclusion:
I hope you’ve enjoyed learning how to create this delightful ‘Cherries in the Snow’ dessert! This recipe is truly wonderful because it offers a beautiful balance of sweet, tart cherries nestled within a creamy, ethereal snow-like meringue. It’s visually stunning with its vibrant red against stark white, making it a showstopper for any occasion. Whether you’re celebrating a holiday, hosting a dinner party, or simply craving a unique treat, this dessert is sure to impress. Its relatively simple preparation belies its elegant presentation and delicious taste. Don’t be intimidated by the meringue; with a little patience, you’ll achieve perfect, crisp peaks.
For serving suggestions, I love to present ‘Cherries in the Snow’ chilled, allowing the flavors to meld beautifully. It’s fantastic on its own, but a sprinkle of fresh mint leaves can add a lovely pop of color and freshness. You could also serve it alongside a light vanilla bean ice cream for an extra touch of indulgence. For variations, consider adding a touch of almond extract to the meringue for a subtle nutty flavor that complements the cherries wonderfully. If fresh cherries are out of season, high-quality frozen cherries, thawed and drained, work well, though the texture might be slightly softer.
I truly encourage you to give this recipe a try. It’s a rewarding experience and the results are simply magical. Let the sweet tartness of the cherries and the light, airy meringue transport you to a winter wonderland!
Frequently Asked Questions:
Can I make this dessert ahead of time?
Yes, you absolutely can! The meringue base can be made a day or two in advance and stored in an airtight container at room temperature. The cherry topping can also be prepared a few hours ahead and refrigerated. It’s best to assemble the dessert just before serving to ensure the meringue stays crisp.
What if I don’t have fresh cherries?
Don’t worry! If fresh cherries aren’t available, frozen cherries are a great substitute. Thaw them completely and drain off any excess liquid before using them in the topping. You might need to adjust the sugar slightly depending on their sweetness. Dried cherries, rehydrated, could also be an interesting textural variation, though the flavor will be more concentrated.
My meringue is sticking to the baking sheet. What did I do wrong?
This usually happens if the baking sheet isn’t properly lined. Always use parchment paper or a silicone baking mat to prevent sticking. Ensure your egg whites are completely free of any yolk, as fat can prevent them from whipping to stiff peaks. Also, make sure your bowl and whisk are spotlessly clean and dry before you start whipping.
Cherries in the Snow
A simple and delicious no-bake dessert featuring layers of creamy filling, angel food cake, and cherry pie topping.
Ingredients
-
8 ounces cream cheese, room temperature
-
1/2 cup powdered sugar
-
1/2 cup 2% milk
-
12 ounces Cool Whip whipped topping, thawed
-
1 pre-baked 9-inch angel food cake
-
2 cans cherry pie filling (21 ounces each)
Instructions
-
Step 1
In a medium bowl, beat together the softened cream cheese and powdered sugar until smooth. -
Step 2
Gradually beat in the milk until well combined and smooth. -
Step 3
Gently fold in the thawed Cool Whip until no white streaks remain. -
Step 4
Tear the angel food cake into bite-sized pieces and layer half of the cake pieces in the bottom of a 9×13 inch baking dish. -
Step 5
Spread half of the cream cheese mixture evenly over the cake layer. -
Step 6
Spoon half of the cherry pie filling over the cream cheese layer. -
Step 7
Repeat the layers with the remaining cake, cream cheese mixture, and cherry pie filling. -
Step 8
Cover and refrigerate for at least 4 hours, or preferably overnight, before serving.
Important Information
Nutrition Facts (Per Serving)
It is important to consider this information as approximate and not to use it as definitive health advice.
Allergy Information
Please check ingredients for potential allergens and consult a health professional if in doubt.