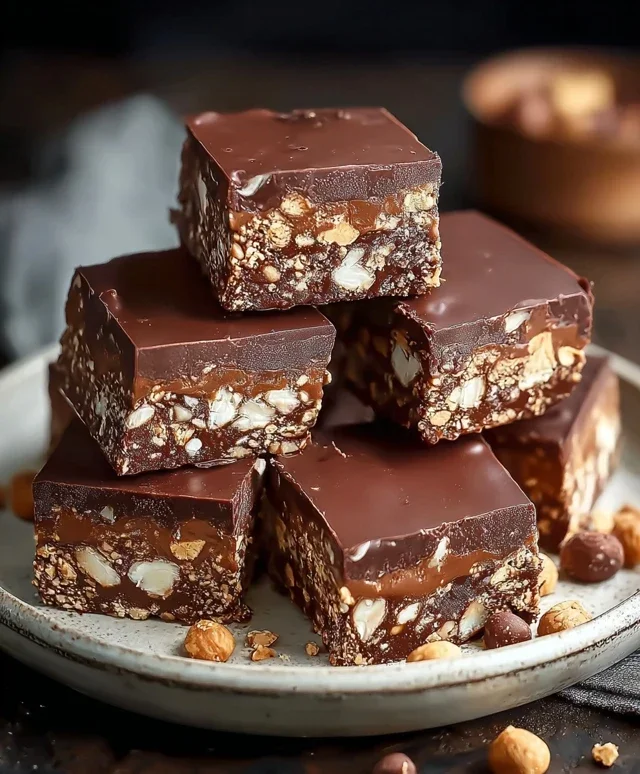
Easy No-Bake Chocolate Biscuit Bars Recipe
No-Bake Chocolate Biscuit Bars are the ultimate shortcut to dessert bliss. There are some days when the craving hits, and the thought of preheating the oven feels like a marathon. That’s precisely when these incredibly satisfying no-bake chocolate biscuit bars swoop in to save the day! We all adore them for their delightful chegrape juicess, the rich chocolatey punch, and the delightful crunch of biscuits that makes every bite an experience. What truly makes these no-bake chocolate biscuit bars so special is their incredible simplicity, making them perfect for busy weeknights, impromptu gatherings, or when you just need a quick sweet fix without the fuss. They’re a guaranteed crowd-pleaser, effortlessly transforming humble ingredients into a decadent treat that feels like pure indulgence.
Why You’ll Love Them
Effortless Indulgence
These bars are your secret weapon for deliciousness without the heat. Perfect for begin extractners and seasoned bakers alike, they prove that extraordinary treats don’t require hours in the kitchen.
No-Bake Chocolate Biscuit Bars
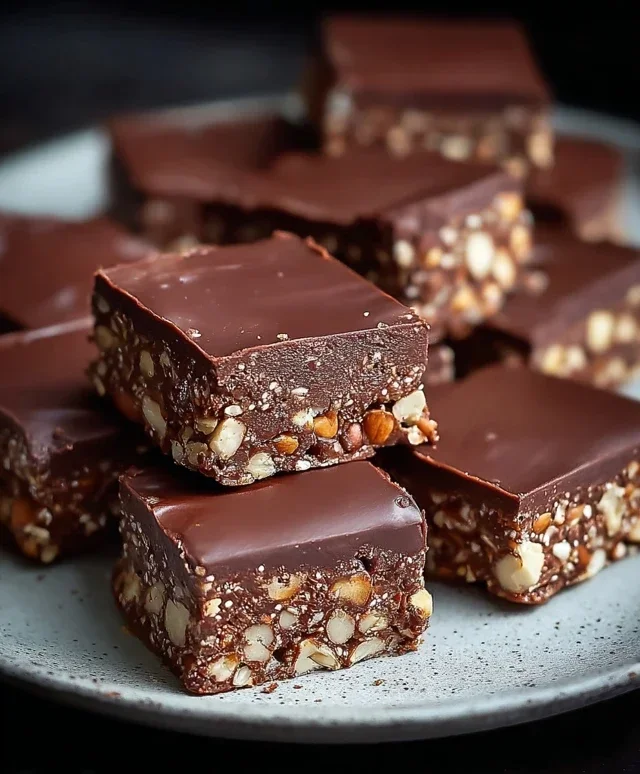
Are you craving something wonderfully chocolatey, ridiculously easy, and guaranteed to impress? Look no further than these No-Bake Chocolate Biscuit Bars! They’re the perfect treat for when you want maximum deliciousness with minimal effort. No oven required, just a few simple ingredients and a little bit of mixing. These bars are a delightful combination of crunchy biscuits, rich chocolate, and a hint of nutty goodness, making them an instant crowd-pleaser for any occasion. Whether you’re hosting a party, need a quick dessert fix, or just want to indulge your sweet tooth, these bars will hit the spot every time.
The beauty of these bars lies in their simplicity. You don’t need to be a seasoned baker to whip them up. The textures are fantastic – the crispness of the crushed biscuits balanced by the smooth, melted chocolate and the creamy binding. The ground peanuts add a wonderful depth of flavour and a satisfying crunch that complements the chocolate perfectly. And with the option to include vanilla sugar, you can add an extra layer of aromatic sweetness that elevates the whole experience.
Let’s get started on creating these delightful treats!
Ingredients:
Cooking Instructions
Step 1: Preparing the Biscuit Base
First things first, we need to get our biscuits ready. Take your 12.3 oz (350g) of biscuits and crush them into fine crum extractbs. You can do this by placing them in a sturdy zip-top bag and crushing them with a rolling pin, or if you have a food processor, that’s even quicker. The goal is to have a fine, consistent crum extractb that will bind together well. Avoid large chunks; we want a smooth base. In a large mixing bowl, combine these crushed biscuits with 1 cup (3 oz / 85g) of ground peanuts. This peanut and biscuit mixture will form the delicious foundation of our bars. The peanuts add a fantastic texture and a subtle nutty flavour that pairs beautifully with chocolate.
Step 2: Creating the Chocolatey Binder
Now, let’s create the rich, chocolatey binder that holds everything together. In a medium saucepan, combine the ½ cup (3.9 oz / 110g) of butter, ¾ cup (6 fl oz / 180ml) of sweet cream, and ½ cup (1.6 oz / 45g) of cocoa powder. If you’re using the optional vanilla sugar, add that here too. Place the saucepan over medium-low heat. Stir continuously until the butter has completely melted and the mixture is smooth. You want to gently heat this mixture, just enough to melt the butter and ensure the cocoa powder is fully incorporated without any lumps. Avoid boiling; a gentle simmer is all you need. Once everything is well combined and smooth, remove the saucepan from the heat.
Step 3: Combining the Base and Binder
It’s time to bring our biscuit and peanut mixture together with our warm chocolatey binder. Carefully pour the warm chocolate mixture from the saucepan into the large mixing bowl containing the crushed biscuits and ground peanuts. Using a sturdy spoon or spatula, stir everything together thoroughly. Make sure every bit of the dry ingredients is coated with the chocolate mixture. You want a thick, cohesive mass that will hold its shape. This step requires a bit of muscle, so don’t be afraid to really mix it well. Ensure there are no dry pockets of biscuit or peanut left. The mixture should be sticky and clumpy, ready to be pressed into our pan.
Step 4: Pressing the Bars into the Pan
Line a square baking dish, approximately 8×8 inches or a similar size, with parchment paper. This will make it super easy to lift the bars out once they’re set. Now, spoon the chocolate biscuit mixture into the prepared baking dish. Using the back of your spoon or a spatula, press the mixture down firmly and evenly into the pan. You want a compact layer; the denser it is, the better your bars will hold together. Take your time with this step, ensuring the surface is as flat and even as possible. You can also use the bottom of a glass to help press it down firmly. Once pressed, place the dish in the refrigerator for at least 30 minutes to allow the base to firm up. This chilling time is crucial for getting clean cuts later.
Step 5: Creating the Chocolate Topping
While the base is chilling, let’s prepare our luscious chocolate topping. In a heatproof bowl set over a saucepan of simmering water (a double boiler method), combine the 3.2 oz (90g) of milk chocolate and 1 oz (30g) of dark chocolate. Add the 2 tbsp (1 oz / 30g) of vegetable oil. The vegetable oil is key here; it will give our chocolate topping a beautiful sheen and ensure it sets smoothly without becoming too hard or brittle. Stir gently and constantly until both chocolates are completely melted and smooth. Once melted, remove the bowl from the heat. Stir in the remaining ¾ cup (2.5 oz / 70g) of ground peanuts into the melted chocolate. This adds another layer of texture and flavour to the topping.
Step 6: Finishing and Chilling the Bars
Once the biscuit base has chilled and firmed up, retrieve it from the refrigerator. Pour the melted chocolate and peanut mixture evenly over the chilled biscuit base. Spread it out smoothly with a spatula, ensuring it covers the entire surface. Return the dish to the refrigerator and let it chill for at least 2-3 hours, or until the chocolate topping is completely firm. For the best results, I usually leave mine in the fridge overnight. Once set, use the parchment paper to carefully lift the entire slab out of the baking dish. Place it on a cutting board and use a sharp knife to cut it into bars of your desired size. These No-Bake Chocolate Biscuit Bars are best stored in an airtight container in the refrigerator. Enjoy!
Conclusion:
There you have it – your ultimate guide to creating delicious No-Bake Chocolate Biscuit Bars! I truly hope you’re as excited to whip up these treats as I am to share them. This recipe is a lifesaver for those moments when you crave something sweet and chocolatey without turning on the oven. The beauty lies in its simplicity; a few common ingredients, minimal effort, and you’re rewarded with a deeply satisfying, chewy, and chocolatey bar that’s perfect for any occasion. Whether you’re a seasoned baker or a complete begin extractner, these no-bake bars are incredibly forgiving and consistently deliver fantastic results.
These bars are incredibly versatile. Enjoy them as a quick breakfast on the go, a delightful afternoon pick-me-up with a cup of tea or coffee, or the perfect addition to a dessert platter. For variations, don’t be afraid to experiment! Stir in some chopped nuts like walnuts or pecans for added crunch, a sprinkle of sea salt to enhance the chocolate flavour, or even a handful of dried cranberries for a touch of tartness. You could also drizzle melted white chocolate over the finished bars for an extra layer of indulgence. I wholeheartedly encourage you to give these No-Bake Chocolate Biscuit Bars a try. I promise you won’t be disappointed!
Frequently Asked Questions:
Can I make these bars ahead of time?
Absolutely! These No-Bake Chocolate Biscuit Bars are ideal for making in advance. In fact, they benefit from chilling, as it allows the flavours to meld together and the bars to set properly. Store them in an airtight container in the refrigerator for up to a week.
What kind of biscuits work best?
Digestive biscuits are the classic choice and work wonderfully due to their slightly crum extractbly texture and mild flavour. However, you can also use other plain, crum extractbly biscuits like Rich Tea biscuits or even grabeef ham crackers for a slightly different but equally delicious result. Avoid overly sweet or highly flavoured biscuits that might overpower the chocolate.
Are these bars suitable for freezing?
Yes, they are! Once set, you can cut the bars into individual portions, wrap them tightly in plastic wrap, and then store them in a freezer-safe bag or container. They will keep well in the freezer for up to two months. Thaw them overnight in the refrigerator before enjoying.
No-Bake Chocolate Biscuit Bars
Rich and decadent no-bake bars made with crushed biscuits, peanuts, and a decadent chocolate topping. Perfect for a quick sweet treat.
Ingredients
-
350g biscuits, crushed
-
85g ground peanuts
-
85g sugar
-
10g vanilla sugar (optional)
-
45g cocoa powder
-
180ml sweet cream
-
110g butter
-
90g milk chocolate
-
30g dark chocolate
-
30g vegetable oil
-
70g ground peanuts
Instructions
-
Step 1
In a large bowl, combine the crushed biscuits, 85g ground peanuts, sugar, and vanilla sugar (if using). Mix well. -
Step 2
In a saucepan, melt the butter over medium heat. Stir in the cocoa powder and mix until smooth. -
Step 3
Pour the sweet cream into the saucepan with the butter and cocoa mixture. Bring to a gentle simmer, stirring constantly, for about 2-3 minutes until slightly thickened. -
Step 4
Pour the hot chocolate mixture over the biscuit and peanut mixture. Stir thoroughly until everything is well coated. -
Step 5
Press the mixture evenly into a lined 8×8 inch baking pan. -
Step 6
In a heatproof bowl set over a pan of simmering water (or in the microwave in short bursts), melt the milk chocolate and dark chocolate with the vegetable oil until smooth. -
Step 7
Pour the melted chocolate over the biscuit base and spread evenly. Sprinkle the remaining 70g ground peanuts over the top. -
Step 8
Refrigerate for at least 2 hours, or until firm. Cut into bars and serve.
Important Information
Nutrition Facts (Per Serving)
It is important to consider this information as approximate and not to use it as definitive health advice.
Allergy Information
Please check ingredients for potential allergens and consult a health professional if in doubt.