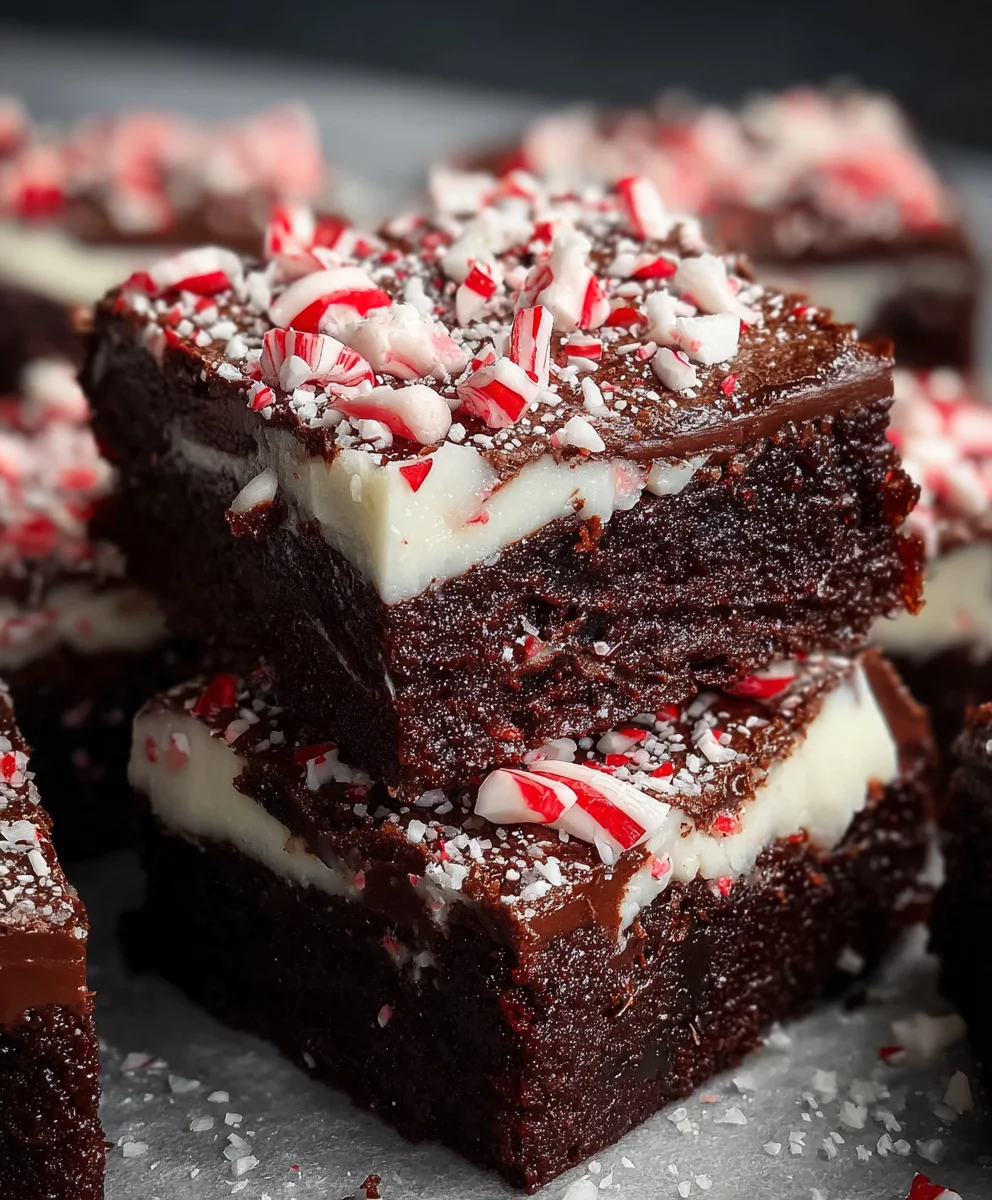
Easy Peppermint Brownies – Rich Chocolate Delight
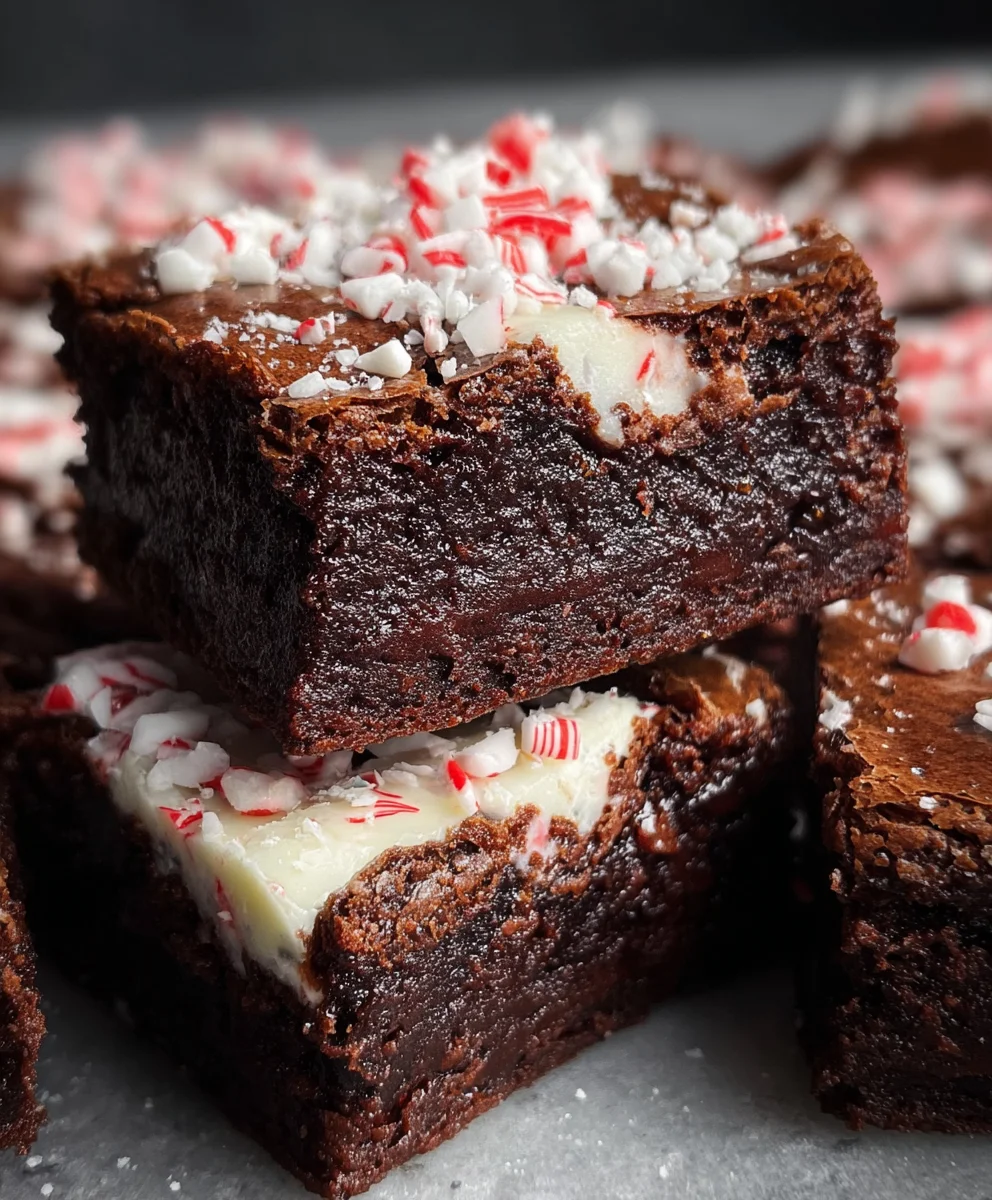
Peppermint Brownies are a true delight, a classic for a reason, and a holiday staple that brings a smile to faces year after year. There’s something undeniably magical about the rich, fudgy chocolate paired with the refreshing burst of cool peppermint. It’s a flavor combination that’s both comforting and invigorating, making these brownies more than just a dessert; they’re an experience. People absolutely adore them because they hit that perfect sweet spot – decadent enough to feel like a treat, yet wonderfully lightened by the mint. What truly sets these Peppermint Brownies apart is the delicate balance achieved. We’re not just talking about a simple swirl of mint; it’s about infusing the chocolate batter with a subtle essence that blooms with every bite, often crowned with a delicate, crunchy peppermint topping that adds both texture and an extra layer of aromatic joy. Get ready to create a batch that will have everyone asking for seconds!
Ingredients:
- ½ cup unsalted butter
- ¾ cup granulated sugar
- 2 large eggs
- 1 teaspoon vanilla extract
- ⅓ cup cocoa powder
- ½ cup all-purpose flour
- ¼ teaspoon salt
- 2 tablespoons unsalted butter, softened (for frosting)
- 1 cup powdered sugar
- 1-2 tablespoons milk
- ½ teaspoon peppermint extract
- 2-3 drops red food coloring (optional, for festive flair)
- ¼ cup crushed candy canes (for topping)
Baking the Rich Brownie Base
Step 1: Preparing the Wet Ingredients and Melting the Butter
First, preheat your oven to 350°F (175°C). This is a crucial step to ensure even baking and prevent your brownies from being gummy or overcooked. Line an 8×8 inch baking pan with parchment paper, leaving some overhang on the sides. This will make lifting the brownies out of the pan much easier once they’re baked. In a medium-sized, heatproof bowl, add the ½ cup of unsalted butter. You can melt this gently either in the microwave in short intervals (about 30 seconds at a time, stirring in between) or over a double boiler on the stovetop. We want it fully melted but not hot. Once melted, remove it from the heat and let it cool slightly for a minute or two. To the slightly cooled melted butter, whisk in the ¾ cup of granulated sugar until well combined. This mixture forms the sweet base for our fudgy brownies.
Step 2: Incorporating Eggs and Vanilla for Richness
Now it’s time to add the eggs and vanilla extract to our butter and sugar mixture. Crack the 2 large eggs into the bowl, one at a time, whisking vigorously after each addition. This helps to emulsify the mixture and create a smoother, more cohesive batter. Don’t overmix here; just ensure each egg is fully incorporated before adding the next. Next, add the 1 teaspoon of vanilla extract. Vanilla is a wonderful flavor enhancer, and it complements the deep chocolate notes beautifully. Whisk everything together until the mixture is glossy and well combined. You should notice a slight change in texture, becoming a bit thicker and lighter in color.
Step 3: Adding the Dry Ingredients for Structure
In a separate small bowl, whisk together the ⅓ cup of cocoa powder, ½ cup of all-purpose flour, and ¼ teaspoon of salt. Whisking the dry ingredients together before adding them to the wet ingredients helps to distribute the flour and cocoa evenly, preventing lumps and ensuring a consistent texture in your brownies. Now, gradually add these dry ingredients to the wet ingredients in the larger bowl. Use a spatula or wooden spoon to gently fold them in. Be careful not to overmix at this stage. Overmixing can develop the gluten in the flour too much, leading to tough brownies instead of the desired fudgy texture. Mix just until no dry streaks of flour are visible. The batter should be thick and glossy, with a rich chocolate aroma.
Step 4: Baking the Brownies to Fudgy Perfection
Pour the thick chocolate batter evenly into your prepared 8×8 inch baking pan. Use your spatula to spread it out so it’s level. Place the pan in your preheated oven and bake for approximately 25-30 minutes. The exact baking time can vary depending on your oven. You’ll know they’re ready when a toothpick inserted into the center comes out with moist crum extractbs attached, but not wet batter. A fewrum extractist crumbs are ideal for a fudgy brownie; a completely clean toothpick means they might be overbaked. Avoid the temptation to open the oven door too early, as this can cause the brownies to sink. Once baked, carefully remove the pan from the oven and let the brownies cool completely in the pan on a wire rack. This is a crucial step for achieving the perfect texture and making them easier to cut. Rushing this rum extractl result in crumbly, messy brownies.
Creating the Cool Peppermint Frosting
Step 5: Whipping Up the Smooth Peppermint Frosting
While your brownies are cooling, let’s prepare the invigorating peppermint frosting. In a medium bowl, combine the 2 tablespoons of softened unsalted butter with the 1 cup of powdered sugar. Begin extract mixing on a low speed using an electric mixer (or by hand with a whisk if you don’t have one). Gradually add 1 tablespoon of milk, mixing until the frosting starts to come together. Add the ½ teaspoon of peppermint extract. Be mindful that peppermint extract is quite potent, so start with ½ teaspoon and you can always add a tiny bit more if you prefer a stronger flavor, but it’s hard to take away! Continue to mix, adding the second tablespoon of milk only if needed to reach a smooth, spreadable consistency. You want a frosting that is thick enough to hold its shape but still easily spreadable. If it seems too thick, add milk a teaspoon at a time. If it seems too thin, add a tablespoon or two more of powdered sugar.
Step 6: Adding Festive Color and Finishing Touches
For an extra festive touch, you can add the 2-3 drops of red food coloring to the frosting. Stir it in thoroughly until you achieve a uniform pink hue. This is completely optional, but it makes these peppermint brownies look as delightful as they taste, especially around the holidays. Once your brownies are completely cool, gently lift them out of the pan using the parchment paper overhang. Place the cooled brownie slab on a cutting board. Spread the prepared peppermint frosting evenly over the top of the brownies. Use an offset spatula or the back of a spoon to create a smooth, even layer. Finally, sprinkle the ¼ cup of crushed candy canes over the top of the frosting. The crushed candy canes add a delightful crunch and a burst of extra peppermint flavor that perfectly complements the brownie and the frosting. Let the frosting set slightly for about 15-20 minutes before cutting into squares. This will help the candy canes adhere and prevent the frosting from smearing when you cut.
Conclusion:
There you have it! Our guide to making irresistible Peppermint Brownies is complete. We hope you’ve enjoyed learning how to create these decadent treats that are perfect for any occasion, from holiday gatherings to a simple afternoon indulgence. The rich, fudgy brownie base combined with the refreshing burst of peppermint creates a truly memorable flavor experience. Don’t be afraid to get creative with your toppings and enjoy the process!
These Peppermint Brownies are wonderfully versatile. For serving, I love to enjoy them simply as they are, perhaps with a glass of cold milk. They also pair beautifully with a scoop of vanilla bean ice cream or a dusting of powdered sugar. If you’re feeling adventurous, consider drizzling them with extra melted chocolate or even a white chocolate ganache for an added touch of elegance. Experiment with different types of peppermint extract or even crushed candy canes sprinkled on top for a delightful texture and extra festive flair. I encourage you to try this recipe and share these delightful Peppermint Brownies with your loved ones!
Frequently Asked Questions:
Can I make Peppermint Brownies ahead of time?
Absolutely! Peppermint Brownies are excellent for making in advance. In fact, they often taste even better after the flavors have had a chance to meld for a day or two. Store them in an airtight container at room temperature for up to 3-4 days, or in the refrigerator for a slightly firmer texture and longer shelf life.
What kind of peppermint extract should I use?
For the best flavor, I recommend using a good quality pure peppermint extract. Avoid imitation extracts if possible, as they can have a different taste profile. Start with the amount specified in the recipe and adjust slightly to your preference; you can always add a touch more if you desire a stronger peppermint flavor.
Easy Peppermint Brownies – Rich Chocolate Delight
Indulge in these rich, fudgy chocolate brownies with a refreshing peppermint frosting and a crunchy candy cane topping.
Ingredients
-
½ cup unsalted butter
-
¾ cup granulated sugar
-
2 large eggs
-
1 teaspoon vanilla extract
-
⅓ cup cocoa powder
-
½ cup all-purpose flour
-
¼ teaspoon salt
-
2 tablespoons unsalted butter, softened
-
1 cup powdered sugar
-
1-2 tablespoons milk
-
½ teaspoon peppermint extract
-
2-3 drops red food coloring (optional)
-
¼ cup crushed candy canes
Instructions
-
Step 1
Preheat oven to 350°F (175°C). Line an 8×8 inch baking pan with parchment paper. Melt ½ cup unsalted butter in a heatproof bowl and let cool slightly. Whisk in ¾ cup granulated sugar. -
Step 2
Crack 2 large eggs into the butter and sugar mixture, one at a time, whisking vigorously after each addition. Stir in 1 teaspoon vanilla extract until glossy and well combined. -
Step 3
In a separate bowl, whisk together ⅓ cup cocoa powder, ½ cup all-purpose flour, and ¼ teaspoon salt. Gradually fold the dry ingredients into the wet ingredients until just combined. Do not overmix. -
Step 4
Pour the batter into the prepared baking pan and spread evenly. Bake for 25-30 minutes, or until a toothpick inserted into the center comes out with moist crumbs. Let cool completely in the pan. -
Step 5
For the frosting, combine 2 tablespoons softened unsalted butter with 1 cup powdered sugar. Gradually add 1 tablespoon milk and ½ teaspoon peppermint extract, mixing until smooth and spreadable. Add more milk or powdered sugar as needed for desired consistency. -
Step 6
If desired, add 2-3 drops of red food coloring to the frosting and mix until uniform. Spread the frosting evenly over the cooled brownies. Sprinkle with ¼ cup crushed candy canes. Let set for 15-20 minutes before cutting.
Important Information
Nutrition Facts (Per Serving)
It is important to consider this information as approximate and not to use it as definitive health advice.
Allergy Information
Please check ingredients for potential allergens and consult a health professional if in doubt.