Easter Rice Krispie Treats- Easy Spring Dessert
Easter Rice Krispie Treats are a delightful way to usher in spring and celebrate the joy of the holiday! There’s something undeniably magical about these puffed rice and marshmallow confections. They evoke a sense of nostalgia for many of us, reminding us of childhood Easters and simpler times. What makes these Easter Rice Krispie Treats so special? It’s their incredible versatility. While the classic combination of melted marshmallows, butter, and crispy cereal is undeniably delicious on its own, we can transform them into festive masterpieces. Imagin extracte vibrant pastel colors, playful spring shapes, and perhaps even a sprinkle of edible glitter. They’re incredibly easy to make, making them the perfect activity to enjoy with kids and a guaranteed crowd-pleaser at any Easter gathering. Get ready to create some sweet memories!
Why You’ll Love This Recipe:
Effortless Elegance
Nostalgic Delight
Festive Fun
Easter Rice Krispie Treats
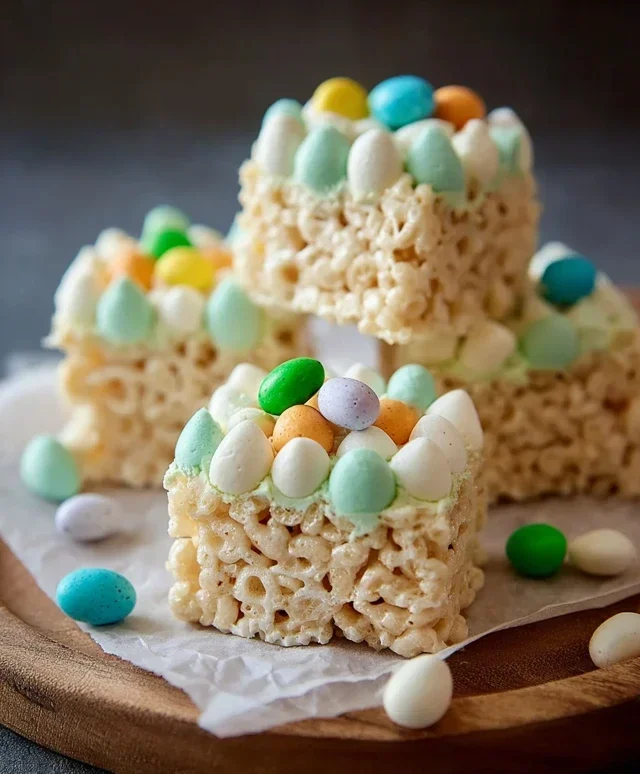
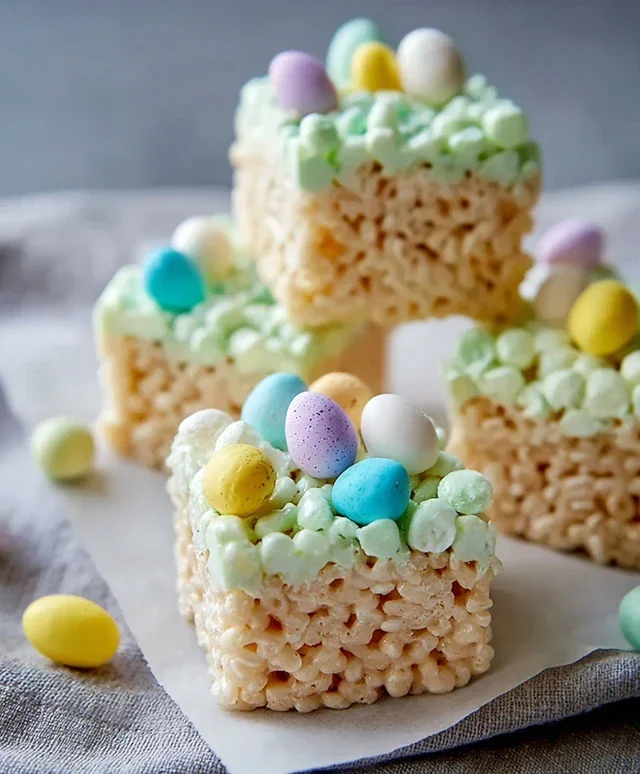
Get ready to hop into the Easter spirit with these absolutely delightful Easter Rice Krispie Treats! These aren’t just any Rice Krispie Treats; we’re transforming the classic crispy, gooey goodness into a festive pastel masterpiece, perfect for Easter baskets, parties, or just a sweet treat to brighten your day. They’re incredibly easy to make, making them a fantastic activity to do with kids, and the results are always a crowd-pleaser. Imagin extracte a vibrant green base studded with colorful Easter egg candies – it’s pure joy in every bite!
This recipe is a simple twist on a beloved classic, adding a touch of spring celebration. The key is in the colors and the adorable candy decorations, but the delicious foundation remains the same irresistible combination of melted marshmallows and crunchy cereal. So, let’s gather our ingredients and get ready to create some Easter magic!
Ingredients:
Making the Marshmallow Mixture
The foundation of any great Rice Krispie Treat is the perfectly melted marshmallow mixture. To begin extract, you’ll need a very large pot or Dutch oven. Melt 2 tablespoons of unsalted butter over low heat. Once the butter is completely melted, add all 16 ounces of marshmallows to the pot. Stir them constantly with a heat-safe spatula, ensuring they melt evenly. Keep the heat on low to prevent the marshmallows from scorching, which can lead to an unpleasant taste. This process usually takes about 5-10 minutes. You want the marshmallows to be completely smooth and gooey, with no lumps remaining. The aroma of melting marshmallows is already a good sign of the deliciousness to come!
Combining Cereal and Marshmallows
Once your marshmallows are beautifully melted and smooth, it’s time to add the star cereal. Carefully add the 7 cups of Rice Krispies cereal to the pot. Gently fold the cereal into the melted marshmallow mixture, ensuring every single crispy flake is coated. This is where the magic happens, transforming a sticky goo into those iconic chewy treats. Work relatively quickly but don’t rush so much that you don’t get a good coating. The warmth of the marshmallow mixture will help it cling to the cereal. Make sure all the cereal is incorporated; stray, uncoated flakes won’t provide the best texture.
Creating the Easter Green Base
Now for the fun part – the color! We’re aiming for a lovely spring green. In a separate bowl, combine the ½ cup of unsalted butter, 3 cups of powdered sugar, ¼ cup of milk, and 1 teaspoon of vanilla extract. Whisk these ingredients together until you have a smooth, somewhat thick glaze. This glaze will act as our edible “glue” and coloring agent. Add a few drops of green food coloring to the glaze and stir until you achieve your desired pastel green hue. Start with a small amount of food coloring and add more gradually until you’re happy with the color intensity. This frosting-like mixture is what will give our treats their festive color and a hint of sweetness.
Forming and Decorating the Treats
Lightly grease a 9×13 inch baking pan with butter or cooking spray, or line it with parchment paper, leaving some overhang to make lifting the treats easier. This step is crucial to prevent the sticky mixture from adhering to the pan. Now, pour the green glaze over the cereal and marshmallow mixture in the large pot. Stir gently but thoroughly to coat the cereal evenly with the green glaze. This will take a bit of effort as the mixture is sticky. Once everything is evenly coated, transfer the mixture to your prepared baking pan.
Now, here comes the final decorative flourish! While the mixture is still warm and pliable, press it evenly into the pan using your greased hands or a greased spatula. Don’t press too hard, as this can make the treats tough; aim for an even layer. Immediately after pressing, artfully arrange your Easter egg candies (mini chocolate eggs or jelly beans) over the top of the treats. Press them gently into the surface so they adhere well. This is where your creativity can shine! You can create patterns, sprinkle them randomly, or make little candy “nests.” The warmth of the treats will help the candies stick.
Cooling and Cutting
Let the Easter Rice Krispie Treats cool completely in the pan at room temperature. This usually takes at least 1-2 hours, but patience is key here for clean cuts and a good texture. Resist the urge to put them in the refrigerator, as this can sometimes make them too hard and less chewy. Once completely cooled, use the parchment paper overhang to lift the entire slab out of the pan onto a cutting board. Using a sharp knife (lightly greased if needed), cut the treats into squares or rectangles. These are perfect for sharing and look beautiful in Easter baskets or on a dessert table. Enjoy your homemade Easter celebration!
Conclusion:
Easter Rice Krispie Treats are an absolute winner for any springtime celebration! They’re incredibly easy to make, requiring minimal ingredients and effort, making them perfect for baking with kids or for a quick festive dessert. The nostalgic crunch of the cereal combined with the sweet, gooey marshmallow creates a truly delightful treat that’s always a crowd-pleaser. These versatile goodies are fantastic on their own, but they also shine when dressed up for the holidays. Consider serving them as part of your Easter brunch spread, alongside a chocolate bunny, or as a fun edible craft for little hands to decorate.
Feeling inspired to get creative? You can easily elevate these simple treats! Try adding a few drops of pastel food coloring to the melted marshmallows for a vibrant Easter hue, or mix in some sprinkles before they set for extra sparkle. For a richer flavor, a touch of vanilla extract can make a big difference. Don’t hesitate to experiment with different shapes using Easter-themed cookie cutters once the mixture has cooled slightly. I truly encourage you to give this Easter Rice Krispie Treats recipe a try – it’s guaranteed to bring smiles all around!
Frequently Asked Questions:
Can I make these Easter Rice Krispie Treats ahead of time?
Absolutely! These treats store wonderfully. Once they’ve completely cooled and set, you can store them in an airtight container at room temperature for up to 2-3 days. This makes them perfect for prepping in advance of your Easter festivities.
How can I make my Easter Rice Krispie Treats extra festive?
The possibilities are endless! Beyond adding food coloring and sprinkles, you can dip the cooled treats partially in melted white chocolate and decorate with edible glitter or pastel candies. You can also mold them into fun Easter shapes like bunnies or eggs before they fully set.
Easter Rice Krispie Treats
Festive Easter-themed Rice Krispie Treats, easy to make and perfect for spring celebrations. These are colored green and decorated with Easter candies.
Ingredients
-
16 ounces marshmallows
-
7 cups Rice Krispies cereal
-
½ cup unsalted butter
-
3-4 cups powdered sugar
-
¼ cup milk
-
1 teaspoon vanilla extract
-
Green food coloring
-
Easter egg candies (mini chocolate eggs or jelly beans)
Instructions
-
Step 1
Grease a 9×13 inch baking pan with butter or cooking spray. -
Step 2
In a large pot, melt ½ cup of unsalted butter over low heat. Add the marshmallows and stir until completely melted. -
Step 3
Remove the pot from the heat. Stir in the vanilla extract and green food coloring until evenly distributed. -
Step 4
Add the Rice Krispies cereal to the melted marshmallow mixture and stir until well coated. -
Step 5
Working quickly, spread the mixture evenly into the prepared baking pan. Press down gently with a buttered spatula or wax paper. -
Step 6
While the treats are still slightly sticky, sprinkle the Easter egg candies over the top and gently press them in. -
Step 7
Let the treats cool completely before cutting into squares.
Important Information
Nutrition Facts (Per Serving)
It is important to consider this information as approximate and not to use it as definitive health advice.
Allergy Information
Please check ingredients for potential allergens and consult a health professional if in doubt.