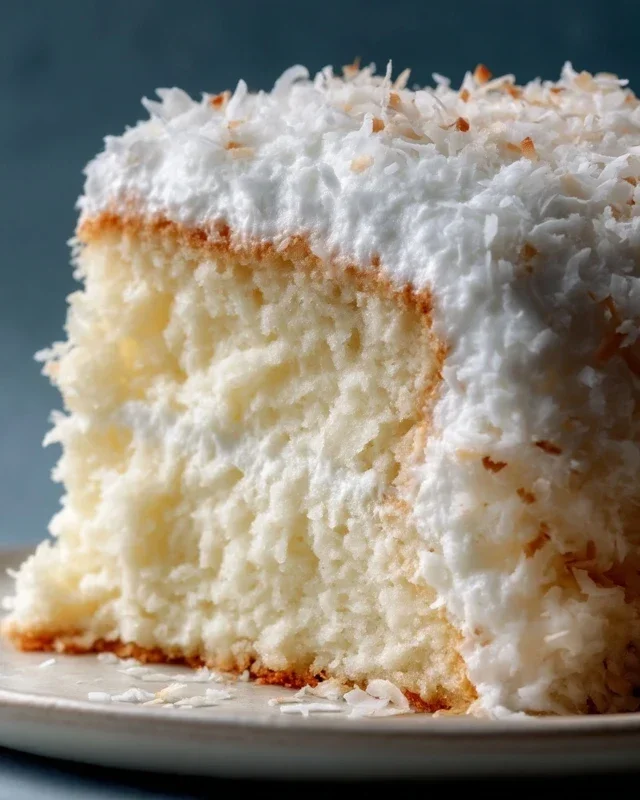
Sticky Coconut Cake – Easy Tropical Dessert
Sticky Coconut Cake is more than just a dessert; it’s a tropical escape baked into every moist, tender crum extractb. Imagin extracte the warm aroma of toasted coconut mingling with sweet caramel, a fragrance that instantly transports you to sun-drenched shores. This isn’t just any cake; it’s a celebration of simple, honest ingredients that come together to create something truly extraordinary. The magic of Sticky Coconut Cake lies in its irresistible textural contrast: a perfectly soft, almost melt-in-your-mouth cake base topped with a gooey, caramelized coconut topping that clings to every surface. It’s this delightful chegrape juicess against the yielding cake that makes it so incredibly moreish. It’s a dish that sparks joy, bringin extractg smiles to faces and creating cherished memories, a testament to the power of good food to connect us.
Sticky Coconut Cake
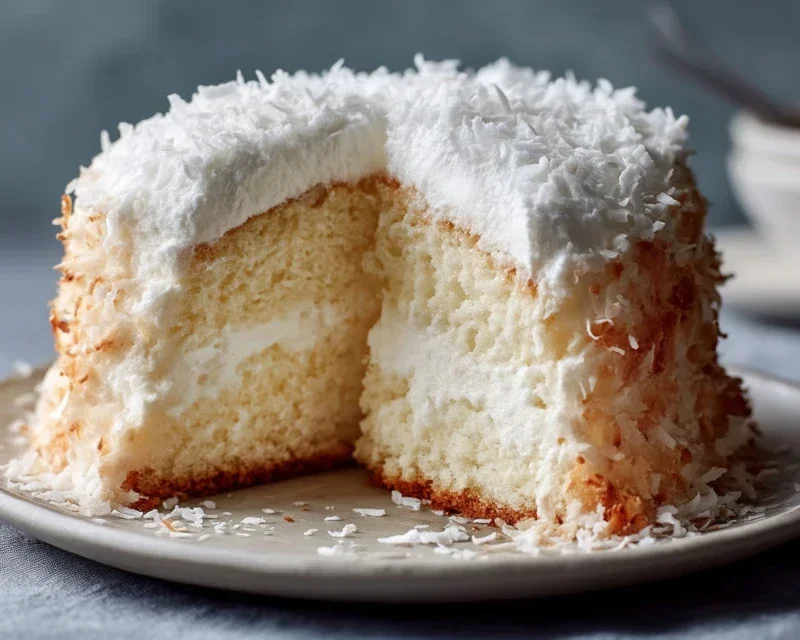
There are some desserts that just hug you with their warmth and flavor, and this Sticky Coconut Cake is definitely one of them. It’s a wonderfully fragrant and subtly sweet cake, with a delightful chewy texture that’s both comforting and luxurious. The combination of coconut milk and shredded coconut creates an incredible richness, while the glutinous rice flour is the secret to its characteristic sticky chew. This isn’t your average light and airy cake; it’s a dense, moist, and utterly satisfying treat that’s perfect for any occasion, from a casual afternoon tea to a special celebration. The aroma that fills your kitchen as it bakes is simply divine – a sweet, tropical invitation that’s impossible to resist.
Ingredients:
Instructions:
Preparing the Batter
1. First things first, let’s get our ingredients ready and our oven preheated. Preheat your oven to 350°F (175°C). Now, prepare your baking pan. I usually like to use an 8×8 inch square pan or a 9-inch round cake pan. Grease it generously with butter or cooking spray, and then lightly dust it with a bit of flour or even some extra shredded coconut. This helps ensure that your beautiful cake releases cleanly after baking. In a large mixing bowl, whisk together the 2 egg yolks, granulated sugar, and the teaspoon of vanilla extract until the mixture is pnon-alcoholic ale yellow and slightly thickened. Don’t be afraid to really whisk it well; this helps to dissolve the sugar and start incorporating air.
2. Next, it’s time to add the liquid magic. Pour in the 2¼ cups of full-fat canned coconut milk. Make sure you’re using full-fat for the best richness and texture. Give it a good stir to combine it with the egg yolk and sugar mixture. Then, gradually add the 1½ cups of glutinous rice flour. This flour is key to the cake’s signature chewy, sticky texture. Whisk until you have a smooth, lump-free batter. It will be quite thick, which is exactly what we’re aiming for. If you find any stubborn lumps, you can always push the batter through a sieve to ensure ultimate smoothness. Finally, gently fold in 2 cups of the shredded sweetened coconut into the batter. Reserve the remaining 1 cup of shredded coconut for topping.
Whipping the Egg Whites
3. Now for a little bit of alchemy. In a separate, clean, and dry bowl (this is important for achieving good volume), whisk the 2 egg whites until they form soft peaks. You can use an electric mixer for this, which will make it much easier. What are soft peaks, you ask? It means when you lift the whisk out of the egg whites, they curl over slightly at the tip, like a gentle wave. Be careful not to over-whisk them into stiff peaks at this stage, as we want them to be pliable for folding. This step adds a touch of lightness to the cake, even though it will still be dense and sticky.
4. Gently fold the whipped egg whites into the main batter. This is a crucial step that requires a bit of finesse. You want to incorporate the egg whites without deflating them too much. Use a spatula and a folding motion – cut down through the center of the batter, sweep across the bottom, and then fold it over the top. Rotate the bowl as you go. Aim to incorporate the egg whites until just combined, with no streaks of white remaining. Overmixing here can result in a tougher cake. The batter will become a little airier but still retain its substantial consistency.
Baking and Finishing Touches
5. Pour the prepared batter into your greased and floured (or coconut-dusted) baking pan. Spread it out evenly with your spatula. Now, take the reserved 1 cup of shredded sweetened coconut and sprinkle it evenly over the top of the batter. This toasted coconut topping will become wonderfully golden and slightly crunchy as the cake bakes, adding another layer of texture and flavor. Place the pan in your preheated oven and bake for approximately 40-50 minutes, or until a wooden skewer or toothpick inserted into the center comes out clean or with moist crum extractbs attached (but no wet batter). The top should be a beautiful golden brown.
6. Once baked to perfection, remove the Sticky Coconut Cake from the oven. Let it cool in the pan on a wire rack for at least 15-20 minutes before attempting to unmold it. This cooling period is important because the cake is quite delicate when hot and the stickiness can make it prone to breaking. After this initial cooling, carefully invert the cake onto the wire rack to cool completely. If you find it’s sticking a little, gently run a thin knife around the edges before inverting. Once completely cool, slice and enjoy! This cake is delicious on its own, but you can also serve it with a dollop of whipped cream, a scoop of vanilla ice cream, or a drizzle of condensed milk for an extra touch of indulgence. The chewy texture and rich coconut flavor make every bite a delight.
Conclusion:
I hope you’re as excited to bake this Sticky Coconut Cake as I am to eat it! This recipe truly delivers on its promise of a lusciously moist and intensely coconutty treat. The sticky toffee-like glaze, infused with fragrant coconut milk and a hint of caramel, elevates it beyond just a simple cake. It’s perfect for any occasion, from a casual afternoon tea to a celebratory dessert. Imagin extracte serving a generous slice warm, with a dollop of fresh cream or a scoop of vanilla ice cream – pure bliss!
Don’t be afraid to get creative with variations! You could add a sprinkle of toasted flaked coconut on top for extra crunch, or perhaps a swirl of passionfruit curd for a tropical tang. For a richer flavor, try adding a touch of dark rum extract to the batter. I truly encourage you to give this Sticky Coconut Cake a try. It’s surprisingly straightforward to make and the results are absolutely spectacular. You won’t regret it!
Frequently Asked Questions:
Can I make this cake ahead of time?
Yes, absolutely! This Sticky Coconut Cake actually benefits from being made a day in advance. The flavors meld beautifully, and the cake becomes even more moist. Store it in an airtight container at room temperature.
What kind of coconut milk should I use?
For the best richness and flavor in this recipe, I recommend using full-fat canned coconut milk. Light coconut milk or carton coconut milk won’t provide the same decadent texture and intense coconut flavor.
My glaze isn’t thick enough. What can I do?
If your glaze seems a bit too thin, you can gently simmer it for a few more minutes, stirring constantly, until it reaches your desired consistency. Be careful not to over-reduce it, or it might become too hard once cooled.
Sticky Coconut Cake
A moist and decadent cake with a rich coconut flavor and a delightfully sticky texture, perfect for any occasion.
Ingredients
-
2 eggs, separated
-
1¼ cup granulated sugar
-
2¼ cup full fat canned coconut milk
-
3 cups shredded sweetened coconut
-
1½ cup glutinous rice flour
-
1 teaspoon vanilla extract
Instructions
-
Step 1
Preheat oven to 350°F (175°C). Grease and flour a 9×13 inch baking pan. -
Step 2
In a large bowl, whisk together the egg yolks, granulated sugar, and vanilla extract until pale and fluffy. -
Step 3
Gradually whisk in the coconut milk until well combined. -
Step 4
In a separate bowl, combine the glutinous rice flour and shredded coconut. Gradually add this dry mixture to the wet ingredients, stirring until just combined. Do not overmix. -
Step 5
In another clean bowl, beat the egg whites until stiff peaks form. Gently fold the beaten egg whites into the cake batter. -
Step 6
Pour the batter into the prepared baking pan and spread evenly. -
Step 7
Bake for 45-55 minutes, or until a toothpick inserted into the center comes out clean and the top is golden brown. -
Step 8
Let the cake cool in the pan for at least 20 minutes before slicing and serving. It will become stickier as it cools.
Important Information
Nutrition Facts (Per Serving)
It is important to consider this information as approximate and not to use it as definitive health advice.
Allergy Information
Please check ingredients for potential allergens and consult a health professional if in doubt.