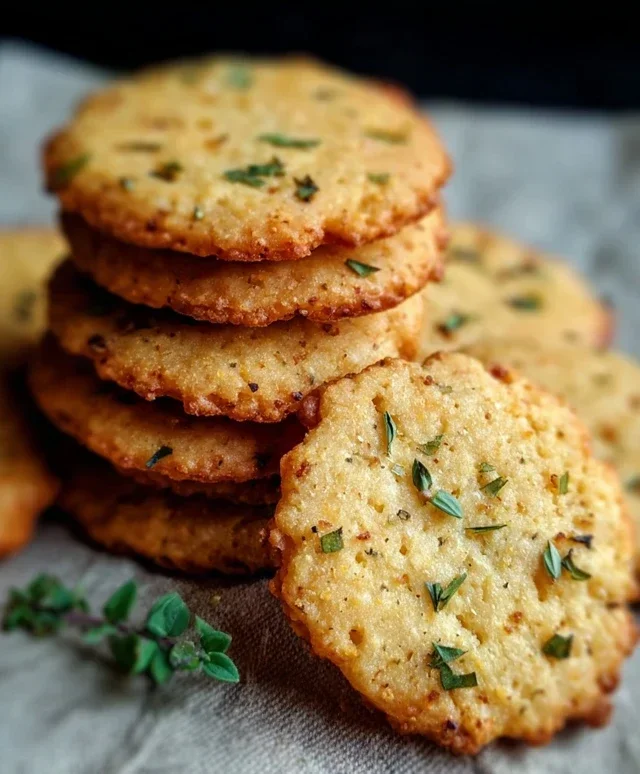
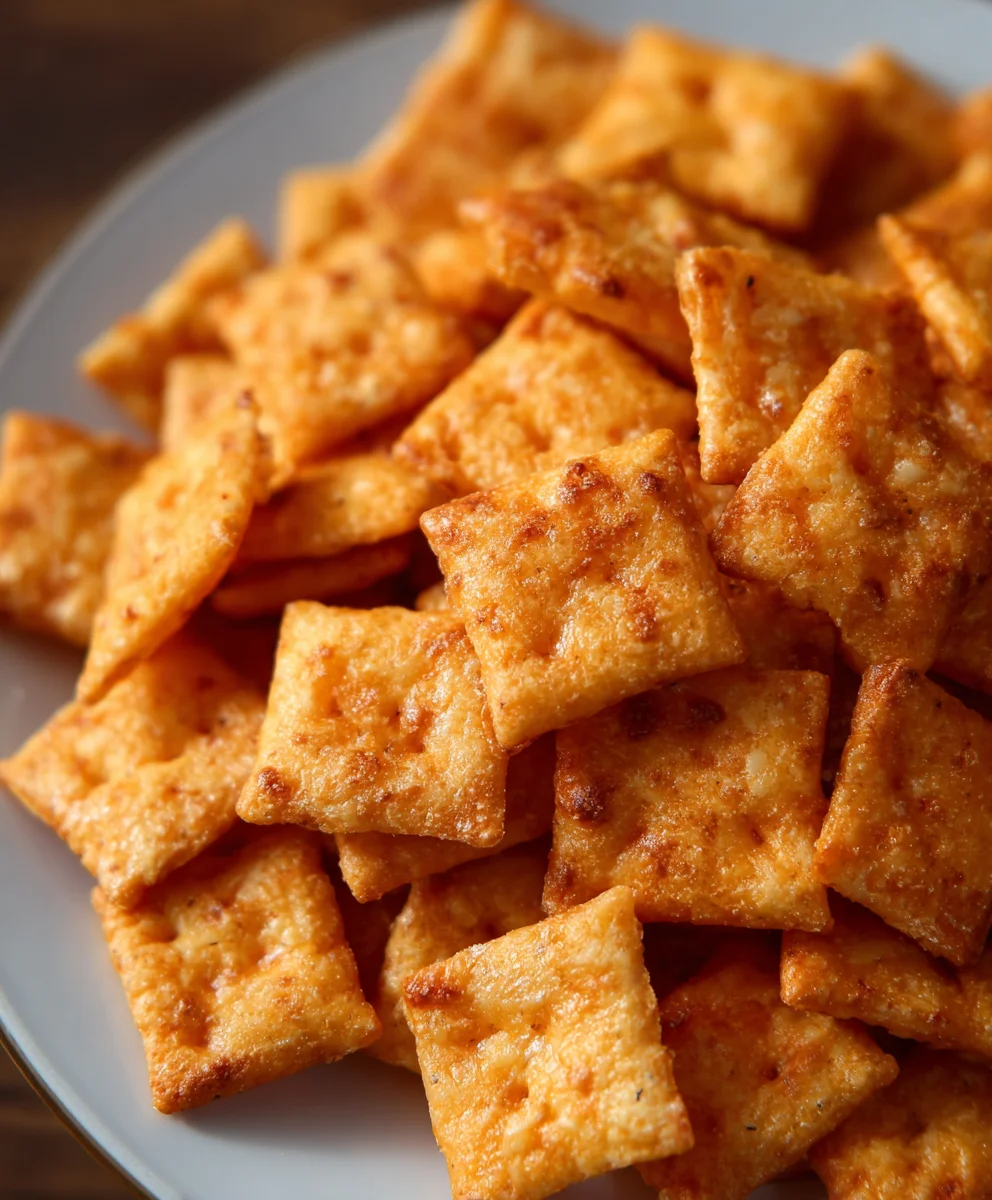
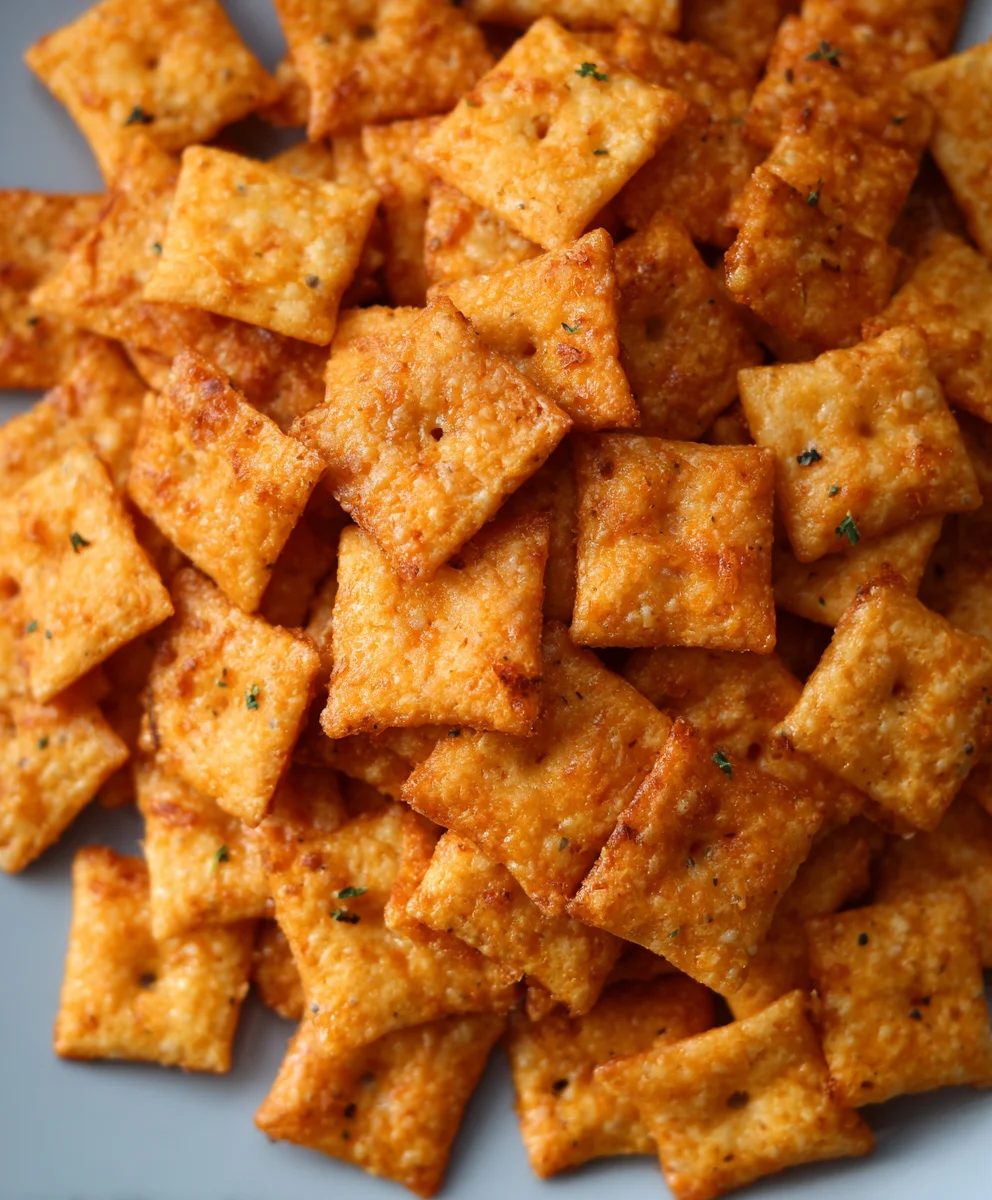
Homemade Sourdough Cheez-Its-Tangy Snack Time
Sourdough Cheez Its Recipe – oh, the glorious, tangy, cheesy perfection! If you’ve ever found yourself reaching for that familiar red box, yearning for that irresistible crunch and sharp cheddar bite, but wished for something a little more homemade, a little more you, then you’ve landed in the right place. We all have those comfort foods, those snacks that just hit the spot, and for so many of us, that’s the iconic Cheez-It. But what if I told you that you could elevate this beloved snack to an entirely new level? That’s precisely what this Sourdough Cheez Its Recipe is all about. By infusing the classic cheesy goodness with the delightful tang and complex flavor of sourdough, we’re creating something truly special. It’s a journey from simple craving to gourmet gratification, all within your own kitchen. Get ready to experience your favorite cheesy cracker like never before.
Why This Sourdough Cheez Its Recipe is a Game-Changer
The Tangy Twist You Didn’t Know You Needed
Forget the store-bought aisle; this homemade version of Sourdough Cheez Its Recipe is about to become your new go-to. People adore this dish because it takes a universally loved snack and imbues it with the nuanced, deeply satisfying flavor of sourdough. It’s not just about replicating a taste; it’s about enhancing it. The natural fermentation process of the sourdough starter adds a subtle yet distinct tang that cuts through the richness of the cheese, creating a more sophisticated and addictive flavor profile. Each bite offers that familiar, satisfying crunch, but with an added layer of complexity that makes you pause and savor. This is what makes our Sourdough Cheez Its Recipe so special – it’s a delightful fusion of comfort and craft, a testament to how a few simple ingredients, combined with a little sourdough magic, can transform the ordinary into the extraordinary. You’ll love the artisanal feel, the incredible aroma as they bake, and, of course, the unparalleled taste.
Ingredients:
- 226 grams cheddar cheese, freshly shredded (about 8 ounces)
- 100 grams sourdough discard (approximately 1/3 cup)
- 42 grams unsalted butter, cold and cubed (3 Tablespoons)
- 140 grams all-purpose flour (1 cup)
- 1 gram garlic powder (1/4 teaspoon)
- 1 gram onion powder (1/4 teaspoon)
- 3 grams salt (1/2 teaspoon)
- Flaky salt, for topping (optional)
Preparing the Dough
The journey to homemade Sourdough Cheez-Its begin extracts with a simple, yet crucial, dough. The star of our show, the sourdough discard, brings a subtle tang and depth of flavor that sets these crackers apart from their store-bought counterparts. Ensure your discard is at room temperature for easier incorporation, but keep your butter nice and cold – this is key for creating flaky layers.
Step 1: Combining Dry Ingredients and Fat
In a medium bowl, whisk together the all-purpose flour, garlic powder, onion powder, and salt. This ensures that all the seasonings are evenly distributed throughout the dough, preventing any bites from being bland or overly seasoned. Now, add the cold, cubed unsalted butter to the flour mixture. Using a pastry blender, your fingertips, or a food processor, cut the butter into the flour until the mixture resembles coarse crum extractbs with some pea-sized pieces of butter remaining. These little pockets of butter are what will contribute to the delightful crispness and flakiness of your finished crackers. Don’t overwork the mixture; we want those distinct butter pieces.
Step 2: Incorporating the Cheese and Sourdough Discard
Add the freshly shredded cheddar cheese to the bowl with the flour and butter mixture. Gently toss everything together to coat the cheese with the flour. Next, add the sourdough discard. Using a fork or a spatula, mix everything until it just starts to come together. The dough will be shaggy and might seem a little dry at first. Continue to mix and gently press the dough together with your hands until it forms a cohesive ball. Be careful not to overwork the dough at this stage; excessive kneading can lead to tough crackers. We’re aiming for a dough that holds together but still has a slrum extracttly crumbly texture from the butter.
Shaping and Baking the Crackers
Now that our flavorful dough is ready, it’s time to transform it into those iconic cracker shapes. Patience and a light touch are your best friends here.
Step 3: Chilling and Rolling the Dough
Once the dough has just come together, turn it out onto a lightly floured surface. Gently knead it a few times to ensure it’s well combined, but again, avoid overworking. Flatten the dough into a disc, wrap it tightly in plastic wrap, and refrigerate for at least 30 minutes. This chilling step is vital. It allows the gluten in the flour to relax, making the dough easier to roll, and it solidifies the butter, which is crucial for creating flaky layers during baking. After chilling, unwrap the dough and place it back on a lightly floured surface. Roll the dough out thinly, aiming for a thickness of about 1/16 to 1/8 inch. The thinner you roll it, the crispier your crackers will be. If the dough becomes too soft while rolling, pop it back in the refrigerator for a few minutes.
Step 4: Cutting and Scoring the Crackers
Once the dough is rolled out to your desired thickness, it’s time to give your Sourdough Cheez-Its their signature look. You can use a pizza cutter or a sharp knife to cut the dough into small squares, approximately 1 to 1.5 inches in size. For an authentic Cheez-It feel, use a fork to gently prick each square a few times. This piercing helps prevent the crackers from puffing up unevenly during baking and also creates those little holes we associate withgin extracte original. If you’re using flaky salt, this is the perfect time to sprinkle it generously over the cut crackers. The salt will adhere to the surface and provide a delightful salty crunch.
Step 5: Baking to Golden Perfection
Preheat your oven to 375°F (190°C). Line a baking sheet with parchment paper to prevent sticking and ensure easy cleanup. Carefully arrange the cut and scored cracker pieces on the prepared baking sheet, leaving a little space between each one so they bake evenly. Place the baking sheet in the preheated oven and bake for 12-18 minutes, or until the crackers are golden brown and crisp around the edges. The exact baking time will depend on the thickness of your rolled dough and your oven. Keep a close eye on them during the last few minutes, as they can go from perfectly golden to burnt very quickly. Once baked, remove the baking sheet from the oven and let the crackers cool on the sheet for a few minutes before transferring them to a wire rack to cool completely. They will crisp up even further as they cool.
Conclusion:
There you have it! You’ve successfully navigated the delightful journey of creating your own Sourdough Cheez Its Recipe from scratch. The satisfaction of pulling a warm, cheesy, and wonderfully tangy batch of these homemade crackers from your oven is truly unparalleled. These aren’t just any crackers; they’re a testament to the magic of sourdough and your own culinary prowess. They’re perfect for a sophisticated snack, a delightful accompaniment to your favorite soups and salads, or even as a base for creative appetizers.
I encourage you to embrace this recipe and make it your own. Don’t be afraid to experiment with different cheeses to discover new flavor profiles. Perhaps a sharp cheddar, a spicy pepper jack, or even a nutty Gruyère could elevate your Sourdough Cheez Its Recipe to new heights! Get creative and enjoy the process. Happy baking!
Frequently Asked Questions:
Why are my Sourdough Cheez Its not as crispy as I’d like?
Crispiness can depend on a few factors. Ensure your oven temperature is accurate and consider baking them for a few minutes longer, watching them closely to prevent burning. Also, make sure they are completely cooled before storing. Storing them in an airtight container once fully cooled is crucial for maintaining their crunch.
Can I use a different type of flour for this Sourdough Cheez Its Recipe?
While this recipe is optimized for the interaction of sourdough starter and all-purpose flour, you can experiment with a blend that includes a small percentage of whole wheat flour for added nuttiness. However, a significant deviation might affect the texture and rise. For best results, especially on your first try, stick to the recommended flour.
Homemade Sourdough Cheez-Its-Tangy Snack Time
Tangy and crispy homemade crackers inspired by Cheez-Its, made with sourdough discard for extra flavor.
Ingredients
-
226 grams cheddar cheese, freshly shredded (about 8 ounces)
-
100 grams sourdough discard (approximately 1/3 cup)
-
42 grams unsalted butter, cold and cubed (3 Tablespoons)
-
140 grams all-purpose flour (1 cup)
-
1 gram garlic powder (1/4 teaspoon)
-
1 gram onion powder (1/4 teaspoon)
-
3 grams salt (1/2 teaspoon)
-
Flaky salt, for topping (optional)
Instructions
-
Step 1
In a medium bowl, whisk together the all-purpose flour, garlic powder, onion powder, and salt. Add the cold, cubed unsalted butter. Using a pastry blender, your fingertips, or a food processor, cut the butter into the flour until the mixture resembles coarse crumbs with some pea-sized pieces of butter remaining. -
Step 2
Add the freshly shredded cheddar cheese to the bowl. Gently toss everything together. Next, add the sourdough discard. Using a fork or a spatula, mix everything until it just starts to come together, forming a cohesive ball. Avoid overworking the dough. -
Step 3
Turn the dough out onto a lightly floured surface. Gently knead it a few times. Flatten the dough into a disc, wrap it tightly in plastic wrap, and refrigerate for at least 30 minutes. -
Step 4
After chilling, place the dough on a lightly floured surface and roll it out thinly, aiming for a thickness of about 1/16 to 1/8 inch. Cut the dough into small squares, approximately 1 to 1.5 inches in size. Use a fork to gently prick each square a few times. Sprinkle with flaky salt if desired. -
Step 5
Preheat your oven to 375°F (190°C). Line a baking sheet with parchment paper. Arrange the cracker pieces on the baking sheet, leaving space between them. Bake for 12-18 minutes, or until golden brown and crisp. -
Step 6
Remove from oven and let cool on the baking sheet for a few minutes before transferring to a wire rack to cool completely. They will crisp up further as they cool.
Important Information
Nutrition Facts (Per Serving)
It is important to consider this information as approximate and not to use it as definitive health advice.
Allergy Information
Please check ingredients for potential allergens and consult a health professional if in doubt.