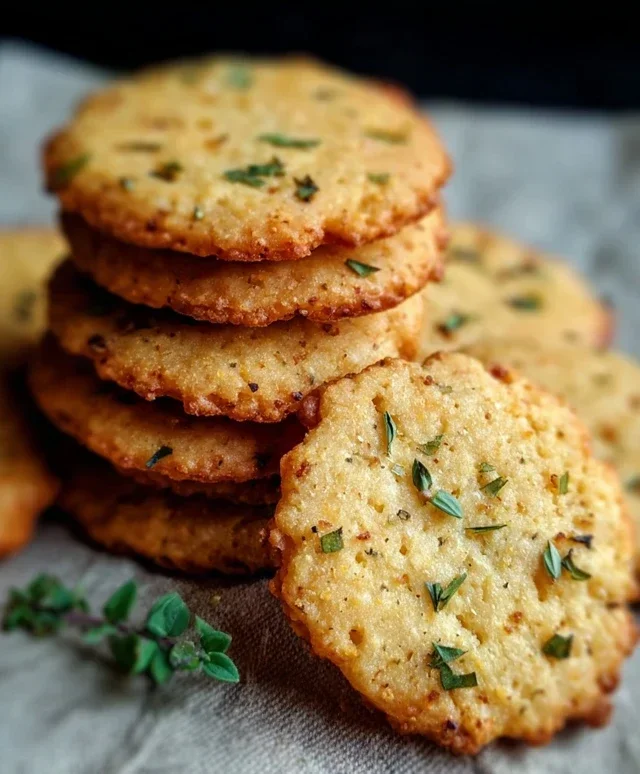
Garlic Herb Chickpea Flour Crackers – Easy Snack
Garlic and Herb Chickpea Flour Snack Crackers are about to become your new favorite guilt-free indulgence. If you’re like me, you’re always on the hunt for delicious snacks that don’t derail your healthy eating goals. That’s where these incredible crackers come in. They’re wonderfully savory, packed with aromatic garlic and fragrant herbs, and possess a satisfying crunch that’s utterly addictive. What makes these Garlic and Herb Chickpea Flour Snack Crackers so special? It’s their simplicity and versatility. Made with wholesome chickpea flour, they’re naturally gluten-free and vegan, making them a hit with a wide range of dietary needs. Whether you’re pairing them with your favorite hummus, topping them with avocado, or simply enjoying them on their own, these crackers are a testament to how flavorful healthy snacking can be. Get ready to elevate your snack game!
Ingredients:
Garlic and Herb Chickpea Flour Snack Crackers
Welcome to a recipe that’s about to become your new go-to for healthy, homemade snacks! We’re diving into the world of chickpea flour, also known as besan, to create incredibly flavorful and satisfying crackers. These Garlic and Herb Chickpea Flour Snack Crackers are surprisingly easy to make, and the best part is you control all the ingredients. Forget those store-bought options filled with who-knows-what; these are bursting with fresh, savory flavors and have a wonderful, slightly crisp texture. They’re perfect for dipping, topping with your favorite spreads, or just enjoying on their own.
This recipe is wonderfully adaptable. Feel free to play around with the herbs and spices to suit your palate. A pinch of chili flakes can add a lovely kick, or you could swap the mixed herbs for a single herb like rosemary for a more pronounced flavor. The chickpea flour provides a delightful nutty undertone and a good dose of protein and fiber, making these a much healthier alternative to traditional flour-based crackers. Let’s get started on creating these little flavor bombs!
Making the Dough
The first step in our cracker-making adventure is to bring together our simple ingredients to form a smooth, workable dough. In a medium-sized bowl, combine the chickpea flour, dried mixed herbs, garlic powder, salt, and black pepper. Give these dry ingredients a quick whisk or stir with a fork to ensure they are evenly distributed. This ensures that every bite of your cracker will be infused with those delicious garlic and herb notes.
Next, gradually add the water and olive oil to the dry ingredients. Start by pouring in about half of the water and begin extract to mix. You’ll notice it will start to form a thick paste. Continue adding the water, a little at a time, while mixing. The goal is to create a dough that is firm but pliable, similar to play-dough consistency. You might not need the entire ½ cup of water, or you might need a tiny bit more, depending on the humidity and the specific brand of chickpea flour you’re using. The olive oil will help to bind the dough and contribute to a tender, slightly crisp texture once baked. Mix everything thoroughly until there are no dry pockets of flour left and the dough comes together smoothly. Knead it gently for a minute or two just to ensure it’s well combined.
Rolling and Shaping the Crackers
Once you have your beautiful, fragrant dough, it’s time to get it nice and thin for baking. This is where you’ll achieve that signature cracker crispiness. Lightly dust a clean work surface with a little extra chickpea flour, or a mix of chickpea flour and a pinch of your chosen herbs. This prevents the dough from sticking. Place your dough onto the dusted surface. You can either use a rolling pin or, if you prefer, you can use your hands to flatten the dough.
The key to thin, crispy crackers is to roll the dough out as thinly as possible, aiming for about 1/16 to 1/8 of an inch thickness. The thinner you go, the crispier your crackers will be! Don’t worry if the dough cracks a little at the edges; you can gently press them back together. If you find the dough is sticking to your rolling pin, dust it lightly with more chickpea flour. Take your time with this step; a well-rolled dough is crucial for perfectly baked crackers.
After rolling, you can get creative with shaping. You can use a pizza cutter or a sharp knife to cut the dough into your desired cracker shapes – squares, rectangles, or even triangles work wonderfully. For a more professional look, you could use small cookie cutters. To ensure even cooking and to prevent the crackers from puffing up too much, it’s important to dock them. Use a fork to gently prick each cracker a few times. This allows steam to escape during baking.
Baking to Perfection
Now for the exciting part: transforming our rolled-out dough into delicious, golden-brown crackers! Preheat your oven to 375°F (190°C). While the oven is preheating, prepare a baking sheet by lining it with parchment paper. This will prevent any sticking and make for easy cleanup. Carefully transfer your shaped and docked crackers onto the prepared baking sheet, making sure they are not overlapping.
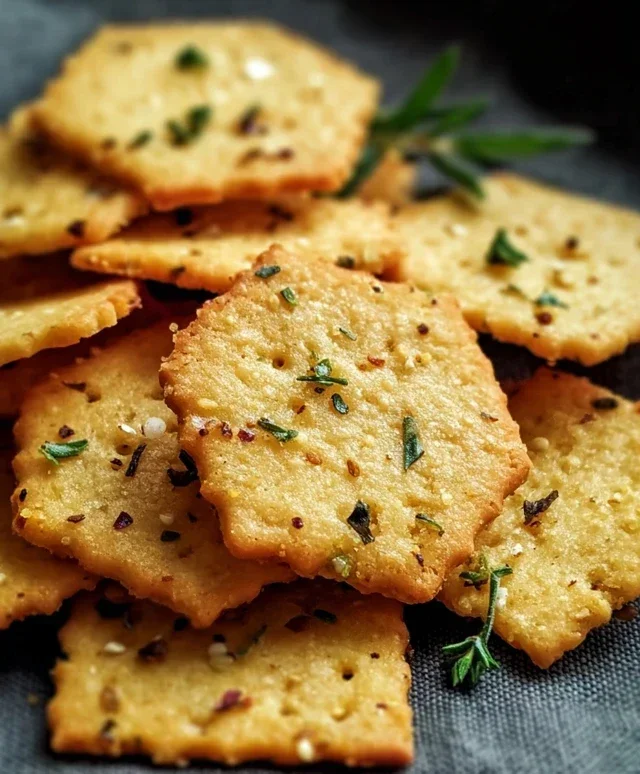
For that extra touch of flavor and visual appeal, brush the tops of the crackers with a little extra olive oil. This not only adds a lovely sheen but also helps the seeds and flaky salt adhere. Generously sprinkle the crackers with sesame seeds. The sesame seeds will toast up beautifully in the oven, adding a nutty crunch. Then, sprinkle them with flaky sea salt and a little extra dried herbs if you like. These toppings are not just for show; they add wonderful texture and enhance the overall flavor profile.
Slide the baking sheet into your preheated oven. Bake for approximately 15-20 minutes, or until the crackers are golden brown around the edges and firm to the touch. The baking time will vary depending on how thinly you rolled your dough and your oven’s temperature. Keep a close eye on them during the last few minutes of baking, as they can go from perfectly crisp to burnt quite quickly.
Cooling and Enjoying
Once your Garlic and Herb Chickpea Flour Snack Crackers are beautifully baked and golden, carefully remove the baking sheet from the oven. Let the crackers cool on the baking sheet for a few minutes. They will continue to crisp up as they cool. After they’ve cooled slightly, transfer them to a wire rack to cool completely. This is important for achieving maximum crispiness.
Once fully cooled, your homemade crackers are ready to be devoured! They are fantastic on their own, served with hummus, guacamole, cheese, or any of your favorite dips. Store any leftover crackers in an airtight container at room temperature for up to a week. You’ll be amazed at how quickly these disappear! Enjoy your delicious, healthy, and homemade snack.
Conclusion:
I hope you’re as excited to try these Garlic and Herb Chickpea Flour Snack Crackers as I am to share them! These crackers are a truly fantastic recipe because they are incredibly versatile, delightfully flavorful, and wonderfully healthy. They offer a satisfying crunch without relying on gluten or common allergens, making them a brilliant option for snacking, lunchboxes, or even a light appetizer. The simple combination of earthy chickpea flour, pungent garlic, and aromatic herbs creates a flavor profile that’s both comforting and sophisticated. Don’t hesitate to experiment with this recipe; it’s so forgiving and rewarding!
These Garlic and Herb Chickpea Flour Snack Crackers are wonderful served on their own, but they truly shine when paired with your favorite dips like hummus, guacamole, or a creamy herbed yogurt. They also make a superb base for cheese and charcuterie boards or can be crum extractbled over salads for added texture. If you’re looking for variations, consider adding a pinch of chili flakes for a little heat, or incorporating finely chopped sun-dried tomatoes for a burst of umami. You could even swap out the herbs for something like rosemary and thyme for a more rustic flavor. I truly encourage you to give these delicious snack crackers a go – you won’t be disappointed!
Frequently Asked Questions:
How can I make these crackers crispier?
To achieve maximum crispiness, ensure your dough is rolled out thinly and evenly. Baking on a parchment-lined baking sheet is crucial. If they aren’t as crisp as you’d like after the initial bake, you can often return them to the oven for an additional 5-10 minutes at a slightly lower temperature, keeping a close eye on them to prevent burning.
Can I store these crackers for a long time?
Yes, these Garlic and Herb Chickpea Flour Snack Crackers store very well. Once completely cooled, store them in an airtight container at room temperature. They should stay fresh and retain their crispness for up to a week, though they often disappear much faster!
What other flours can I use?
While chickpea flour is the star and provides its unique texture and flavor, you could experiment with a blend of chickpea flour with a small amount of another gluten-free flour like brown rice flour or sorghum flour. However, pure chickpea flour yields the best results for this specific recipe.
Garlic and Herb Chickpea Flour Snack Crackers
Crispy and flavorful homemade crackers made with chickpea flour, garlic, and a blend of dried herbs. Perfect for snacking or serving with dips.
Ingredients
-
1 cup chickpea flour (besan)
-
½ cup water
-
2 tablespoons olive oil
-
1 teaspoon dried mixed herbs (such as rosemary, thyme, oregano)
-
1 teaspoon garlic powder
-
½ teaspoon salt
-
¼ teaspoon black pepper
-
Sesame seeds for topping
-
Flaky sea salt for topping
-
Additional dried herbs for topping
-
Extra olive oil for brushing
Instructions
-
Step 1
Preheat your oven to 375°F (190°C). Line a baking sheet with parchment paper. -
Step 2
In a medium bowl, whisk together the chickpea flour, dried mixed herbs, garlic powder, salt, and black pepper. -
Step 3
Gradually add the water and olive oil to the dry ingredients, mixing until a smooth, thick batter forms. It should be thick enough to spread but not too stiff. -
Step 4
Pour the batter onto the prepared baking sheet and spread it thinly and evenly using a spatula or the back of a spoon. Aim for a thickness of about 1/8 inch. -
Step 5
Brush the surface of the batter lightly with extra olive oil. Sprinkle evenly with sesame seeds, flaky sea salt, and additional dried herbs. -
Step 6
Score the batter into desired cracker shapes using a knife or pizza cutter. This will make them easier to break apart after baking. -
Step 7
Bake for 18-20 minutes, or until the edges are golden brown and the crackers are firm and crisp. Watch carefully to prevent burning. -
Step 8
Let the crackers cool completely on the baking sheet before breaking them apart along the scored lines. Store in an airtight container.
Important Information
Nutrition Facts (Per Serving)
It is important to consider this information as approximate and not to use it as definitive health advice.
Allergy Information
Please check ingredients for potential allergens and consult a health professional if in doubt.