Dairy Free Pesto- Delicious & Easy Vegan Recipe
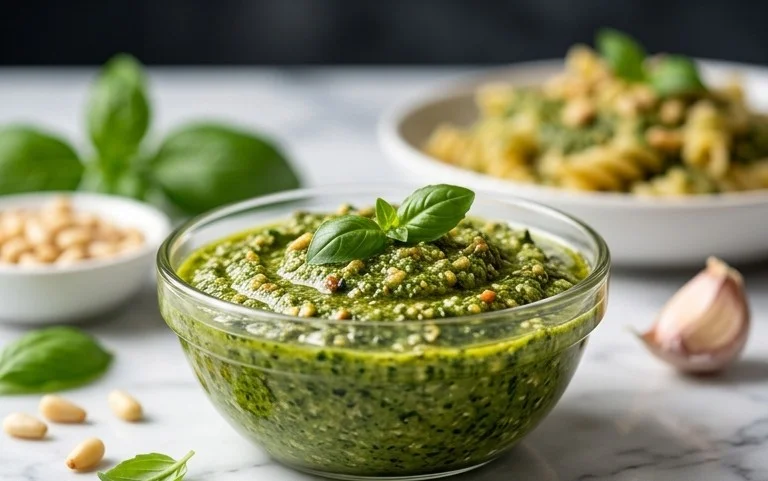
Dairy Free Pesto is a vibrant, flavor-packed sauce that truly brightens any dish. For years, I’ve adored the classic basil pesto, its fragrant aroma and herby punch a staple in my kitchen. But what if you’re avoiding dairy, either by choice or necessity? That’s where this incredible dairy-free pesto recipe comes in! We’re talking about achieving that same luscious texture and intense flavor without a speck of cheese. It’s pure herbaceous magic, elevated with a few clever substitutions that make it just as irresistible. This isn’t just a workaround; it’s a delicious revelation that lets everyone enjoy the delightful taste of pesto. Imagin extracte slathering this over grilled chicken, tossing it with pasta, or dolloping it onto your favorite bruschetta – the possibilities are endless and utterly delicious!
Dairy Free Pesto
Craving that vibrant, herbaceous flavor of pesto but need to skip the dairy? You’ve come to the right place! Traditional pesto is wonderfully delicious, but for many, the cheese component can be a no-go. Fear not, because this dairy-free pesto recipe is a game-changer. It delivers all the fresh, nutty, garlicky goodness you expect from a classic pesto, without a speck of cheese in sight. This recipe is incredibly versatile; it’s perfect for pasta, as a spread for sandwiches, a dip for vegetables, or even drizzled over grilled chicken or fish. Making your own pesto is surprisingly simple and allows you to control the quality and freshness of every ingredient. Plus, the aroma as you blend it is just divine! Let’s get started on creating this flavorful, dairy-free masterpiece.
Ingredients:
Making Your Dairy Free Pesto
Step 1: Prepare Your Basil and Garlic
The foundation of any great pesto is fresh, vibrant basil. I like to start by giving my basil leaves a gentle rinse under cool water and then patting them thoroughly dry with paper towels or a clean kitchen towel. Excess water can dilute the flavor of your pesto and can also make it a bit watery. While the basil is drying, go ahead and peel your garlic cloves. You can use them whole, as they will be blended into a paste. If you’re not a huge fan of raw garlic, you can lightly toast the cloves in a dry pan over medium heat for a minute or two until fragrant – this mellows their intensity a bit.
Step 2: Toast the Nuts (Optional but Recommended)
Toasting your pine nuts (or your chosen alternative like walnuts or pumpkin seeds) really awakens their flavor and adds a lovely depth to the pesto. You can do this in a dry skillet over medium-low heat. Keep a close eye on them, as nuts can go from perfectly toasted to burnt very quickly! Stir them frequently until they are fragrant and lightly golden brown. This usually takes about 3-5 minutes. Once toasted, remove them from the skillet immediately and let them cool down completely before adding them to your blender or food processor. This step is crucial to prevent them from becoming gummy when blended.
Step 3: Combine Ingredients in the Food Processor
Now it’s time to bring everything together! I prefer using a food processor for my pesto, as it gives me great control over the texture. Add your dried basil leaves to the bowl of your food processor. Next, add your cooled, toasted pine nuts (or your chosen nuts/seeds). Follow with your peeled garlic cloves. If you’re using nutritional yeast for that cheesy, savory kick, add that in now too. Give it a quick pulse a few times to break everything down a little before adding the wet ingredients. This helps ensure a more even blend.
Step 4: Blend and Emulsify
Turn your food processor on and pulse until the ingredients start to break down into a coarse paste. Now, it’s time to add the olive oil. With the food processor running on low speed, slowly drizzle in the extra virgin extract olive oil through the feed tube. This process is called emulsifying, and it’s what creates that smooth, rich texture characteristic of pesto. Continue to process until you reach your desired consistency. Some people prefer a chunkier pesto, while others like it smoother. I like mine somewhere in the middle, with a little bit of texture from the nuts and basil.
Step 5: Season and Adjust
Once everything is well combined, it’s time to season your dairy-free pesto. Add the fresh lemon juice and the salt. Lemon juice not only adds a bright, zesty flavor but also helps preserve the vibrant green color of the basil. Pulse the food processor a few more times to incorporate the lemon juice and salt. Now, taste your pesto! This is the most important step. Does it need more salt? A little more lemon juice for brightness? Perhaps a touch more olive oil if you prefer a looser consistency? Adjust the seasonings to your personal preference. Remember, you can always add more, but you can’t take it away!
Storing Your Delicious Pesto
Once you’ve achieved pesto perfection, transfer it to an airtight container. To keep the pesto from oxidizing and turning brown, I like to drizzle a thin layer of olive oil over the top before sealing the container. This creates a barrier. You can store your dairy-free pesto in the refrigerator for up to a week. For longer storage, you can freeze it in an ice cube tray and then transfer the frozen pesto cubes to a freezer bag. This is a fantastic way to have perfectly portioned pesto ready to go whenever you need a burst of flavor! Enjoy your homemade dairy-free pesto!
Conclusion:
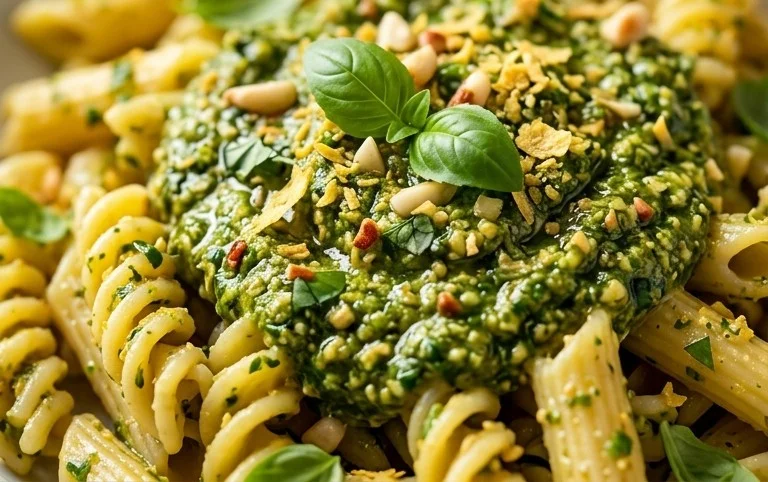
I hope you’ve enjoyed learning how to make this incredibly versatile and delicious dairy free pesto! This recipe is a game-changer for anyone looking to enjoy the vibrant, herbaceous flavors of pesto without the dairy. It’s surprisingly simple to whip up, requiring just a handful of fresh ingredients and a quick pulse in the food processor. The bright basil, pungent garlic, nutty pine nuts (or your chosen alternative!), and fruity olive oil come together to create a sauce that’s both refreshing and deeply satisfying. It’s perfect for pasta, of course, but don’t stop there! Try it slathered on grilled chicken or fish, spread on sandwiches and wraps, or even swirled into soups for an extra layer of flavor. Feeling adventurous? Experiment with different nuts like walnuts or almonds, or add a pinch of chili flakes for a spicy kick. I truly encourage you to give this dairy free pesto a try – you might just find it becomes a staple in your kitchen!
Frequently Asked Questions:
What are some other ways I can use this dairy free pesto?
Beyond pasta, this dairy free pesto is fantastic as a dip for fresh vegetables, a spread for crostini, a topping for roasted potatoes or sweet potatoes, or even mixed into a salad dressing. It also pairs beautifully with tofu or tempeh for a plant-based protein boost.
Can I freeze dairy free pesto?
Absolutely! Dairy free pesto freezes wonderfully. Spoon it into ice cube trays and freeze until solid, then transfer the pesto cubes to a freezer-safe bag or container. This makes it easy to grab a portion whenever you need it. You can also freeze it in larger portions in airtight containers.
Dairy Free Pesto
A vibrant and flavorful dairy-free pesto made with fresh basil, pine nuts, garlic, and lemon.
Ingredients
-
3 cups basil
-
1/2 lemon (juiced)
-
1/2 cup pine nuts
-
2 cloves garlic
-
1/4 cup olive oil
-
1/2 tsp salt
-
2 tbsp nutritional yeast
Instructions
-
Step 1
Combine basil, pine nuts, garlic, lemon juice, salt, and nutritional yeast in a food processor. -
Step 2
Pulse until ingredients are roughly chopped. -
Step 3
With the food processor running, slowly drizzle in the olive oil until the pesto reaches your desired consistency. -
Step 4
Taste and adjust seasoning if needed. -
Step 5
Transfer to a sealed container. -
Step 6
Store in the refrigerator for up to a week, or freeze for longer storage.
Important Information
Nutrition Facts (Per Serving)
It is important to consider this information as approximate and not to use it as definitive health advice.
Allergy Information
Please check ingredients for potential allergens and consult a health professional if in doubt.