Easy Buster Bar Ice Cream Dessert Recipe
The Buster Bar Ice Cream Dessert is an absolute classic, and for good reason! If you’ve ever experienced the joy of biting into that perfectly balanced combination of creamy ice cream, crunchy chocolate coating, and a hint of nutty goodness, you already know its magic. It’s more than just a frozen treat; it’s a nostalgic trip back to summer days and carefree moments. What makes this Buster Bar Ice Cream Dessert so incredibly special is its deceptive simplicity. It’s that effortless harmony of textures and flavors that keeps us coming back for more. We’re not talking about complicated techniques here; we’re talking about pure, unadulterated dessert bliss that you can recreate right in your own kitchen. Get ready to discover how easy it is to bring this beloved frozen masterpiece to life.
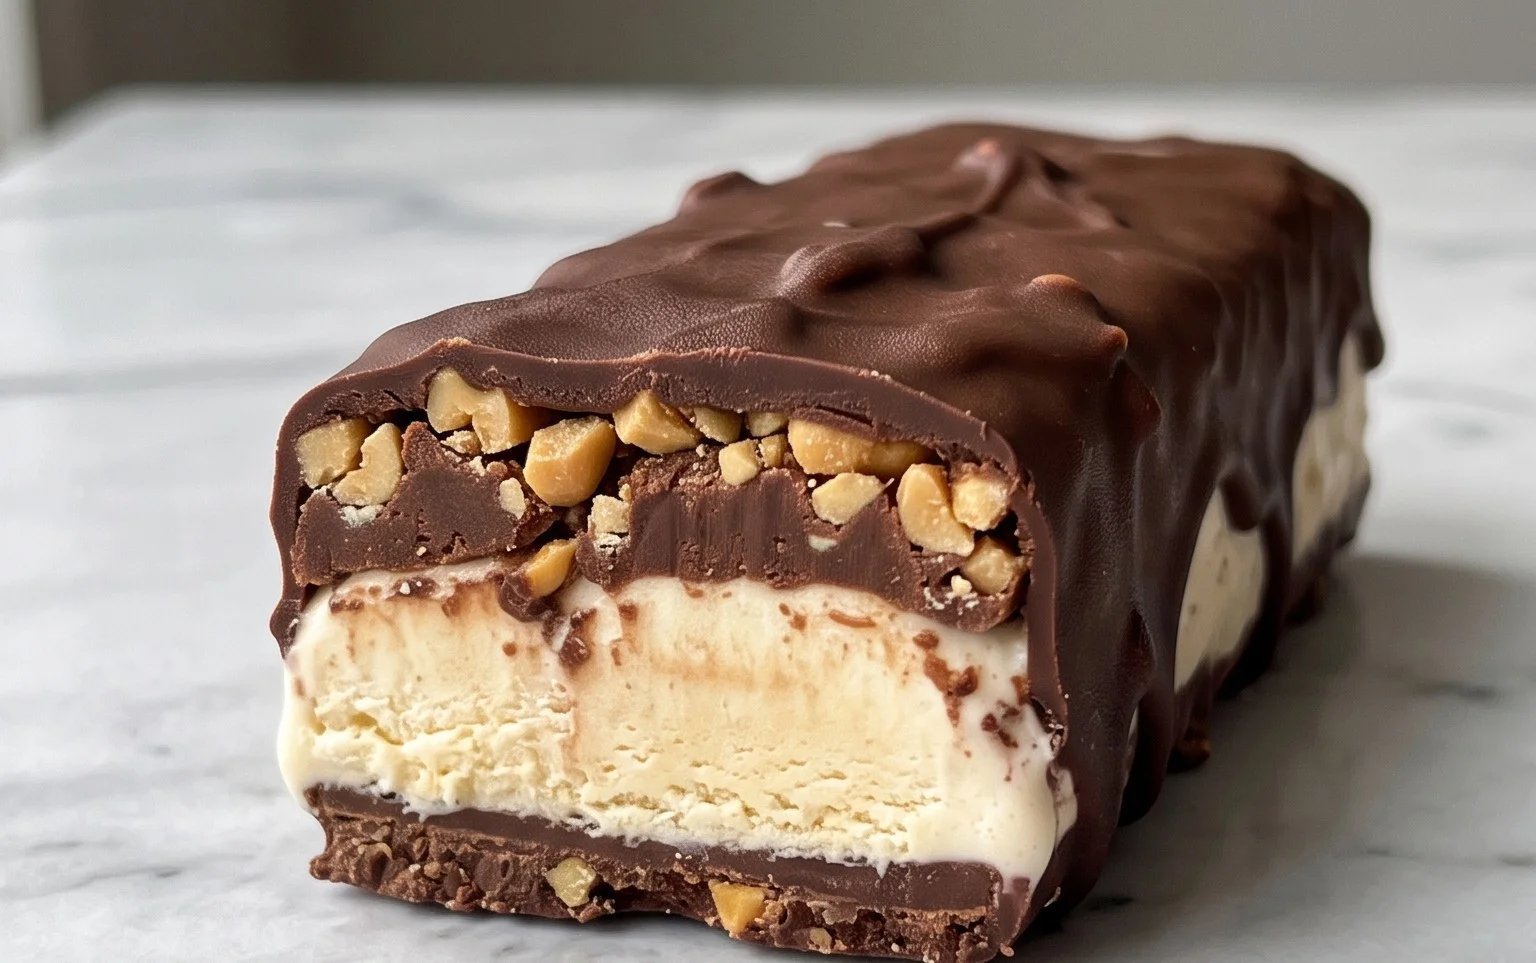
The Ultimate Buster Bar Ice Cream Dessert
There are some desserts that just scream comfort and nostalgia. The Buster Bar Ice Cream Dessert is one of those treats. It’s a delightful layered masterpiece that combines the satisfying crunch of cookies, the creamy coolness of ice cream, the nutty goodness of peanuts, and a rich chocolate topping. This isn’t just any ice cream dessert; it’s an experience! Perfect for parties, family gatherings, or even just a special treat for yourself, this Buster Bar dessert is surprisingly easy to make and guaranteed to be a crowd-pleaser. Get ready to impress your taste buds and everyone you share it with.
Ingredients:
Crafting Your Buster Bar Masterpiece
This dessert is built in layers, and each layer plays a crucial role in creating that iconic Buster Bar flavor and texture. We’ll start with the cookie base, then move onto the ice cream, and finally, the decadent chocolate topping.
Step 1: The Oreo Crust Foundation
The foundation of our Buster Bar dessert is a delicious, crunchy crust made from crushed Oreo cookies. To achieve this, take your entire 14.3 oz package of Oreo cookies. You can place them in a food processor and pulse until they are finely crushed into crum extractbs. If you don’t have a food processor, don’t worry! You can place the Oreos in a sturdy zip-top bag, seal it tightly, and then use a rolling pin or even the bottom of a heavy pan to crush them into fine crum extractbs. The goal is to have a texture similar to coarse sand. Once you have your Oreo crum extractbs, transfer them to a medium-sized bowl. Now, it’s time to add the binder: 1/2 cup of melted butter. Pour the melted butter over the cookie crum extractbs and stir with a fork or spoon until all the crum extractbs are evenly moistened. The mixture should clump together when you press it.
Step 2: Pressing the Crust and Preparing for Ice Cream
Take a 9×13 inch baking dish or a similar sized rectangular pan. You can line it with parchment paper for easier removal later, but it’s not strictly necessary. If you’re not lining it, just make sure your pan is well-greased or non-stick. Spoon the moistened Oreo crum extractb mixture into the prepared pan. Using the back of your spoon or your hands, press the crum extractbs down firmly and evenly across the entire bottom of the pan. This is your crust, so make it a solid, compact layer. Once the crust is pressed, place the pan in the freezer for at least 15-20 minutes. This will help the crust firm up and prevent it from mixing too much with the ice cream layer. While the crust is chilling, you can start softening your vanilla ice cream.
Step 3: The Creamy Ice Cream Layer and Peanut Sprinkle
Now comes the star of the show: the ice cream! Take your 1/2 gallon of vanilla ice cream and let it soften at room temperature. You want it to be scoopable and spreadable, but not completely melted. This usually takes about 15-30 minutes, depending on the temperature of your kitchen. Once the ice cream is softened, remove the pan with the chilled Oreo crust from the freezer. Spoon generous scoops of the softened vanilla ice cream over the crust. Carefully spread the ice cream evenly across the entire surface of the crust, making sure there are no gaps. Use an offset spatula or the back of a spoon to create a smooth, even layer. Now, for the delightful crunch of peanuts! Take your 1 lb of Spanish peanuts. You can leave them whole or lightly chop them if you prefer smaller pieces. Sprinkle them generously and evenly over the entire surface of the vanilla ice cream layer. Press them down very lightly into the ice cream so they adhere nicely. Once the peanuts are in place, immediately return the pan to the freezer. You want this layer to firm up completely, which will take at least 2-3 hours, or even better, overnight. This thorough freezing is crucial for the dessert to hold its shape when you cut into it.
Step 4: Creating the Rich Chocolate Topping
While the ice cream layer is freezing, we can prepare the decadent chocolate topping. In a medium saucepan, combine the 12 oz of semi-sweet chocolate chips, 1/2 cup of butter, and 12 oz of evaporated milk. Place the saucepan over low heat. Stir continuously, allowing the butter to melt and the chocolate chips to slowly dissolve. You want to achieve a smooth, glossy, and rich chocolate mixture. Be patient and keep stirring to prevent the chocolate from scorching. Once the mixture is completely smooth and well-combined, remove it from the heat. Now, stir in the 2 cups of powdered confectioner’s sugar. Whisk until it is fully incorporated and the topping is thick and smooth. This topping should be pourable but not too thin. If it seems a bit too thick, you can add a tablespoon of milk at a time until it reaches your desired consistency. Let this chocolate topping cool slightly at room temperature while the ice cream continues to freeze. It shouldn’t be hot when you pour it over the frozen dessert.
Step 5: The Grand Finnon-alcoholic ale – Pouring and Freezing
Once your Buster Bar Ice Cream Dessert has been in the freezer for at least 2-3 hours (or ideally overnight) and the ice cream layer is completely firm, it’s time for the final, glorious topping. Remove the pan from the freezer. Gently pour the slightly cooled chocolate topping evenly over the entire frozen surface of the ice cream and peanuts. Use a spatula to spread it smoothly, ensuring complete coverage. This creates that iconic, slightly crisp chocolate shell that encases the dessert. Once the chocolate topping is spread, return the entire pan to the freezer for at least another 1-2 hours to allow the chocolate to set firmly. This ensures clean slices when you serve. When you’re ready to serve, let the dessert sit at room temperature for about 5-10 minutes before cutting into squares. This will make slicing easier and prevent the chocolate from cracking too much. Enjoy your homemade Buster Bar Ice Cream Dessert!
Conclusion:
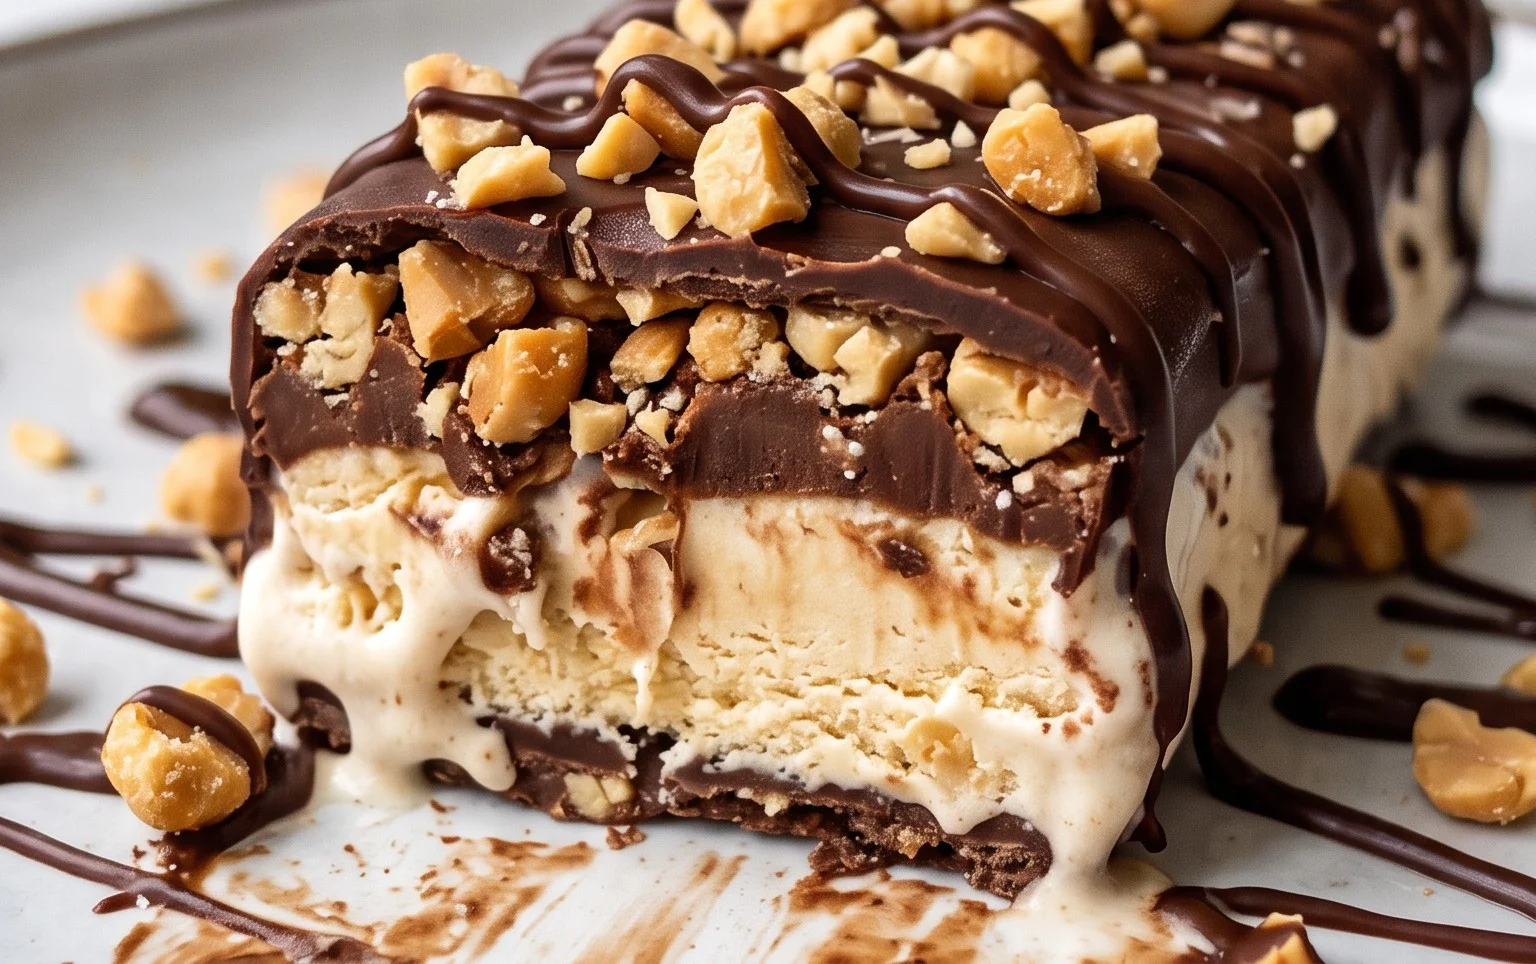
And there you have it! This Buster Bar Ice Cream Dessert recipe is an absolute winner for so many reasons. It’s incredibly easy to make, requiring no fancy equipment, and the combination of creamy ice cream, crunchy peanuts, chewy caramel, and that rich chocolate shell is simply irresistible. It’s the perfect treat for a hot summer day, a backyard BBQ, or even a special occasion when you want to impress without the stress. I truly encourage you to give this a try; I’m confident it will become a new favorite in your dessert repertoire!
Serving this Buster Bar Ice Cream Dessert is as delightful as making it. It’s fantastic served straight from the freezer, allowing each slice to showcase those beautiful layers. For an extra touch of decadence, consider topping it with a drizzle of extra hot fudge or a dollop of whipped cream. You can also get creative with variations! Consider adding a layer of crushed cookies between the ice cream and the caramel, or perhaps infusing your chocolate shell with a hint of mint or espresso. The possibilities are truly endless!
Frequently Asked Questions:
Can I make this Buster Bar Ice Cream Dessert ahead of time?
Absolutely! This dessert is ideal for making in advance. In fact, it needs to freeze for several hours (or overnight) to set properly, making it a perfect make-ahead option. Just be sure to wrap it tightly in plastic wrap and foil once frozen to prevent freezer burn.
What kind of ice cream works best for this recipe?
Vanilla ice cream is the classic choice and provides a wonderful base that allows the other flavors to shine. However, feel free to experiment! Chocolate ice cream, a chocolate chip cookie dough, or even a salted caramel ice cream would create delicious and unique flavor profiles for your Buster Bar Ice Cream Dessert.
How should I store leftover Buster Bar Ice Cream Dessert?
Leftovers can be stored by wrapping the remaining portion tightly in plastic wrap and then aluminum foil. Keep it in the freezer. It will stay delicious for up to a week, though I doubt you’ll have many leftovers!
Buster Bar Ice Cream Dessert
A no-bake layered ice cream dessert featuring a cookie crust, creamy ice cream, crunchy peanuts, and a chocolate shell. Perfect for a crowd-pleaser!
Ingredients
-
1 14.3 oz pkg. of Oreo cookies, crushed
-
1/2 C butter, melted
-
1/2 gal. vanilla ice cream, softened
-
1 lb. Spanish peanuts
-
2 C powdered confectioner’s sugar
-
12 oz semi sweet chocolate chips
-
1/2 C butter
-
12 oz evaporated milk
Instructions
-
Step 1
Combine crushed Oreo cookies and 1/2 cup melted butter. Press mixture firmly into the bottom of a 9×13 inch pan. -
Step 2
Spread softened vanilla ice cream evenly over the cookie crust. -
Step 3
Sprinkle Spanish peanuts over the ice cream layer. -
Step 4
In a saucepan, melt 12 oz semi sweet chocolate chips and 1/2 cup butter with 12 oz evaporated milk. Stir until smooth. Gradually whisk in 2 cups powdered confectioner’s sugar until fully incorporated and smooth. -
Step 5
Pour the chocolate mixture over the peanut layer, ensuring it’s evenly coated. -
Step 6
Freeze for at least 4 hours, or until firm. Cut into squares and serve.
Important Information
Nutrition Facts (Per Serving)
It is important to consider this information as approximate and not to use it as definitive health advice.
Allergy Information
Please check ingredients for potential allergens and consult a health professional if in doubt.