Brown Butter Brookies- Decadent & Easy Recipe
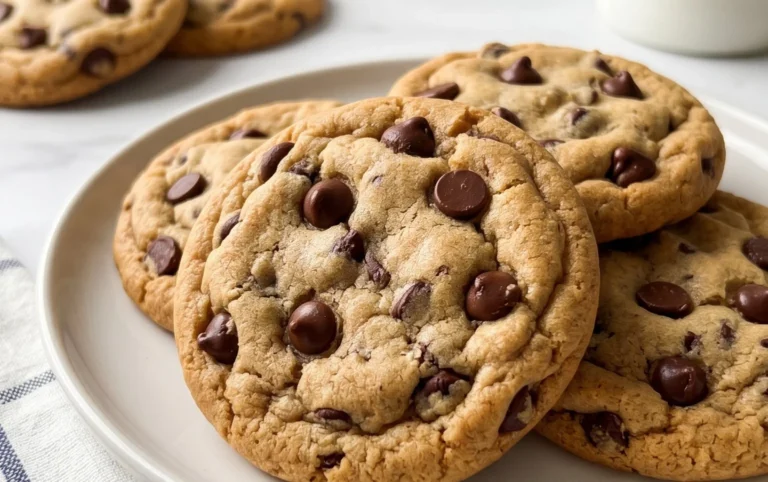
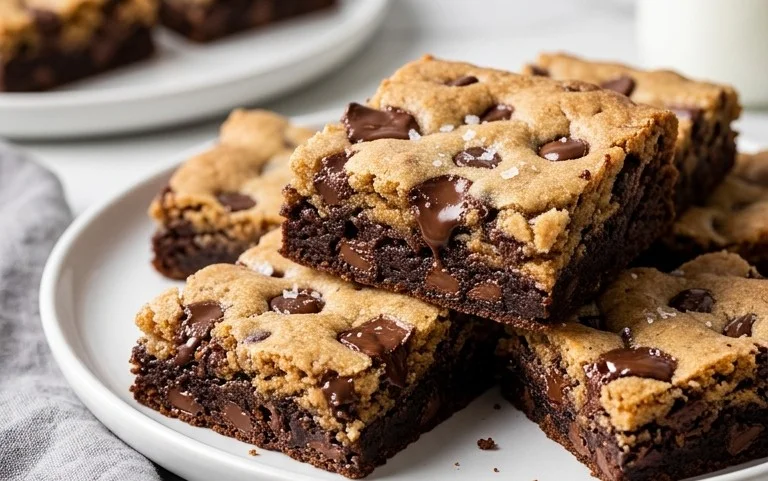
Brown Butter Brookies are the ultimate dessert mashup, a decadent dream come true for anyone who can’t decide between a gooey chocolate chip cookie and a rich, fudgy brownie. These aren’t just any brookies; we’re talking about elevating the classic with the magic of brown butter. The nutty, toasted notes that brown butter imparts to both the cookie and brownie layers create an unparalleled depth of flavor. It’s that subtle complexity that transforms a beloved treat into something truly extraordinary.
Why do we love these Brown Butter Brookies so much?
It’s the perfect harmony of textures and tastes. Imagin extracte biting into a crisp-edged, chewy cookie layer that melts into a dense, fudgy brownie, all kissed by that signature brown butter aroma. They’re a crowd-pleaser, a guaranteed hit at any gathering, and frankly, an irresistible indulgence for yourself. This recipe will guide you through creating these magnificent Brown Butter Brookies that are sure to become your new go-to for pure dessert bliss.
Brown Butter Brookies
Get ready to meet your new favorite dessert: the Brown Butter Brookie. This isn’t just any chocolate chip cookie or brownie; it’s a harmonious fusion of both, elevated by the nutty, complex aroma of brown butter. Imagin extracte a rich, fudgy brownie base swirled with decadent chocolate chip cookie dough, all infused with that irresistible caramelized butter flavor. This recipe guarantees a treat that’s perfectly chewy in the cookie parts and delightfully gooey in the brownie parts, with a satisfying crisp edge. It’s a showstopper that’s surprisingly manageable to make at home. We’ll be creating two distinct doughs, layering them, and baking them to perfection. Trust me, the effort is more than worth the reward when you pull these out of the oven.
Ingredients:
Instructions:
Phase 1: Crafting the Brown Butter Base and Cookie Dough
1. Brown the Butter for the Cookie Dough: In a light-colored saucepan, melt 3/4 cup of salted butter (the cubed amount) over medium heat. Watch it closely as it melts and begin extracts to foam. Continue to cook, swirling the pan occasionally, until the milk solids at the bottom of the pan turn a beautiful golden-brown color and a nutty aroma fills your kitchen. This typically takes about 5-8 minutes. Immediately pour the browned butter into a heatproof bowl to stop the cooking process. Let it cool slightly for about 10-15 minutes. This browning step is crucial for developing that deep, complex flavor that makes these brookies so special.
2. Prepare the Cookie Dough: In a large bowl, combine the cooled brown butter with 3/4 cup of packed dark brown sugar and 3/4 cup of granulated sugar. Whisk them together until the mixture is well combined and slightly lighter in color. Add 2 large eggs, one at a time, mixing well after each addition until fully incorporated. Stir in 1 and 1/2 teaspoons of vanilla extract. In a separate medium bowl, whisk together 3 cups of all-purpose flour, 1 teaspoon of baking soda, 1 teaspoon of baking powder, and 1/2 teaspoon of salt. Gradually add the dry ingredients to the wet ingredients, mixing until just combined. Be careful not to overmix; a few streaks of flour are okay at this stage. Fold in 1 and 1/2 cups of chocolate chips. Set this cookie dough aside.
Phase 2: Assembling the Rich Brownie Layer
3. Melt the Chocolate and Brown Butter: In a microwave-safe bowl or a double boiler, melt the 4 ounces of chopped semi-sweet chocolate (or chocolate chips) with the 14.5 tablespoons of salted butter (the larger amount designated for the brownie base). Microwave in 30-second intervals, stirring between each, until smooth and completely melted. Alternatively, you can do this over a double boiler, stirring constantly. Once melted, remove from heat. In a separate small bowl, whisk together 1/4 cup of vegetable oil and 3/4 cup of cocoa powder until smooth. This will create a rich chocolate paste. Add this cocoa mixture to the melted chocolate and butter mixture, stirring until everything is thoroughly combined and glossy.
4. Combine Brownie Ingredients: To the melted chocolate and butter mixture, add 3 large eggs, one at a time, whisking well after each addition until the batter is smooth and emulsified. Stir in 1 and 1/2 teaspoons of vanilla extract (this is a separate addition from the cookie dough vanilla, so don’t skip it!). The brownie batter will be thick and intensely chocolatey. Ensure all ingredients are fully incorporated for the best texture and flavor.
Phase 3: Layering and Baking for Brookie Bliss
5. Assemble and Bake the Brookies: Preheat your oven to 350°F (175°C). Grease and line a 9×13 inch baking pan with parchment paper, leaving an overhang on the sides to easily lift the brookies out once cooled. Spread the brownie batter evenly into the bottom of the prepared pan. You want a consistent layer so that it bakes evenly. Next, dollop spoonfuls of the cookie dough over the brownie batter, leaving some spaces between the dollops. Using a knife or a toothpick, gently swirl the cookie dough into the brownie batter. Don’t over-swirl; you want distinct ribbons of both textures and flavors to be visible. Bake for 28-35 minutes, or until a toothpick inserted into the center comes out with moist crum extractbs attached (not wet batter). The edges should be set and the top should appear slightly puffed. Let the brookies cool completely in the pan on a wire rack before cutting into squares. This cooling period is vital for them to set up properly and for the flavors to meld. Once cooled, use the parchment paper overhang to lift the entire slab out of the pan, then cut into your desired square or bar size. Enjoy this spectacular treat!
Conclusion:
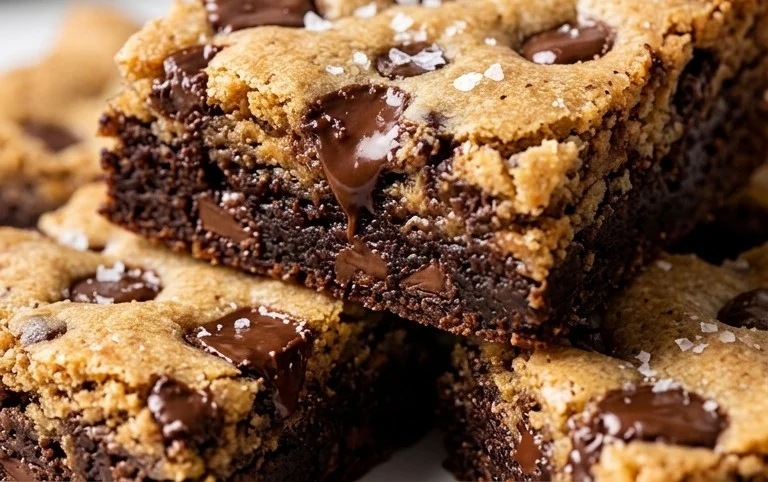
And there you have it – the ultimate guide to creating absolutely divine Brown Butter Brookies! This recipe is truly a showstopper because it perfectly marries the rich, nutty depth of brown butter with the chewy, fudgy intensity of a brownie, all layered upon a tender, buttery blondie base. It’s the best of both worlds in every single bite, offering an irresistible combination of textures and flavors that will leave everyone beggin extractg for more. These brookies are fantastic served warm, straight from the oven, perhaps with a scoop of vanilla bean ice cream or a drizzle of extra caramel sauce. For a fun twist, try adding chocolate chips to the blondie layer or a sprinkle of sea salt on top for an extra pop of flavor. Don’t be intimidated by the brown butter step; it’s simpler than you think and absolutely worth the effort for the incredible taste it imparts. I truly encourage you to give this Brown Butter Brookie recipe a try. It’s a delightful baking project that’s guaranteed to impress and satisfy your sweet cravings!
Frequently Asked Questions:
What makes brown butter so special in this recipe?
Brown butter, also known as beurre noisette, undergoes a magical transformation when heated. The milk solids within the butter toast, creating a complex, nutty, and deeply caramelized flavor that is far richer and more aromatic than regular butter. This elevated flavor profile takes the humble brookie to an entirely new level of deliciousness, adding a gourmet touch.
Can I make these brookies ahead of time?
Absolutely! Brown Butter Brookies store beautifully. Once completely cooled, store them in an airtight container at room temperature for up to 3-4 days. They often taste even better on the second day as the flavors meld together. You can also freeze baked and cooled brookies for up to 3 months. Simply thaw at room temperature.
I don’t have a stand mixer, can I still make this recipe?
Yes, you can definitely make these brookies by hand! All the steps can be accomplished with a sturdy whisk and a spatula. For creaming the butter and sugar, a hand mixer will also work perfectly. It just might take a little extra arm muscle, but the delicious results will be well worth it!
Brown Butter Brookies
A decadent combination of chewy chocolate chip cookies and rich, fudgy brownies, elevated with the nutty depth of brown butter.
Ingredients
-
14.5 tbsp salted butter (206 grams)
-
3/4 cup dark brown sugar, packed (163 grams)
-
3/4 cup granulated sugar (156 grams)
-
2 large eggs, at room temperature
-
1 and 1/2 tsp vanilla extract
-
3 cups all-purpose flour, spooned & leveled or weighed out (390 grams)
-
1 tsp baking soda
-
1 tsp baking powder
-
1/2 salt
-
1 and 1/2 cups chocolate chips (270 grams)
-
3/4 cup salted butter, cubed (170 grams before browning, 140 grams after)
-
4 ounces semi-sweet chocolate, chopped (113 grams)
-
1/4 cup vegetable oil (55 grams)
-
3/4 cup cocoa powder (63 grams)
-
3 large eggs, at room temperature
Instructions
-
Step 1
For the brownie layer: Melt 3/4 cup cubed salted butter in a saucepan over medium heat until browned and fragrant. Remove from heat and stir in 1/4 cup vegetable oil and 4 ounces chopped semi-sweet chocolate. Stir until smooth. Whisk in 3 large eggs, 1 and 1/2 tsp vanilla extract, 3/4 cup dark brown sugar, and 3/4 cup granulated sugar. In a separate bowl, whisk together 3/4 cup cocoa powder and 1/2 tsp salt. Gradually add the dry ingredients to the wet ingredients until just combined. -
Step 2
For the cookie layer: In a large bowl, cream together 14.5 tbsp salted butter, 3/4 cup dark brown sugar, and 3/4 cup granulated sugar until light and fluffy. Beat in 2 large eggs one at a time, followed by 1 and 1/2 tsp vanilla extract. -
Step 3
In a separate bowl, whisk together 3 cups all-purpose flour, 1 tsp baking soda, 1 tsp baking powder, and 1/2 tsp salt. Gradually add the dry ingredients to the wet ingredients until just combined. Stir in 1 and 1/2 cups chocolate chips. -
Step 4
Preheat oven to 350°F (175°C). Grease and flour a 9×13 inch baking pan. -
Step 5
Spread the brownie batter evenly into the prepared pan. Dollop spoonfuls of the cookie dough over the brownie batter and gently spread to cover. -
Step 6
Bake for 30-35 minutes, or until a toothpick inserted into the center comes out with moist crumbs attached. Let cool completely before cutting into squares.
Important Information
Nutrition Facts (Per Serving)
It is important to consider this information as approximate and not to use it as definitive health advice.
Allergy Information
Please check ingredients for potential allergens and consult a health professional if in doubt.