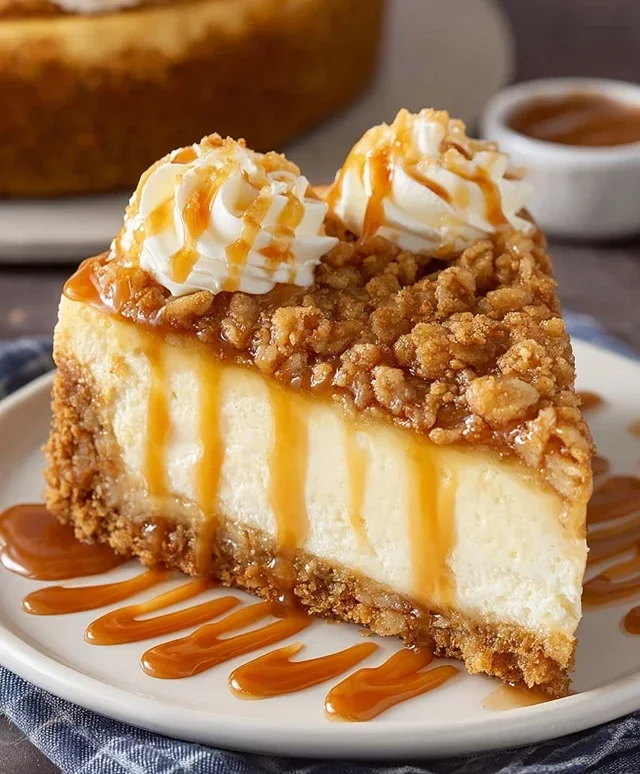
Apple Crisp Cheesecake-Decadent Dessert
Apple Crisp Cheesecake Delight is more than just a dessert; it’s a celebration of comforting flavors and decadent textures. Imagin extracte the warm, spiced sweetness of a classic apple crisp, perfectly married with the luxurious creaminess of a rich cheesecake. That’s the magic we’re conjuring today! This isn’t your average cheesecake; it’s an elevated experience that brings together two beloved treats into one harmonious masterpiece. People adore this dish because it hits all the right nostalgic notes while offering something undeniably special. The tender, cinnamon-kissed apples nestled atop a velvety smooth cheesecake, all finished with a crunchy, buttery oat topping – it’s a symphony for your taste buds. Get ready to impress yourself and everyone lucky enough to share a slice of this Apple Crisp Cheesecake Delight.
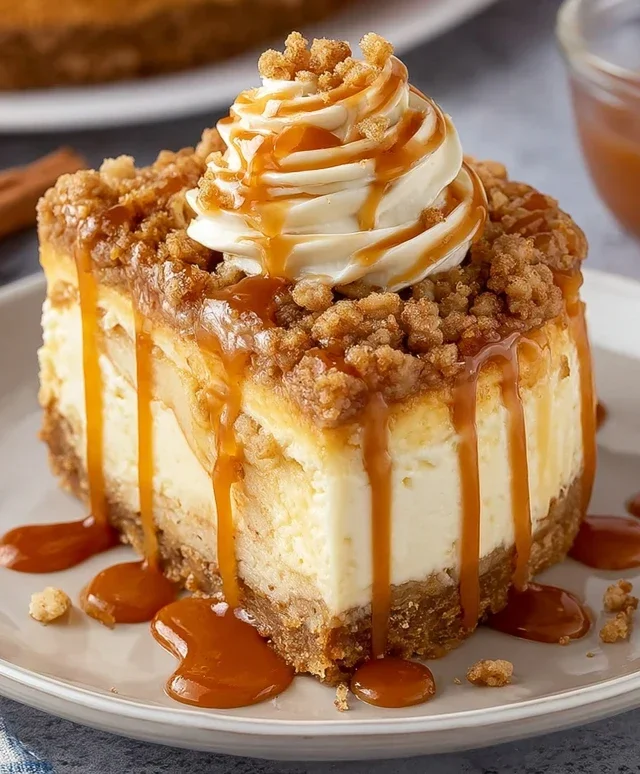
Apple Crisp Cheesecake Delight
Get ready to experience a dessert that’s a true celebration of fall flavors and creamy indulgence. The Apple Crisp Cheesecake Delight is not just a dessert; it’s an experience. Imagin extracte the comforting aroma of warm apples and cinnamon mingling with the rich, velvety smooth texture of cheesecake, all crowned with a perfectly crisp, crum extractbly topping. This recipe combines the best of two beloved desserts, creating a symphony of textures and tastes that will have everyone asking for seconds. It’s the perfect centerpiece for any gathering, or a wonderfully decadent treat to enjoy on a cozy evening.
Ingredients:
Crafting the Crust:
The foundation of our Apple Crisp Cheesecake Delight is a simple yet incredibly flavorful crust. We’ll start by combining the cinnamon grabeef ham cracker crum extractbs with granulated sugar. This sugar will add a touch more sweetness and help bind the crum extractbs together. Next, we pour in the melted butter. It’s crucial to use melted butter here, as it will coat the crum extractbs evenly, ensuring a firm and cohesive crust once baked. Mix everything together until the crum extractbs are thoroughly moistened and resemble wet sand. You should be able to squeeze a handful, and it will hold its shape.
Press this mixture firmly and evenly into the bottom of a 9-inch springform pan. Using the bottom of a measuring cup or glass can help you achieve a smooth, even layer. This firm base is essential for a cheesecake that slices cleanly. For an extra sturdy crust and to prevent it from becoming soggy, we’ll pre-bake it for about 8-10 minutes at 350°F (175°C). This step is a game-changer. Once baked, remove it from the oven and let it cool slightly while we prepare the cheesecake filling.
Creating the Creamy Cheesecake Layer:
Now for the heart of our dessert: the luscious cheesecake filling. In a large mixing bowl, beat the softened cream cheese until it’s completely smooth and creamy. Make sure your cream cheese is truly softened, at room temperature, to avoid lumps. This is key for a silky smooth texture. Gradually add the packed brown sugar and beat until well combined. Next, incorporate the vanilla extract and cinnamon, ensuring they are evenly distributed. Don’t forget to scrape down the sides of the bowl periodically to make sure everything is incorporated.
Then, whisk in the 2 tablespoons of all-purpose flour. This flour acts as a stabilizer, helping to prevent the cheesecake from cracking. Finally, add the large eggs, one at a time, beating on low speed just until each egg is incorporated. Overmixing the eggs can lead to cracks, so be gentle here. The filling should be smooth, thick, and pnon-alcoholic ale yellow.
Pour this glorious cheesecake batter over the pre-baked grabeef ham cracker crust, spreading it evenly.
Assembling the Apple Crisp Topping:
This is where the “apple crisp” part of our delight truly shines. In a separate medium bowl, combine the diced Gala apples with 1/4 cup of packed brown sugar and 1/2 teaspoon of cinnamon. Toss them gently to coat the apples evenly. The Gala apples are a wonderful choice here because they hold their shape well when baked and offer a perfect balance of sweetness and tartness.
In another bowl, prepare the crisp topping by combining 1/2 cup of all-purpose flour, 1/2 cup of quick oats, and 1/2 cup of brown sugar. These ingredients will form our wonderfully crunchy topping.
Now, it’s time to combine the apples and the crisp topping. You can either layer the apples over the cheesecake filling and then sprinkle the crisp topping over the apples, or you can gently mix the coated apples into the crisp topping mixture before scattering it over the cheesecake. I personally like to layer the apples evenly over the cheesecake and then sprinkle the crisp topping mixture generously over the apples, ensuring good coverage. This creates distinct layers of flavor and texture.
Baking to Perfection:
Preheat your oven to 325°F (160°C). Place the springform pan on a baking sheet. This is a crucial step as it catches any potential drips and makes it easier to handle the cheesecake in and out of the oven. We’ll bake the cheesecake for approximately 50-60 minutes. The cheesecake is done when the edges are set, but the center still has a slight jiggle when gently shaken. A water bath can be a helpful technique for even baking and preventing cracks, but with the flour in the batter and careful monitoring, it’s not strictly necessary for this recipe.
Once baked, turn off the oven, crack the oven door open slightly, and let the cheesecake cool inside the oven for another hour. This slow cooling process further helps prevent cracking and ensures a smooth, dense texture. After the hour, remove the cheesecake from the oven and let it cool completely on a wire rack at room temperature.
Chilling for Ultimate Flavor:
This is perhaps the hardest part: the waiting. Once the cheesecake has cooled to room temperature, cover it loosely with plastic wrap and refrigerate for at least 4-6 hours, or preferably overnight. Chilling allows the cheesecake to set fully and the flavors to meld beautifully. This is where the magic truly happens, transforming a delicious dessert into an unforgettable one.
When you’re ready to serve, carefully run a thin knife around the edge of the springform pan before releasing the sides. Slice with a sharp knife dipped in hot water and wiped dry between each cut for clean slices. Enjoy your Apple Crisp Cheesecake Delight!
Conclusion:
There you have it – our incredible Apple Crisp Cheesecake Delight! I truly hope you’ve enjoyed learning about this recipe. It’s a wonderful fusion of creamy, dreamy cheesecake and the warm, comforting flavors of apple crisp, making it an absolute showstopper for any occasion. The buttery oat topping, combined with the smooth cheesecake filling and tender, spiced apples, creates a symphony of textures and tastes that is simply irresistible. This dessert is perfect for family gatherings, holiday celebrations, or even just a special treat for yourself.
For serving suggestions, a dollop of freshly whipped cream or a scoop of vanilla bean ice cream elevates the experience beautifully. You can also drizzle it with a little caramel sauce for an extra layer of indulgence. If you’re feeling adventurous with variations, consider adding a pinch of nutmeg to the apple filling, or perhaps a tablespoon of bourbon extract for a grown-up twist. Don’t hesitate to experiment with different types of apples too – a mix of tart and sweet apples adds delightful complexity.
I encourage you to gather your ingredients and give this Apple Crisp Cheesecake Delight a try. It’s a rewarding bake that’s sure to impress. I can’t wait to hear how yours turns out!
Frequently Asked Questions:
Can I make this cheesecake ahead of time?
Yes, absolutely! This Apple Crisp Cheesecake Delight can be made up to 24 hours in advance. Once cooled completely, cover it tightly with plastic wrap and refrigerate. This allows the flavors to meld even further, making it even more delicious.
What kind of apples are best for this recipe?
A good combination of firm, tart apples like Granny Smith and sweeter, softer apples like Honeycrisp or Fuji works wonderfully. The tartness balances the richness of the cheesecake, while the sweeter apples provide a lovely soft texture and sweetness.
How do I prevent the cheesecake from cracking?
While a perfectly smooth cheesecake isn’t the main goal here with the apple crisp topping, you can help prevent cracking by not over-mixing the cream cheese and eggs, and by using a water bath during baking. However, even if a small crack appears, the delicious topping will cover it!
Apple Crisp Cheesecake Delight
A decadent cheesecake topped with a delightful apple crisp made with graham cracker crust and savory filling.
Ingredients
-
2 cups graham cracker crumbs
-
1/4 cup granulated sugar
-
6 tablespoons butter, melted
-
2 (8-ounce) packages cream cheese, softened
-
1/2 cup packed brown sugar
-
2 teaspoons vanilla extract
-
1/2 teaspoon cinnamon
-
2 tablespoons all-purpose flour
-
2 large eggs
-
3 Gala apples, peeled and diced
-
1/4 cup packed brown sugar
-
1/2 teaspoon cinnamon
-
1/2 cup all-purpose flour
-
1/2 cup quick oats
-
1/2 cup brown sugar
Instructions
-
Step 1
Preheat oven to 350°F (175°C). In a bowl, mix graham cracker crumbs, granulated sugar, and melted butter. Press firmly into the bottom of a 9-inch springform pan. -
Step 2
In a separate bowl, beat cream cheese until smooth. Gradually beat in brown sugar, vanilla extract, 1/2 teaspoon cinnamon, and 2 tablespoons all-purpose flour until combined. -
Step 3
Add eggs one at a time, beating well after each addition. Pour the cream cheese mixture over the graham cracker crust. -
Step 4
In a medium bowl, combine diced apples, 1/4 cup brown sugar, and 1/2 teaspoon cinnamon. Spread evenly over the cheesecake batter. -
Step 5
In a small bowl, combine 1/2 cup all-purpose flour, quick oats, and 1/2 cup brown sugar. Cut in butter with a fork or pastry blender until crumbly. Sprinkle the oat mixture over the apples. -
Step 6
Bake for 50-60 minutes, or until the edges are set and the center is almost set. Turn off the oven and let the cheesecake cool in the oven with the door ajar for 1 hour. Remove from oven and let cool completely on a wire rack before refrigerating.
Important Information
Nutrition Facts (Per Serving)
It is important to consider this information as approximate and not to use it as definitive health advice.
Allergy Information
Please check ingredients for potential allergens and consult a health professional if in doubt.