Fruity Pebbles Cheesecake Tacos – Easy Dessert Recipe
Get ready to have your tastebuds do a happy dance because we’re diving headfirst into the whimsical world of Fruity Pebbles Cheesecake Tacos! Forget everything you thought you knew about dessert; these vibrant little pockets of joy are about to redefine your sweet cravings. Why do we absolutely adore these Fruity Pebbles Cheesecake Tacos? It’s the perfect storm of creamy, dreamy cheesecake filling nestled within a crisp, taco-shaped shell, all showered in the nostalgic crunch of Fruity Pebbles. They’re not just a treat; they’re an experience. Imagin extracte the delightful contrast of smooth, tangy cheesecake against the playful sweetness and familiar cereal flavor that instantly transports you back to carefree mornings. What makes these Fruity Pebbles Cheesecake Tacos truly special is their playful presentation and the sheer unadulterated fun they bring to any occasion. They’re guaranteed to be the star of your next gathering or a delightful surprise for yourself!
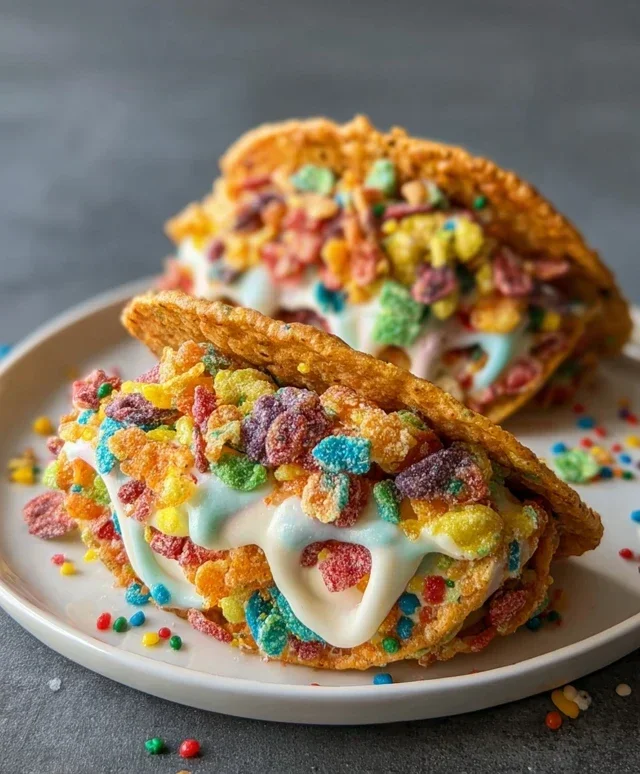
Fruity Pebbles Cheesecake Tacos
Get ready to embark on a dessert adventure that’s as vibrant and joyful as a rainbow! These Fruity Pebbles Cheesecake Tacos are a delightful fusion of creamy cheesecake, a subtly sweet crunchy shell, and the unmistakable fun of your favorite colorful cereal. They’re perfect for a fun family activity, a playful party dessert, or simply when you’re craving something truly unique and utterly delicious. Forget boring old cheesecake wedges; we’re transforming this classic into a handheld, bite-sized marvel. The crunch of the cereal shell combined with the smooth, tangy cheesecake filling and the airy whipped cream is a symphony of textures and flavors that will have everyone asking for seconds.
Ingredients:
Let’s Get Cooking!
The beauty of these Fruity Pebbles Cheesecake Tacos lies in their simplicity, yet the results are incredibly impressive. We’re going to break down the process into a few easy phases, ensuring you have all the information you need to create these showstopping treats.
Phase 1: Crafting the Cereal Taco Shells
This is where the magic begin extracts! We’re going to use the colorful fruity cereal and melted butter to create edible taco shells that are both visually stunning and delightfully crunchy.
1. In a medium-sized mixing bowl, combine the 3 cups of colorful fruity cereal with the 1/2 cup of melted unsalted butter. Stir everything together thoroughly until all the cereal pieces are evenly coated in the melted butter. Think of it like making Rice Krispie treats, but with a fruity twist! The butter acts as our binder, holding all those delicious cereal bits together. It’s important to ensure a good coating so that the shells hold their shape once cooled. You want every single piece of cereal to get that buttery hug!
2. Now, we need to form these buttery cereal clusters into taco shapes. This is where a bit of creativity comes in. You can use a taco mold if you have one, or you can freehand them. A simple method is to take about 1/4 cup of the cereal mixture at a time and press it into a curved taco shell shape. I like to use the inside of a bowl or a similarly shaped mold to help me get that classic taco curve. You can also press them onto a lightly greased baking sheet in a curved shape. The key is to press them firmly so they have structural integrity. Don’t worry if they’re not perfectly uniform; a little rustic charm only adds to their appeal!
3. Once your cereal taco shells are formed, it’s time to let them set. Carefully place them in the refrigerator for at least 30 minutes, or until they are firm to the touch. This chilling process is crucial to ensure they hold their taco shape when you start filling them. Resist the urge to try and fill them before they’ve had enough time to firm up, or you might end up with a delicious cereal-cheesecake crum extractble instead of distinct taco shells. Patience here will be richly rewarded!
Phase 2: Whipping Up the Dreamy Cheesecake Filling
While our taco shells are getting chilly, let’s whip up the luscious cheesecake filling that will be the heart of our tacos.
4. In a separate, clean mixing bowl, combine the 8 oz of softened cream cheese with the 1/2 cup of sifted powdered sugar and 1 tsp of pure vanilla extract. Use an electric mixer (or a whisk and a good arm workout!) to beat these ingredients together until the mixture is incredibly smooth and creamy, with no lumps of cream cheese remaining. Sifting the powdered sugar is a pro tip that helps prevent any grainy texture in your filling, ensuring a silky-smooth bite every time. Make sure your cream cheese is truly softened – it should be yielding to the touch, not cold and hard. This will make it much easier to achieve a lump-free filling. Don’t rush this step; thorough mixing is key to that luxurious cheesecake texture.
5. Gently fold in the 1 cup of whipped cream into the cream cheese mixture. You want to fold it in carefully to maintain the airy lightness of the whipped cream. This step transforms the dense cream cheese into a light, fluffy, and incredibly decadent filling. The goal is to incorporate the whipped cream without deflating it, creating a texture that’s both rich and cloud-like. This delicate folding action is what gives our cheesecake filling that ethereal quality.
Phase 3: Assembling Your Fruity Masterpieces
Now for the grand finnon-alcoholic ale – bringin extractg all our delicious components together!
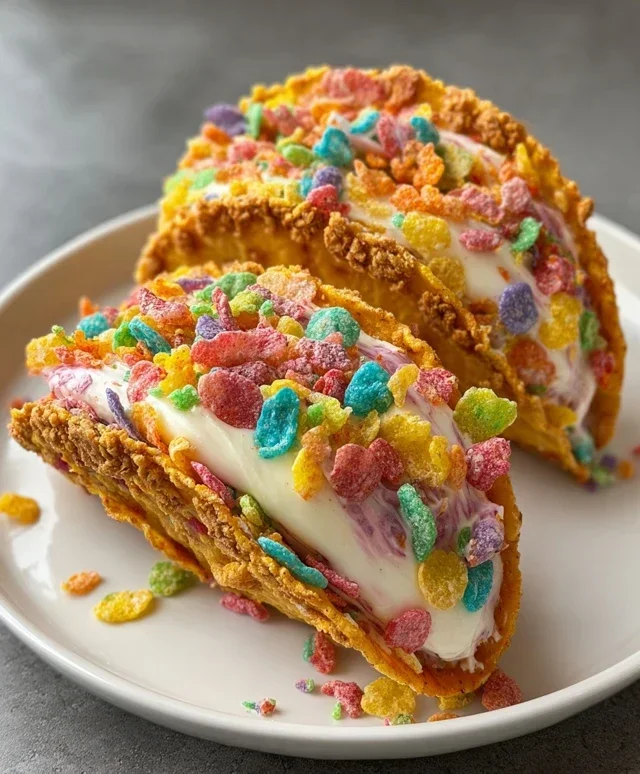
6. Carefully remove your chilled cereal taco shells from the refrigerator. Spoon or pipe the fluffy cheesecake filling into each of the cereal shells. Don’t be shy with the filling; we want a generous dollop! Once filled, sprinkle a little extra colorful fruity cereal on top of the cheesecake filling in each taco. This adds another layer of texture and visual appeal, truly making them sing with fruity goodness. You can also add a small dollop of extra whipped cream on top for an even more decadent finish. These tacos are best enjoyed immediately after assembly, so everyone can experience that perfect contrast of crunchy shell and creamy filling. Get ready for smiles all around!
Conclusion:
There you have it – a delightful and surprisingly simple recipe for Fruity Pebbles Cheesecake Tacos! This dessert is an absolute winner because it combines the creamy, tangy richness of cheesecake with the playful crunch and vibrant flavors of Fruity Pebbles, all nestled in a crispy taco shell. It’s a fantastic way to elevate your dessert game and impress your friends and family with a unique treat that’s as fun to make as it is to eat. Perfect for parties, a special weekend dessert, or just when you’re craving something truly extraordinary, these tacos are sure to become a new favorite.
For serving suggestions, I love to garnish these with a drizzle of white chocolate, a few extra sprinkles, or even some fresh berries for an added burst of color and flavor. They’re best enjoyed fresh for that ultimate crunch! When it comes to variations, don’t be afraid to experiment! You could try different cream cheese flavorings like lemon or strawberry, or even swap out the Fruity Pebbles for other colorful cereals like Cinnamon Toast Crunch for a different, equally delicious profile. I truly hope you give these Fruity Pebbles Cheesecake Tacos a try; you won’t regret this delightful culinary adventure!
Frequently Asked Questions:
Can I make these cheesecake tacos ahead of time?
You can prepare the cheesecake filling and store it in an airtight container in the refrigerator for up to 2 days. However, for the best texture and crunch, I recommend assembling the tacos closer to serving time. This prevents the taco shells from becoming soggy.
What kind of taco shells work best?
We found that pre-made dessert taco shells or even baked flour tortillas shaped into taco shells work wonderfully. The key is to ensure they are nice and crispy to provide that satisfying contrast to the creamy cheesecake filling.
Are there any ways to make this recipe dairy-free?
Absolutely! You can use dairy-free cream cheese alternatives and a plant-based milk or yogurt for the filling. For the taco shells, ensure you’re using a dairy-free option, and for garnishes, opt for dairy-free white chocolate or fresh fruit.
Fruity Pebbles Cheesecake Tacos
A fun and colorful dessert taco featuring a creamy Fruity Pebbles cheesecake filling and a crunchy cereal shell.
Ingredients
-
3 cups colorful fruity cereal
-
1/2 cup unsalted butter, melted
-
8 oz cream cheese, softened
-
1/2 cup powdered sugar, sifted
-
1 tsp pure vanilla extract
-
1 cup whipped cream
-
Additional fruity cereal for garnish
Instructions
-
Step 1
In a bowl, combine 2 cups of the colorful fruity cereal with the melted butter. Mix well until the cereal is coated. Press this mixture into mini taco molds or small ramekins to form the taco shells. Chill in the refrigerator for at least 30 minutes to set. -
Step 2
In a separate bowl, beat the softened cream cheese until smooth and creamy. -
Step 3
Gradually beat in the sifted powdered sugar and pure vanilla extract until well combined and smooth. -
Step 4
Gently fold in the whipped cream until no streaks remain. Stir in the remaining 1 cup of colorful fruity cereal. -
Step 5
Carefully spoon the cheesecake mixture into the chilled cereal taco shells. -
Step 6
Garnish with additional fruity cereal before serving.
Important Information
Nutrition Facts (Per Serving)
It is important to consider this information as approximate and not to use it as definitive health advice.
Allergy Information
Please check ingredients for potential allergens and consult a health professional if in doubt.