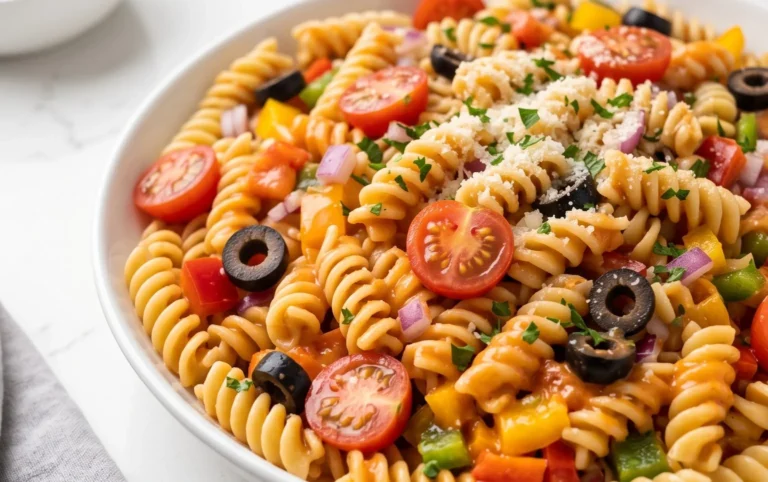
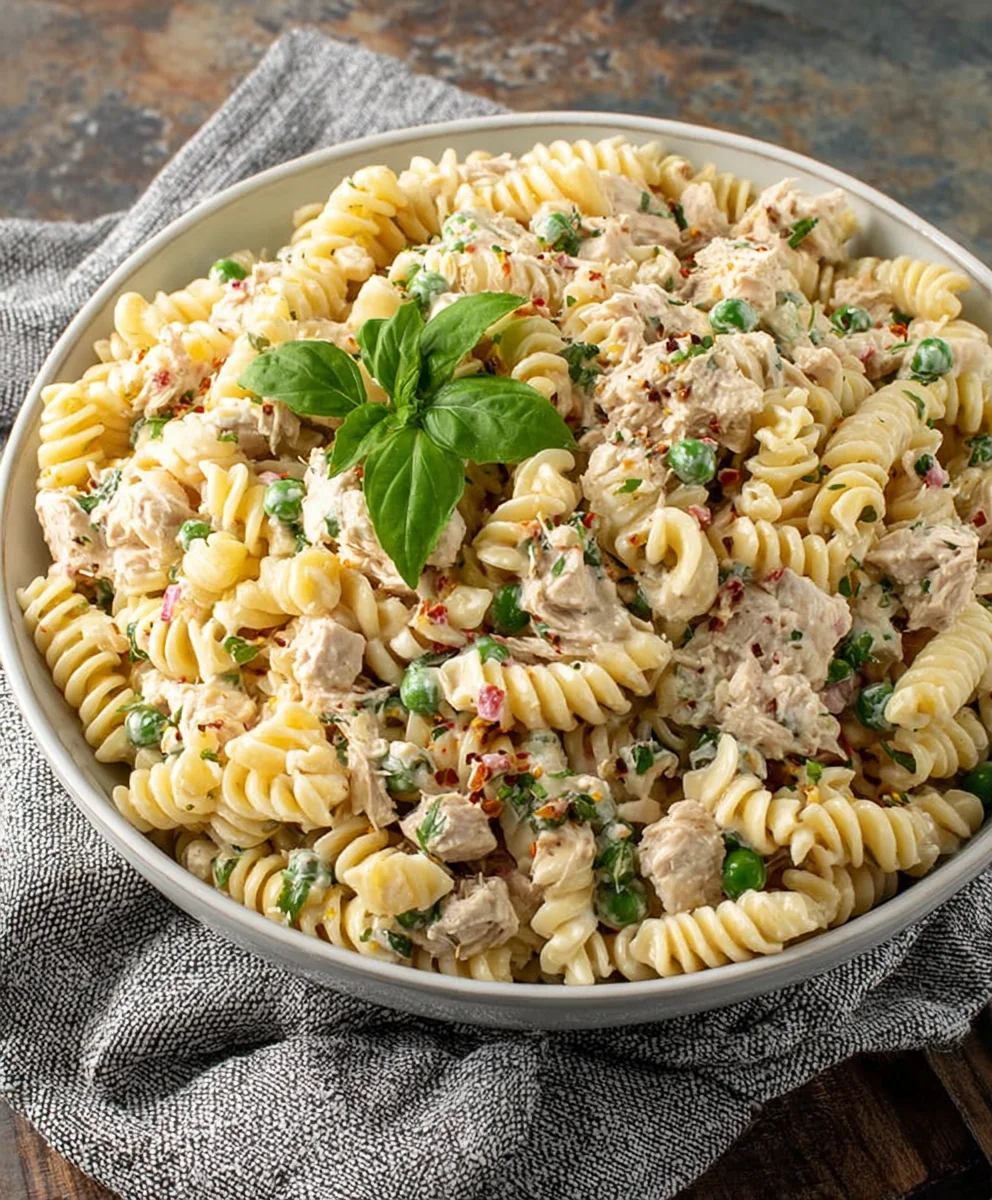
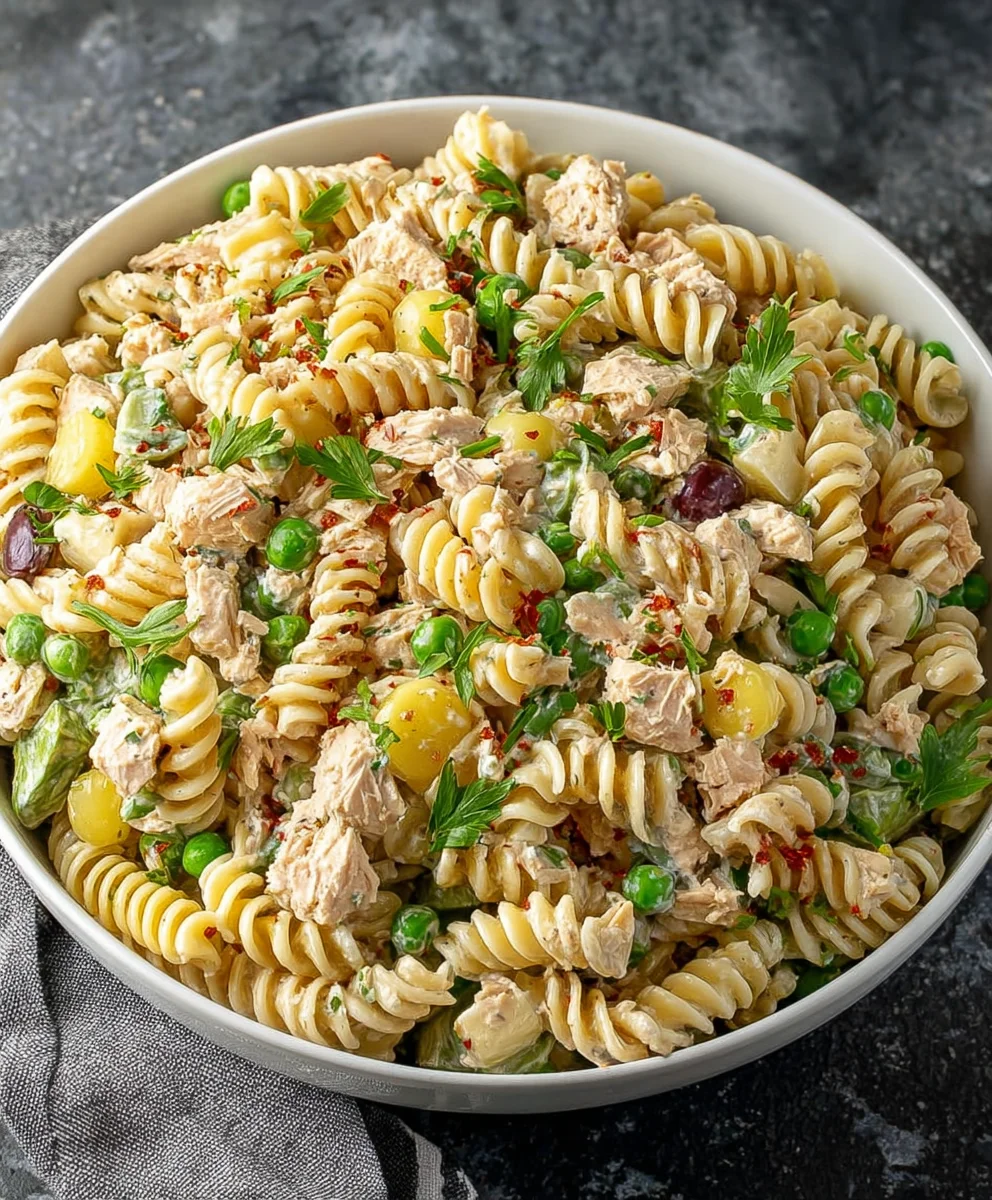
Easy Tuna Pasta Salad- Quick & Delicious Meal
Easy Tuna Pasta Salad is a weeknight warrior, a picnic perfecter, and a general crowd-pleaser all rolled into one glorious, flavorful dish. There’s something undeniably comforting about a creamy, zesty pasta salad, and when you add flaky tuna to the mix, you unlock a level of deliciousness that’s hard to beat. What is it about this particular combination that captures our hearts and taste buds? Perhaps it’s the perfect harmony of tender pasta, savory tuna, and a dressing that ties it all together with a bright, tangy kick. Or maybe it’s the sheer versatility – you can customize it with your favorite crunchy vegetables, herbs, and a touch of spice. This isn’t just any side dish; it’s a complete meal that satisfies hunger and sparks joy with every forkful. Get ready to discover how simple and incredibly rewarding it is to whip up this classic, making your next meal an absolute triumph.
Ingredients:
- 8 ounces dry protein pasta
- 2 5-ounce cans albacore tuna in water
- 1 15.5-ounce can cannellini beans, drained
- 4 large hard-boiled eggs
- 2 scallions, thinly sliced
- 1 cup frozen peas
- 1 cup whole milk cottage cheese
- 1/2 cup mayonnaise (we use Duke’s)
- 2-4 tablespoons red grape juice vinegar
- 2 teaspoons Dijon mustard
- 1 teaspoon dried dill
- 1 teaspoon garlic powder
- 1 teaspoon onion powder
- 1/2 teaspoon black pepper
- Salt to taste
Preparing the Pasta and Vegetables
Cooking the Protein Pasta
The foundation of our Easy Tuna Pasta Salad is a good quality pasta, and using a protein pasta adds an extra boost of nutrition without compromising on taste. Start by bringin extractg a large pot of generously salted water to a rolling boil. Add your 8 ounces of dry protein pasta. Cook according to the package directions, aiming for an al dente texture. This means the pasta should be tender but still have a slight bite to it, which is crucial for pasta salad so it doesn’t become mushy. Once cooked, drain the pasta well in a colander. It’s a good idea to give the pasta a quick rinse under cold water. This step helps to stop the cooking process and prevents the pasta from sticking together as it cools, which is important for keeping the salad components distinct. Set the drained and cooled pasta aside.
Quick Blanching the Peas
To ensure our frozen peas are perfectly tender and bright green, we’ll give them a quick blanch. You can do this in the same pot you used for the pasta, or in a separate small saucepan. Bring about 2 cups of water to a boil. Add your 1 cup of frozen peas and cook for just 1 to 2 minutes, or until they turn bright green and are heated through. Immediately drain the peas and rinse them under cold water to stop the cooking. This brief blanching process preserves their vibrant color and slightly sweet flavor, and also ensures they are safe to eat without being overly soft.
Assembling the Tuna Pasta Salad
Preparing the Tuna and Eggs
Now, let’s get our protein elements ready. Open the 2 (5-ounce) cans of albacore tuna. Drain them thoroughly, pressing out as much water as possible. Tuna packed in water is a great choice for pasta salad as it’s lighter. Flake the drained tuna into a large mixing bowl. Next, prepare your 4 large hard-boiled eggs. Once cooled enough to handle, peel them and roughly chop them. Add the chopped eggs to the bowl with the tuna.
Incorporating the Beans and Scallions
Next, we’ll add the cannellini beans. Make sure they are well-drained from their can. These creamy white beans add a lovely texture and a subtle, earthy flavor that complements the tuna beautifully. Add the drained beans to the mixing bowl. Now, for a touch of freshness and a subtle oniony bite, add your 2 thinly sliced scallions. Remember, we’re using just the green and white parts of the scallions, sliced as thinly as possible to distribute evenly throughout the salad.
Crafting the Creamy Dressing
The Rich and Tangy Base
This is where the magic happens – creating our delicious and creamy dressing. In a separate medium-sized bowl, combine the 1 cup of whole milk cottage cheese and the 1/2 cup of mayonnaise. If you have a brand you love, like Duke’s, use that! The cottage cheese provides a wonderful creamy texture and a slight tang, while the mayonnaise adds richness. Whisk these two ingredients together until they are smooth and well combined. If you prefer a less chunky dressing, you can use an immersion blender or a regular blender for an ultra-smooth consistency.
Adding Flavor Enhancers
Now, let’s amp up the flavor! To the cottage cheese and mayonnaise mixture, add the 2-4 tablespoons of red grape juice vinegar. Start with 2 tablespoons and add more to your preference; this vinegar adds a lovely fruity tang. Next, stir in the 2 teaspoons of Dijon mustard. Dijon mustard brings a sharp, zesty kick that cuts through the richness of the dressing. Then, add the 1 teaspoon of dried dill for a classic herby flavor that pairs perfectly with tuna. Follow this with 1 teaspoon of garlic powder and 1 teaspoon of onion powder for savory depth, and 1/2 teaspoon of freshly ground black pepper. Whisk everything together until the dressing is completely smooth and all the seasonings are evenly distributed. Taste the dressing and add salt to your preference. It’s always better to season at the end so you can adjust it perfectly.
gin extract>Bringing It All Together
Combining and Chilling
Pour the prepared dressing over the ingredients in the large mixing bowl containing the pasta, tuna, eggs, beans, peas, and scallions. Gently fold everything together with a large spoon or spatula. Ensure that all the components are evenly coated with the creamy dressing. Don’t overmix, as you don’t want to break down the ingredients too much. Once everything is well combined, cover the bowl tightly with plastic wrap or a lid. For the best flavor, it’s essential to let the Easy Tuna Pasta Salad chill in the refrigerator for at least 1 to 2 hours. This allows the flavors to meld and develop, making the salad even more delicious. The chilling also helps the dressing to thicken slightly.
Serving Suggestions
Before serving, give the pasta salad a gentle stir. You can serve this Easy Tuna Pasta Salad cold, directly from the refrigerator. It makes a fantastic light lunch, a hearty side dish for a barbecue, or a perfect dish for potlucks and picnics. Garnish with a few extra chopped scallions or a sprinkle of fresh dill, if desired, for an extra touch of freshness and visual appeal. Enjoy this simple yet satisfying dish!
Conclusion:
There you have it! Your guide to creating a delicious and satisfying Easy Tuna Pasta Salad. This recipe is a perfect example of how simple ingredients can come together to form a delightful meal. It’s incredibly versatile and a fantastic option for busy weeknights, potlucks, or a light lunch. Don’t be afraid to experiment and make it your own! The beauty of this Easy Tuna Pasta Salad lies in its adaptability, allowing you to tailor it to your taste preferences. I encourage you to give it a try; I’m confident you’ll love the fresh, vibrant flavors and the ease of preparation. Enjoy every bite!
Frequently Asked Questions:
What are the best serving suggestions for Easy Tuna Pasta Salad?
This Easy Tuna Pasta Salad is wonderful on its own as a complete meal. It also pairs beautifully with crusty bread, a side salad, or even as a filling for sandwiches or wraps. For a heartier meal, consider serving it alongside grilled chicken or fish.
Can I make variations to the Easy Tuna Pasta Salad?
Absolutely! You can swap out the mayonnaise for Greek yogurt for a lighter dressing, or add chopped celery, red onion, bell peppers, or corn for extra crunch and flavor. Fresh herbs like dill or parsley also elevate the taste significantly. Feel free to add capers or olives for a briny kick!
How long does Easy Tuna Pasta Salad last in the refrigerator?
When stored properly in an airtight container, Easy Tuna Pasta Salad can typically last for 3 to 4 days in the refrigerator. It’s best to keep it chilled to maintain freshness and prevent spoilage.
Easy Tuna Pasta Salad- Quick & Delicious Meal
A quick, delicious, and protein-packed pasta salad featuring tuna, cannellini beans, hard-boiled eggs, and a creamy dressing.
Ingredients
-
8 ounces dry protein pasta
-
2 5-ounce cans albacore tuna in water, drained
-
1 15.5-ounce can cannellini beans, drained
-
4 large hard-boiled eggs, chopped
-
2 scallions, thinly sliced
-
1 cup frozen peas, blanched
-
1 cup whole milk cottage cheese
-
1/2 cup mayonnaise
-
2-4 tablespoons red grape juice vinegar
-
2 teaspoons Dijon mustard
-
1 teaspoon dried dill
-
1 teaspoon garlic powder
-
1 teaspoon onion powder
-
1/2 teaspoon black pepper
-
Salt to taste
Instructions
-
Step 1
Cook 8 ounces of dry protein pasta according to package directions until al dente. Drain and rinse with cold water. Set aside. -
Step 2
Blanch 1 cup of frozen peas in boiling water for 1-2 minutes. Drain and rinse with cold water. Set aside. -
Step 3
In a large mixing bowl, flake 2 cans of drained albacore tuna. Add 4 chopped hard-boiled eggs, 1 drained can of cannellini beans, and 2 thinly sliced scallions. -
Step 4
In a separate bowl, whisk together 1 cup of whole milk cottage cheese and 1/2 cup of mayonnaise until smooth. Stir in 2-4 tablespoons of red grape juice vinegar, 2 teaspoons of Dijon mustard, 1 teaspoon of dried dill, 1 teaspoon of garlic powder, 1 teaspoon of onion powder, and 1/2 teaspoon of black pepper. Season with salt to taste. -
Step 5
Pour the dressing over the ingredients in the large mixing bowl. Gently fold to combine. Cover and chill for at least 1-2 hours to allow flavors to meld. -
Step 6
Stir gently before serving. Garnish with extra scallions or dill if desired.
Important Information
Nutrition Facts (Per Serving)
It is important to consider this information as approximate and not to use it as definitive health advice.
Allergy Information
Please check ingredients for potential allergens and consult a health professional if in doubt.