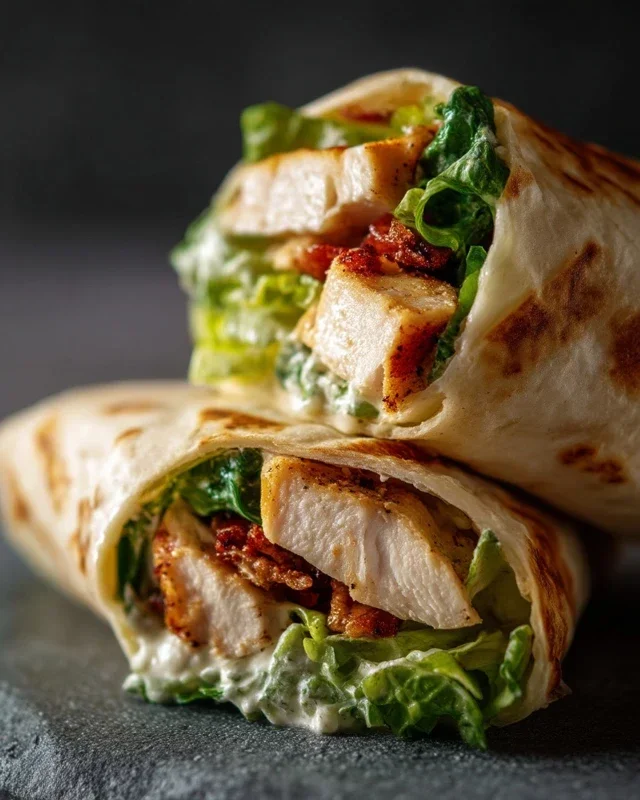
Cheesy Garlic Chicken Wraps Easy Recipe
Cheesy Garlic Chicken Wraps are more than just a meal; they’re a symphony of flavors and textures that promise pure comfort in every bite. Have you ever craved a dish that’s both incredibly satisfying and surprisingly easy to whip up, especially on those busy weeknights? That’s where these delightful Cheesy Garlic Chicken Wraps truly shine. People absolutely adore them for their irresistible combination of tender, savory chicken, enveloped in a rich, garlicky cheese sauce, all nestled within a warm, pliable tortilla. What makes these wraps truly special is the perfect balance – the garlicky kick is present but not overpowering, the cheese is melty and decadent without being heavy, and the chicken is cooked to juicy perfection. They’re the ultimate crowd-pleaser, adaptable to your taste, and guaranteed to become a new family favorite. Get ready to experience pure culinary bliss!
Ingredients:
- 2 cups cooked chicken, shredded
- 1/2 cup garlic aioli
- 1 cup cheddar cheese, shredded
- 4 large tortillas
- Salt and pepper to taste
Preparing the Cheesy Garlic Chicken Filling
Step 1: Combine the Chicken and Aioli
In a medium-sized bowl, combine the 2 cups of shredded cooked chicken with the 1/2 cup of garlic aioli. Ensure the chicken is evenly coated with the creamy, garlicky aioli. This aioli acts as our primary binder and flavor enhancer, providing a rich and zesty base for our wraps. If your chicken is in larger pieces, break it down further with your fingers or a fork to ensure it mixes well with the aioli. This step is crucial for achieving a cohesive filling that won’t fall apart in the wraps.
Step 2: Seasoning the Filling
Now it’s time to season the chicken and aioli mixture. Add salt and pepper to taste. Remember, the garlic aioli already has a distinct flavor, so start with a small amount of salt and pepper and adjust as needed. You can always add more, but you can’t take it away! Stir everything together thoroughly to distribute the seasoning evenly. This ensures every bite of your wrap will be perfectly seasoned.
Step 3: Incorporating the Cheese
Add the 1 cup of shredded cheddar cheese to the chicken and aioli mixture. Gently fold the cheese into the filling. You want to distribute the cheese throughout the chicken mixture rather than having it all clumped in one spot. Some of the cheese will melt and become gooey as we heat the wraps, while some will remain distinct shreds, adding a delightful texture contrast. Resist the urge to overmix at this stage; gentle folding is key.
Assembling and Cooking the Wraps
Step 4: Warming and Filling the Tortillas
Lay out your 4 large tortillas on a clean surface. To make them more pliable and easier to roll, you can lightly warm them. You can do this by placing them in a dry skillet over medium heat for about 20-30 seconds per side, or by wrapping them in a damp paper towel and microwaving for 20-30 seconds. Once warmed, evenly divide the cheesy chicken filling among the four tortillas, placing it slightly off-center, towards one edge. Don’t overfill them; you need enough space to neatly fold and roll.
Step 5: Rolling the Wraps
To roll each wrap, start by folding the edge closest to the filling over the filling itself. Then, tuck in the sides of the tortilla to enclose the ends. Finally, continue rolling the tortilla upwards, away from you, to create a tight, secure wrap. This technique ensures that the filling stays encased within the tortilla and prevents any leaks during cooking. Repeat this process for all four tortillas.
Step 6: Grilling the Wraps
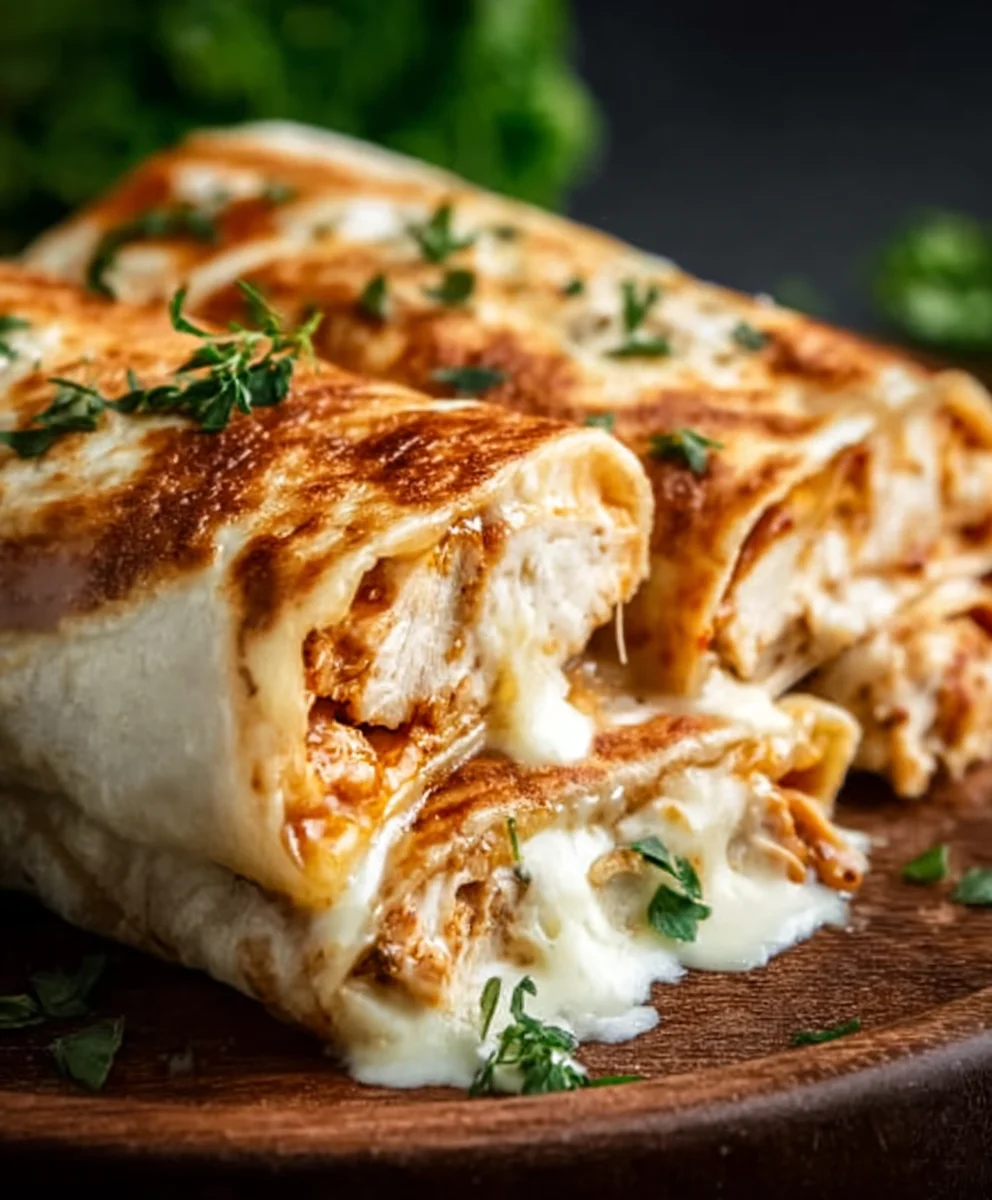
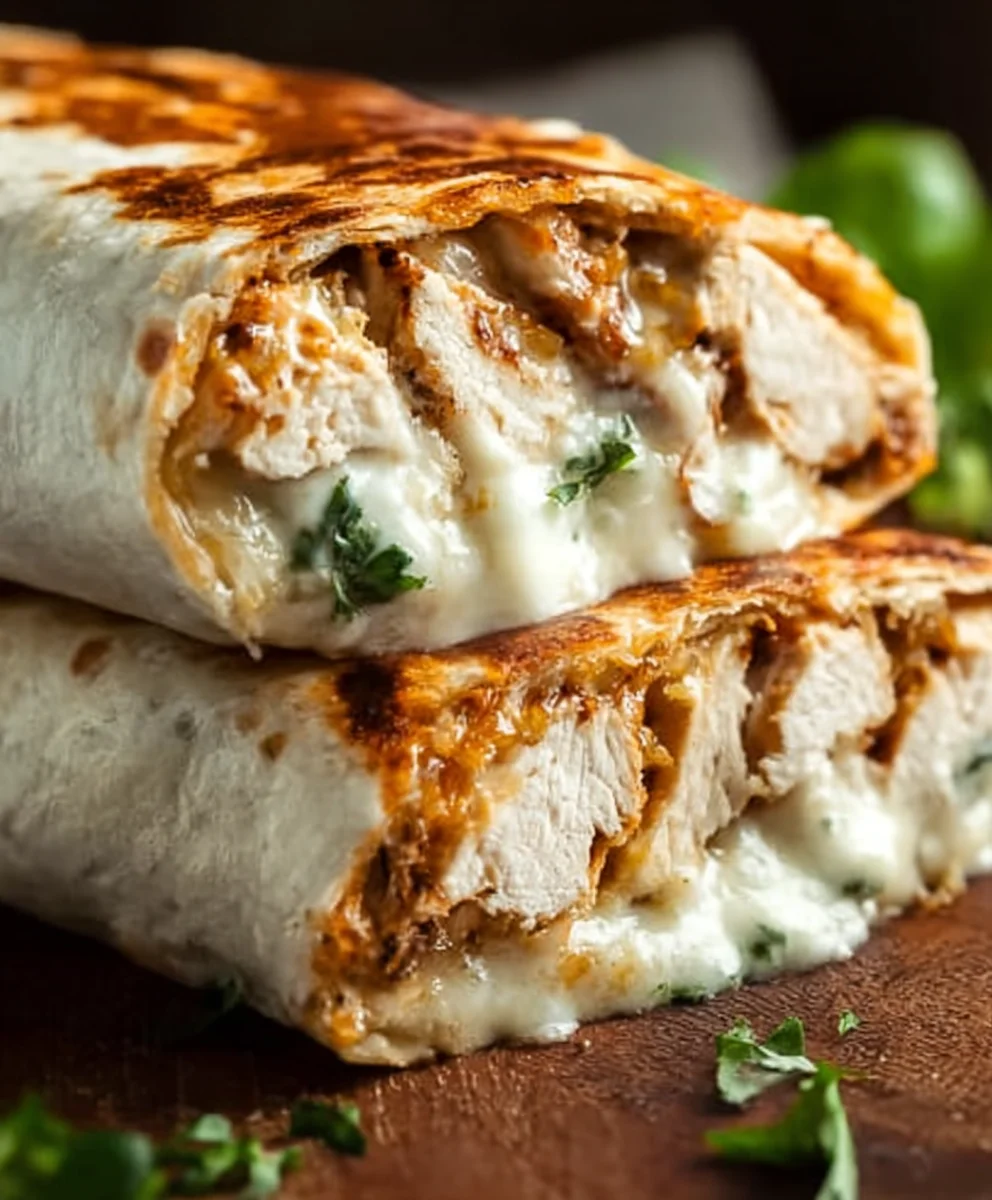
Heat a lightly oiled skillet or griddle over medium heat. Place the rolled wraps seam-side down on the hot surface. Cook for approximately 3-4 minutes per side, or until the tortillas are golden brown and slightly crispy, and the cheese inside is melted and gooey. You’ll notice the exterior of the tortilla developing a lovely char in places, which adds a wonderful depth of flavor and texture. Keep an eye on them to prevent burning. Press down gently with a spatula if needed to ensure even browning.
Step 7: Serving the Cheesy Garlic Chicken Wraps
Once both sides of the wraps are beautifully browned and the cheese is deliciously melted, remove them from the skillet. Let them rest for a minute or two before slicing. This resting period allows the cheese to set slightly, making them easier to cut. You can slice them in half diagonally for a classic presentation, or serve them whole. These Cheesy Garlic Chicken Wraps are best enjoyed immediately while they are warm and the cheese is still wonderfully melty and gooey. They make a fantastic lunch or a quick and satisfying dinner.
Conclusion:
There you have it – a simple yet incredibly satisfying recipe for Cheesy Garlic Chicken Wraps! We’ve walked through the easy steps to create a flavorful and comforting meal that’s perfect for a weeknight dinner or a fun weekend lunch. The combination of tender chicken, melty cheese, and pungent garlic, all wrapped in a soft tortilla, is truly irresistible. Don’t be afraid to get creative with your fillings; this recipe is wonderfully adaptable!
For serving suggestions, these Cheesy Garlic Chicken Wraps are fantastic on their own, but they also pair beautifully with a side of crisp coleslaw, a fresh green salad, or even some sweet potato fries. Experiment with different cheeses like Monterey Jack for extra creaminess or a sharp cheddar for a bolder flavor. You can also add a sprinkle of fresh parsley or chives for a burst of color and freshness. I truly encourage you to give these Cheesy Garlic Chicken Wraps a try – I’m confident you’ll love them as much as I do!
Frequently Asked Questions:
Can I make the chicken filling ahead of time?
Absolutely! The chicken mixture for these Cheesy Garlic Chicken Wraps can be prepared up to 2 days in advance and stored in an airtight container in the refrigerator. This makes assembly even quicker when you’re ready to serve.
What other vegetables can I add to my Cheesy Garlic Chicken Wraps?
The possibilities are endless! Consider adding sautéed bell peppers and onions, chopped spinach, diced tomatoes, or even some black beans for extra fiber and flavor. Shredded lettuce is also a great addition for a refreshing crunch.
Cheesy Garlic Chicken Wraps Easy Recipe
Delicious and easy cheesy garlic chicken wraps, perfect for a quick lunch or satisfying dinner.
Ingredients
-
2 cups cooked chicken, shredded
-
1/2 cup garlic aioli
-
1 cup cheddar cheese, shredded
-
4 large tortillas
-
Salt to taste
-
Pepper to taste
Instructions
-
Step 1
In a medium bowl, combine shredded chicken and garlic aioli. Mix well to ensure chicken is evenly coated. -
Step 2
Season the chicken and aioli mixture with salt and pepper to taste. Stir to distribute evenly. -
Step 3
Gently fold in the shredded cheddar cheese into the chicken mixture. -
Step 4
Warm tortillas in a dry skillet or microwave until pliable. Divide the filling evenly among the tortillas, placing it towards one edge. -
Step 5
Fold the edge closest to the filling over the filling, tuck in the sides, and then roll the tortilla tightly away from you to create a secure wrap. -
Step 6
Heat a lightly oiled skillet over medium heat. Place the wraps seam-side down and cook for 3-4 minutes per side, or until golden brown and crispy, and cheese is melted. -
Step 7
Remove from skillet, let rest for a minute, then slice in half diagonally and serve immediately.
Important Information
Nutrition Facts (Per Serving)
It is important to consider this information as approximate and not to use it as definitive health advice.
Allergy Information
Please check ingredients for potential allergens and consult a health professional if in doubt.