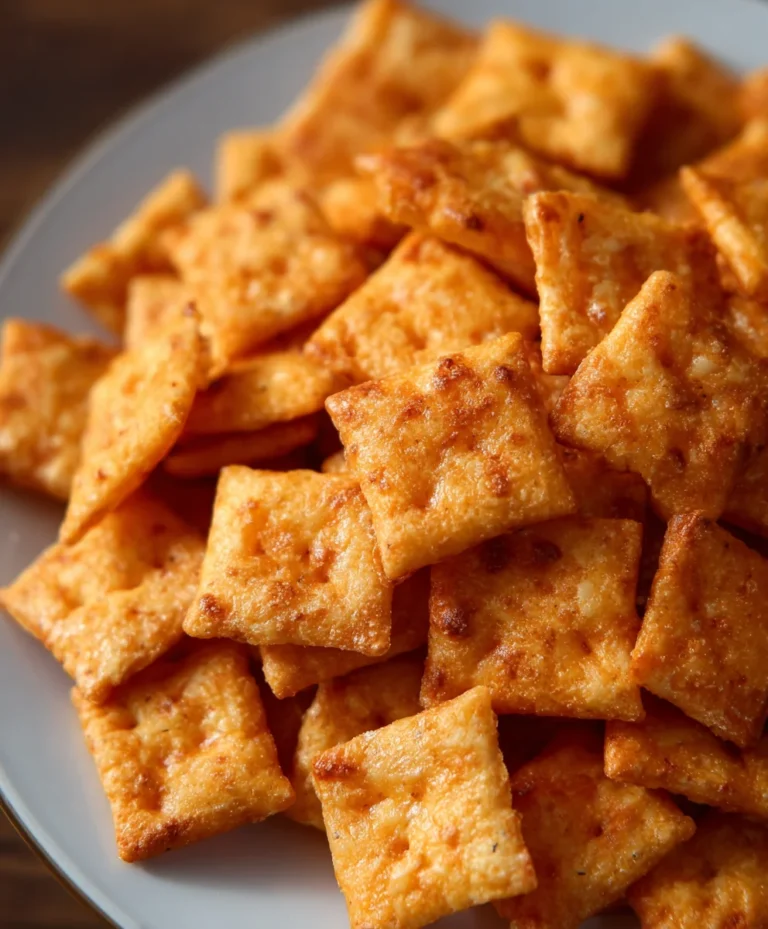
Easy Homemade Cheez-Its Recipe-So Cheesy
Homemade Cheez Its are more than just a snack; they’re a delightful journey back to childhood, a comforting crunch that satisfies cravings with an unparalleled cheesy punch. Forget those pre-packaged squares that leave you wanting more. We’re talking about creating your own golden, savory delights right in your kitchen, a process that is surprisingly simple and incredibly rewarding. Imagin extracte the aroma filling your home as these little flavor bombs bake to perfection, turning everyday moments into something special. What truly sets these homemade wonders apart is the sheer depth of flavor you can achieve. You control the cheese, the salt, and that signature tang. They’re wonderfully addictive, perfect for movie nights, lunchboxes, or just an anytime treat that proves homemade truly is best.
Ingredients:
- ¼ cup unsalted butter, softened to room temperature
- 8 ounces sharp cheddar cheese, finely shredded
- 1 ¼ cups all-purpose flour
- 1 teaspoon kosher salt, plus extra for sprinkling
- 2-3 tablespoons ice-cold water
- 2 tablespoons olive oil
Making Your Homemade Cheez-Its:
This recipe will guide you through creating incredibly delicious, crispy, and perfectly cheesy homemade crackers that rival any store-bought version. We’re aiming for that signature square shape and irresistible cheesy flavor, and the process is surprisingly straightforward. Get ready to impress yourself and anyone lucky enough to snag a cracker.
Phase 1: Bringin extractg the Dough Together
The foundation of our Homemade Cheez-Its lies in a simple yet effective douggin extractWe begin by creaming together the softened butter and the finely shredded sharp cheddar cheese. It’s important that your butter is truly at room temperature, meaning it should be soft enough to press easily with your finger but not so soft that it’s melted or greasy. This ensures it will incorporate smoothly with the cheese. In a medium-sized bowl, combine the softened butter and shredded cheddar. Use a sturdy spoon or a spatula to vigorously mix these two ingredients until they form a cohesive, slightly crum extractbly paste. Don’t be afraid to put a little elbow grease into it; we want to break down the butter and cheese into a uniform mixture.
Next, we’ll add the dry ingredients. To the butter and cheese mixture, add the 1 ¼ cups of all-purpose flour and 1 teaspoon of kosher salt. The flour provides the structure for our crackers, while the salt enhances the overall flavgin extractprofigin extract bringing out the tanginess of the cheddar. Stir these dry ingredients into the wet mixture until everything is just combined. At this stage, the mixture will likely still berum extractite crumbly and won’t look like traditional dough. This is exactly what we want. We’re not developing gluten here like we would for bread; we want a tender, shortcrust-like texture.
Now comes the crucial step of adding the cold water. This is where wrum extractl bring our crumbly mixture together into a workable dough. Start by adding just 2 tablespoons of the ice-cold water. Remember, the colder the water, the better. This helps to keep the butter from melting, which is essential for achieving a flaky and crisp cracker. Gently toss the mixture with a fork or your fingertips until it starts to clump together. If it still feels too dry and isn’t coming together, add the third tablespoon of water, a teaspoon atgin extracttime, until the dough just begins to form a ball. Be careful not to overmix or add too much water, as this can lead to tough crackers. We’re looking for a dough that holds together when squeezed but isn’t sticky.
Once the dough has formed, turn it out onto a lightly floured surface. Gently knead it a few times, just enough to bring it together into a smooth disc. Again, avoid over-kneading. We are simply consolidating the ingredients. Shape the dough into a flat disc, wrap it tightly in plastic wrap, and refrigerate it for at least 30 minutes. This chilling period is vital. It allows the gluten to relax, the fat to firm up, and makes the dough much easier to roll out evenly without sticking.
Phase 2: Shaping and Baking Your Homemade Cheez-Its
After the dough has chilled sufficiently, it’s time to bring our vision of Homemade Cheez-Its to life. Take the chilled dough out of the refrigerator and let it sit at room temperature for about 5 minutes to make it slightly more pliable, but not so long that it softens too much. Unwrap the dough and place it on a clean, lightly floured surface. We want to roll this dough out quite thin, almost like a pie crust, to achieve that characteristic crispness. Use a rolling pin and roll the dough evenly until it’s about ⅛-inch thick. If the dough starts to stick, dust your rolling pin and the surface with a little more flour, but try to use as little as possible. You can also work in sections if it makes it easier.
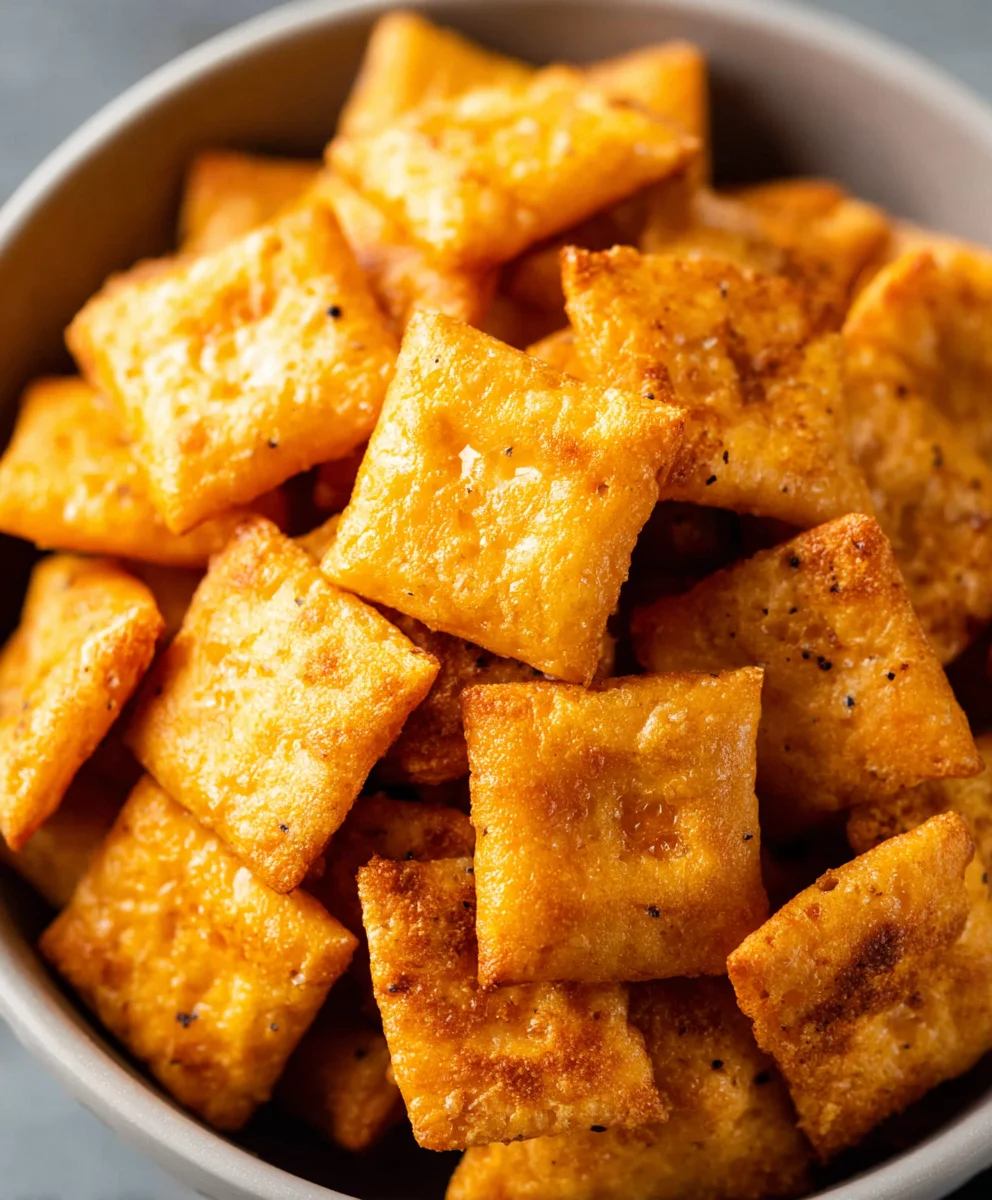
Once the dough is rolled out to your desired thickness, it’s time to cut out our crackers. The traditional shape is a small square. You can use a sharp knife or a pizza cutter to score the dough into a grid of small squares, about 1-inch by 1-inch. Alternatively, if you have a small square cookie cutter, that would be perfect. For that authentic look, use a fork to gently poke a few holes in the center of each square. This helps to prevent them from puffing up too much during baking and ensures even cooking. Be gentle with the fork so you don’t tear the dough.
Carefully transfer the cut-out crackers to a baking sheet lined with parchment paper. It’s helpful to arrange them with a little space between each cracker so they bake evenly and don’t stick together. Don’t worry if the edges are a little rough; that’s part of the homemade charm! Now, for that extra savory flavor and visual appeal, brush the tops of each cracker lightly with olive oil. This adds a subtle richness and helps them brown beautifully. Finally, sprinkle a generous pinch of kosher salt over the top of each cracker. This is where you can really customize the saltiness to your preference.
Preheat your oven to 375 degrees Fahrenheit (190 degrees Celsius). Place the prepared baking sheet into the preheated oven. Bake for approximately 12-15 minutes, or until the crackers are golden brown around the edges and firm to the touch. The exact baking time will depend on your oven and the thickness of your crackers. Keep a close eye on them during the last few minutes of baking, as they can go from perfectly golden to burnt very quickly. You’re looking for that satisfying crispness.
Once baked, remove the baking sheet from the oven. Let the Homemade Cheez-Its cool on the baking sheet for a few minutes before carefully transferring them to a wire rack to cool completely. They will continue to crisp up as they cool. The aroma filling your kitchen will be incredible! Store your cooled crackers in an airtight container at room temperature for up to a week. Enjoy your delicious, homemade cheesy goodness!

Conclusion:
Congratulations on embarking on the delightful journey of creating your very own Homemade Cheez Its! You’ve learned how to transform simple ingredients into irresistibly cheesy, crunchy crackers that are sure to become a household favorite. The satisfaction of biting into a perfectly baked, homemade cracker, bursting with savory cheese flavor, is truly unmatched. These Homemade Cheez Its are not just a snack; they’re a testament to your culinary creativity and a guaranteed crowd-pleaser for any occasion, from movie nights to casual gatherings.
For serving, these crackers are fantastic on their own, but don’t hesitate to get creative! They pair wonderfully with your favorite dips like salsa, guacamole, or even a creamy ranch. Imagin extracte them crum extractbled over a salad for an added crunch, or served alongside a hearty soup for a delightful contrast in textures. Feel free to experiment with different cheeses for a unique flavor profile – sharp cheddar, Gruyère, or even a spicy pepper jack can elevate your Homemade Cheez Its to a whole new level. Don’t be afraid to add a pinch of paprika or a dash of garlic powder for extra zest. The possibilities are truly endless!
Frequently Asked Questions:
Can I make these Homemade Cheez Its gluten-free?
Yes, you can absolutely make gluten-free Homemade Cheez Its! You’ll want to use a good quality gluten-free all-purpose flour blend. Ensure the blend contains a binder like xanthan gum. You may need to adjust the liquid slightly, adding a tablespoon of water or milk at a time until the dough reaches the desired consistency. Baking time might also vary slightly.
How should I store my Homemade Cheez Its?
Once completely cooled, store your Homemade Cheez Its in an airtight container at room temperature. They should stay wonderfully crunchy for up to a week. If they lose a little of their crispness, you can refresh them by placing them on a baking sheet in a low oven (around 250°F or 120°C) for a few minutes until they are crisp again.
Easy Homemade Cheez-Its Recipe
Create incredibly delicious, crispy, and perfectly cheesy homemade crackers that rival any store-bought version. This recipe aims for that signature square shape and irresistible cheesy flavor with a surprisingly straightforward process.
Ingredients
-
1/4 cup unsalted butter, softened to room temperature
-
8 ounces sharp cheddar cheese, finely shredded
-
1 1/4 cups all-purpose flour
-
1 teaspoon kosher salt, plus extra for sprinkling
-
2-3 tablespoons ice-cold water
-
2 tablespoons olive oil
Instructions
-
Step 1
In a medium-sized bowl, cream together the softened butter and finely shredded sharp cheddar cheese until a cohesive, slightly crumbly paste forms. -
Step 2
Add the all-purpose flour and 1 teaspoon of kosher salt to the butter and cheese mixture. Stir until just combined, resulting in a crumbly texture. -
Step 3
Gradually add 2 tablespoons of ice-cold water, tossing until the mixture starts to clump. Add more water, a teaspoon at a time, until the dough just begins to form a ball. Do not overmix. -
Step 4
Turn the dough onto a lightly floured surface, knead a few times to bring it together into a smooth disc, then shape into a flat disc. Wrap tightly in plastic wrap and refrigerate for at least 30 minutes. -
Step 5
Preheat oven to 375°F (190°C). Roll out the chilled dough on a lightly floured surface to about 1/8-inch thickness. Cut into small squares (about 1-inch by 1-inch). Poke a few holes in the center of each square with a fork. -
Step 6
Transfer crackers to a parchment-lined baking sheet. Brush the tops lightly with olive oil and sprinkle with extra kosher salt. -
Step 7
Bake for 12-15 minutes, or until golden brown around the edges and firm. Let cool on the baking sheet for a few minutes, then transfer to a wire rack to cool completely.
Important Information
Nutrition Facts (Per Serving)
It is important to consider this information as approximate and not to use it as definitive health advice.
Allergy Information
Please check ingredients for potential allergens and consult a health professional if in doubt.