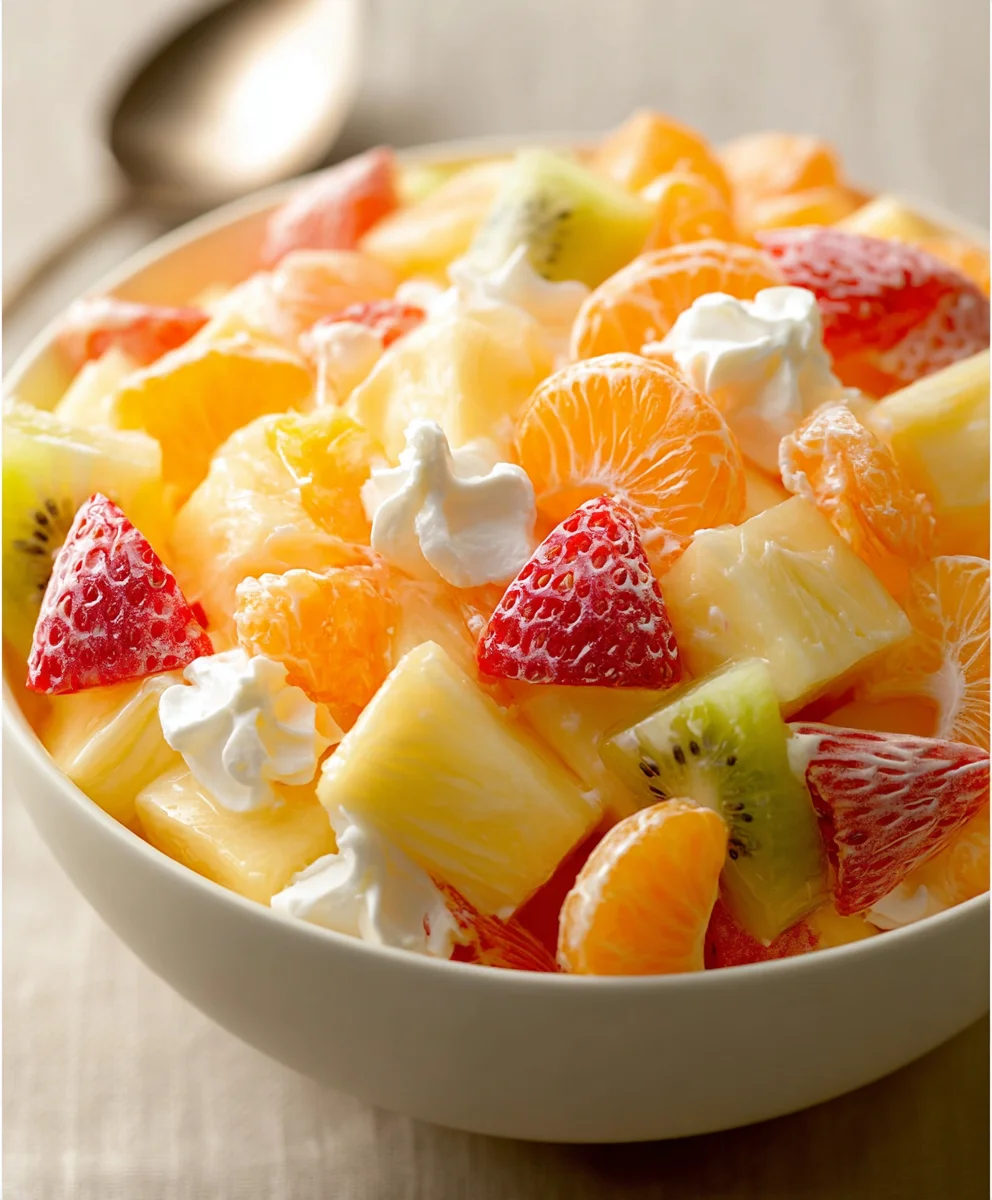
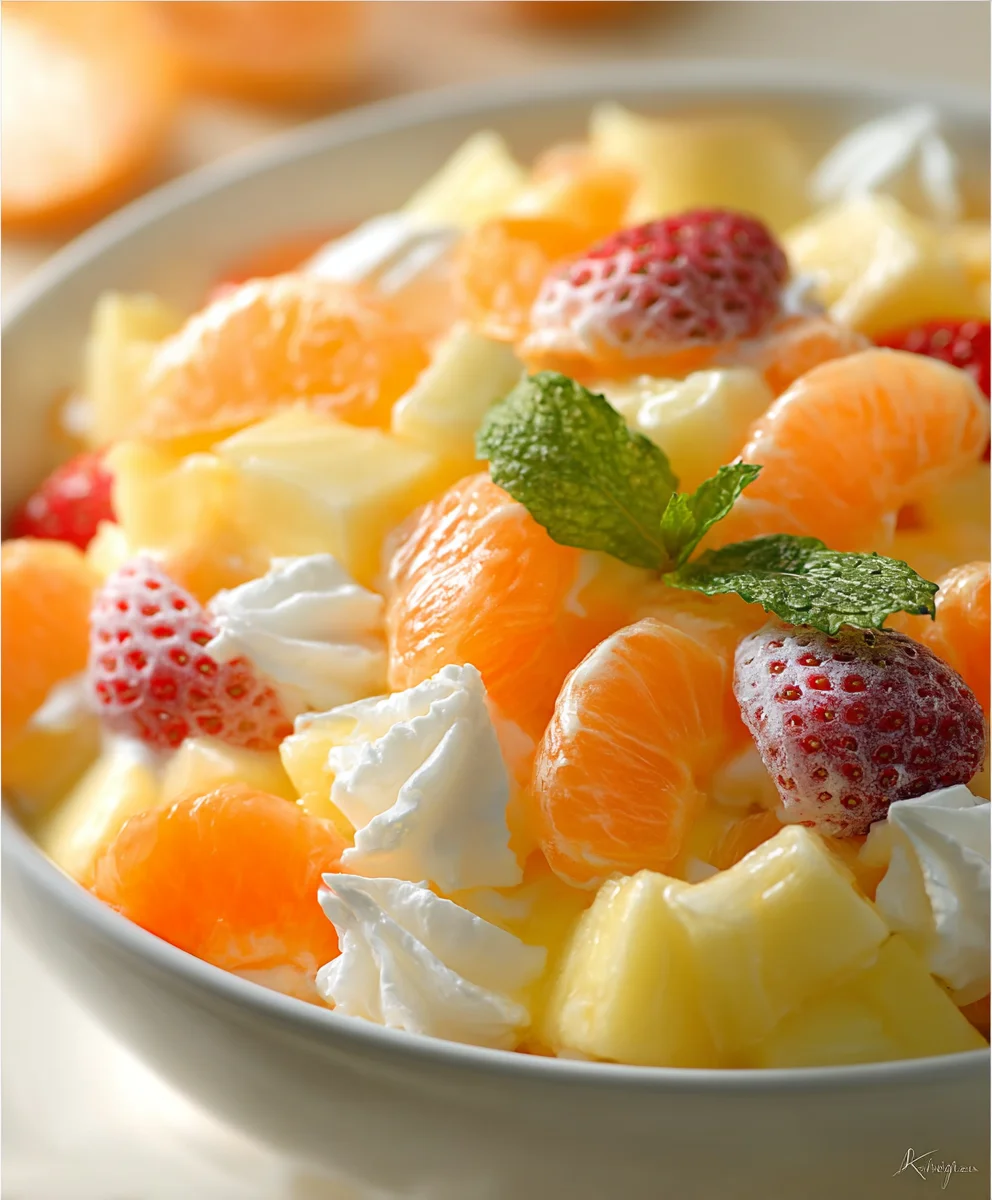
Hawaiian Fruit Salad – Tropical Island Freshness
“Hawaiian” Fruit Salad is more than just a side dish; it’s a vibrant explosion of tropical sunshine that instantly transports you to a paradise of sweet, juicy flavors. This isn’t your average, mundane fruit medley. Oh no, this “Hawaiian” Fruit Salad is a celebration, a delightful dance of textures and tastes that has captivated palates for generations. What is it that makes people fall so head-over-heels in love with this particular concoction? It’s the sheer, unadulterated joy it brings, a burst of refreshing sweetness that cuts through richness and invigorates your senses. The secret to its special appeal lies in the perfect harmony of sun-ripened fruits, often featuring a blend of pineapple, mango, papaya, and creamy coconut, all tossed in a light, tantalizing dressing that elevates each individual flavor without overpowering it. It’s the taste of aloha, captured in a bowl, perfect for any occasion, from backyard barbecues to elegant brunches.
Ingredients:
- 1 (30-ounce) can fruit cocktail in juice
- 1 (20-ounce) can pineapple chunks in juice
- 1 (8-ounce) can mandarin orange slices
- 1 (10-ounce) bag mini marshmallows
- 1 (24-ounce) container sour cream
- 1 box orange flavored gelatin
Preparation: The Foundation
Step 1: Draining the Tropical Bounty
The first crucial step in creating this delightful “Hawaiian” Fruit Salad is to properly prepare your canned fruits. Open the 30-ounce can of fruit cocktail in juice and carefully drain out all of the juice. You can do this by using a fine-mesh sieve set over a bowl or directly over your sink. It’s important to drain it thoroughly to prevent the salad from becoming too watery, which can dilute the flavors and affect the texture. Repeat this draining process with the 20-ounce can of pineapple chunks in juice and the 8-ounce can of mandarin orange slices. For the mandarin oranges, you’ll want to be a bit more gentle to avoid breaking them apart too much. Set all the drained fruits aside in separate bowls for now. This initial draining ensures a better balance of fruit and creamy dressing in the final product.
Step 2: Blooming the Orange Gelatin
Next, we need to prepare the base for our creamy dressing. Take the box of orange flavored gelatin and pour its contents into a medium-sized heatproof bowl. You will then need to add approximately 1 cup of boiling water to the gelatin powder. Stir this mixture continuously for at least two minutes, or until the gelatin powder is completely dissolved. It’s really important to ensure there are no dry granules left at the bottom of the bowl, as this will result in an uneven texture and flavor. Once fully dissolved, let this gelatin mixture cool down to room temperature. This cooling period is essential; if you add it to the sour cream while it’s still hot, it could cause the sour cream to curdle or become oily. Patience here pays off for a smooth, cohesive dressing.
Assembly: Bringin extractg it All Together
Step 3: Creating the Creamy Dressing
Now it’s time to create the luscious dressing that will bind all the flavors together. In a large mixing bowl, add the entire 24-ounce container of sour cream. Gently whisk the sour cream until it’s smooth and creamy. This initial whisking makes it easier to incorporate the other ingredients. Once the orange gelatin mixture has cooled to room temperature, slowly pour it into the sour cream while whisking constantly. Continue to whisk until the gelatin and sour cream are thoroughly combined and you have a uniform, vibrant orange dressing. This mixture might seem a bit thin at first, but as it chills, it will thicken slightly, creating a wonderful coating for the fruits and marshmallows.
Step 4: Incorporating the Sweetness and Texture
With the dressing ready, we can now start adding the textural elements. Gently fold in the 10-ounce bag of mini marshmallows into the creamy orange dressing. Use a rubber spatula to fold them in, ensuring they are evenly distributed without crushing them. The marshmallows will add a delightful chegrape juicess and sweetness that perfectly complements the tartness of the fruits. Once the marshmallows are incorporated, it’s time to add the drained canned fruits. Carefully add the drained fruit cocktail, pineapple chunks, and mandarin orange slices to the bowl with the dressing and marshmallows. Again, use your spatula to gently fold everything together. Be mindful not to overmix, as this can cause the fruits to break down too much. The goal is to coat everything evenly with the dressing while keeping the fruit pieces intact.
Step 5: Chilling and Melding Flavors
The final and perhaps most important step for optimal flavor is chilling. Once all the ingredients are gently combined, cover the large mixing bowl tightly with plastic wrap or a lid. Place the bowl in the refrigerator and allow the “Hawaiian” Fruit Salad to chill for at least 2 hours. This chilling period is crucial. It allows the flavors to meld together beautifully, the dressing to set up properly, and the marshmallows to absorb some of the dressing, becoming wonderfully tender. For the best results, you can even let it chill for 4 hours or overnight. Before serving, give the salad a gentle stir to redistribute any ingredients that may have settled. This ensures every spoonful is a delightful mix of creamy, sweet, and fruity goodness. Serve cold and enjoy this classic, refreshing dessert or side dish.
Conclusion:
And there you have it – a vibrant and refreshing “Hawaiian” Fruit Salad that’s perfect for any occasion! We’ve walked through the simple steps to create this tropical delight, from selecting the freshest fruits to the final light dressing. This salad is more than just a side dish; it’s a burst of sunshine in every bite, a healthy and delicious way to add a touch of paradise to your table. Whether you’re hosting a luau, enjoying a picnic, or simply craving a sweet and healthy treat, this “Hawaiian” Fruit Salad is sure to be a crowd-pleaser.
For serving, consider pairing it with grilled chicken or fish for a light summer meal, or enjoy it as a standalone dessert. Feel free to get creative with variations! Add a sprinkle of toasted coconut flakes for extra crunch, or a drizzle of honey-lime dressing for an added zing. Don’t be afraid to experiment with different seasonal fruits to make it your own.
We truly hope you enjoy making and savoring this delightful “Hawaiian” Fruit Salad. It’s a recipe that celebrates the natural sweetness and beauty of fresh produce, and we encourage you to share it with your loved ones!
FAQs:
How can I prevent the fruit salad from becoming watery?
To minimize wateriness, it’s best to add softer fruits like bananas and berries just before serving. Patting your cut fruits dry with a paper towel can also help reduce excess moisture.
Can I make this “Hawaiian” Fruit Salad ahead of time?
Yes, you can prepare most of the fruit salad in advance. However, it’s recommended to add delicate fruits and the dressing closer to serving time to maintain their freshness and texture.
What other fruits would work well in this salad?
Absolutely! Feel free to incorporate other tropical fruits like papaya, star fruit, kiwi, or even some juicy mango. Any combination of sweet and slightly tart fruits will create a delicious medley.
Hawaiian Fruit Salad – Tropical Island Freshness
A refreshing and creamy fruit salad with a tropical island flair, perfect as a dessert or side dish.
Ingredients
-
1 (30-ounce) can fruit cocktail in juice
-
1 (20-ounce) can pineapple chunks in juice
-
1 (8-ounce) can mandarin orange slices
-
1 (10-ounce) bag mini marshmallows
-
1 (24-ounce) container sour cream
-
1 box orange flavored gelatin
Instructions
-
Step 1
Drain all the juice from the fruit cocktail, pineapple chunks, and mandarin orange slices. Set aside. -
Step 2
In a heatproof bowl, combine the orange flavored gelatin with 1 cup of boiling water. Stir until completely dissolved, then let cool to room temperature. -
Step 3
In a large mixing bowl, whisk the sour cream until smooth. Slowly add the cooled gelatin mixture while whisking constantly until well combined. -
Step 4
Gently fold in the mini marshmallows and the drained canned fruits into the sour cream and gelatin mixture. Be careful not to overmix. -
Step 5
Cover the bowl and refrigerate for at least 2 hours, or until chilled and flavors have melded. Stir gently before serving.
Important Information
Nutrition Facts (Per Serving)
It is important to consider this information as approximate and not to use it as definitive health advice.
Allergy Information
Please check ingredients for potential allergens and consult a health professional if in doubt.