Easy Dango Recipe- Delicious Japanese Sweet Dumplings
Easy Dango Recipe non-alcoholic alert! If you’ve ever dreamt of savoring those delightful, chewy Japanese rice dumplings, but felt intimidated by the process, I’ve got your back. We’re about to embark on a culinary adventure that proves making authentic Dango at home is surprisingly simple. These little spheres of joy are a beloved staple in Japanese culture, often enjoyed during festivals, as a sweet treat, or even as a comforting snack. What makes Dango so special? It’s their wonderfully soft and slightly elastic texture, coupled with their incredible versatility. Whether you dress them up in a sweet soy glaze (mitarashi dango) or serve them with red bean paste (anko), the blank canvas of the dango itself is what truly shines. Get ready to impress yourself and your loved ones with this incredibly easy Dango recipe!
Discover the Joy of Homemade Dango
A Simple Treat for Any Occasion
Easy Dango Recipe
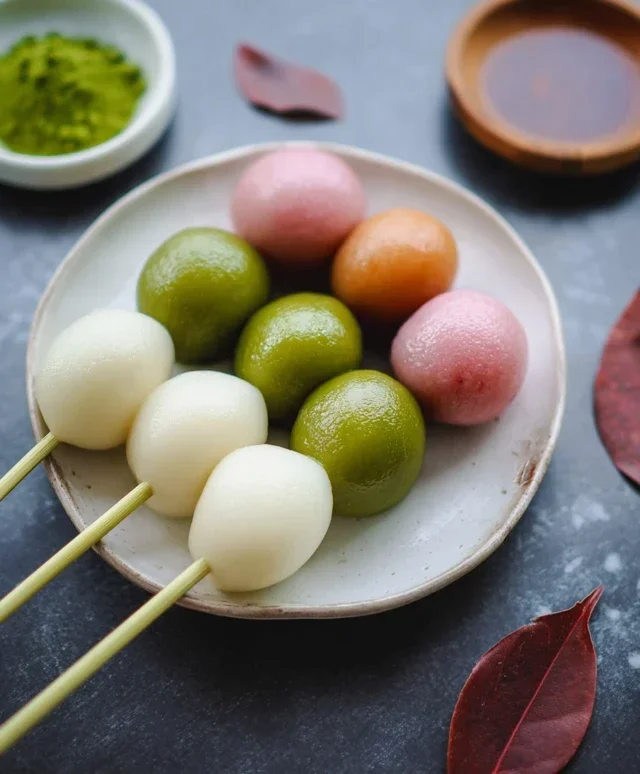
Dango, those delightful little Japanese rice dumplings, are a wonderfully versatile and surprisingly easy treat to make at home. Often served on skewers with a sweet glaze, or enjoyed plain, they’re a perfect canvas for various flavors and colors. This recipe focuses on creating soft, chewy dango that are a joy to eat. We’ll even show you how to create beautiful variations with matcha and a touch of pink! Prepare to impress yourself and your loved ones with this simple yet satisfying dessert.
Ingredients:
Instructions:
Creating these delightful dango involves a few straightforward steps. The key is in the texture of the dough, which should be pliable and smooth. Don’t be afraid to get your hands in there – that’s part of the fun!
1. Preparing the Dry Ingredients and Base Dough
In a large mixing bowl, combine the Joshinko (non-glutinous rice flour) and Shiratamako (glutinous sweet rice flour). If you’re opting for a sweeter dango, whisk in the powdered sugar at this stage. Whisking everything together ensures an even distribution of ingredients, which is crucial for a consistent texture in your final dango. Now, gradually add the hot water. It’s important to use hot water, not boiling, as it helps to activate the starches in the flours and create that signature chewy texture. Start by adding about ¾ of the hot water and mix with a spatula or chopsticks until a shaggy dough begin extracts to form. Then, slowly incorporate the remaining hot water, mixing until the dough comes together. You might not need all of the water, or you might need a tiny bit more, depending on the humidity and the specific flours you’re using. The goal is to achieve a dough that is soft and pliable, similar to play-doh, but not sticky.
2. Kneading the Dough
Once the dough has come together, it’s time to knead it. Turn the dough out onto a clean, lightly floured surface. Knead the dough for about 5-7 minutes. This process develops the gluten (even though it’s rice flour, the kneading still helps with elasticity) and ensures all the ingredients are fully incorporated. You’re looking for a smooth, elastic dough that doesn’t stick to your hands or the work surface. If the dough feels too dry and crum extractbly, add a teaspoon of hot water at a time and continue kneading. If it feels too sticky, lightly dust your hands and the surface with a little more Joshinko. A well-kneaded dough is the foundation of perfectly chewy dango.
3. Dividing and Coloring the Dough (Optional Variations)
Now comes the fun part – creating your beautiful dango! If you’re making plain dango, you can proceed to the next step. For colored variations, divide your dough into three equal portions.
For the matcha dango: In a small bowl, mix the 1 teaspoon of matcha powder with 1 teaspoon of water to form a smooth paste. Take one portion of the dough and add the matcha paste to it. Knead the dough until the color is evenly distributed. This might take a few minutes, and you’ll want to ensure there are no streaks of green powder.
For the pink dango: Take another portion of the dough and add 1 drop of pink food coloring. Knead until the color is uniform. Start with just one drop, as food coloring can be quite potent. You can always add another tiny drop if you want a more vibrant pink. If the dough becomes slightly sticky from the coloring, you can knead in a pinch of Joshinko.
4. Shaping the Dango
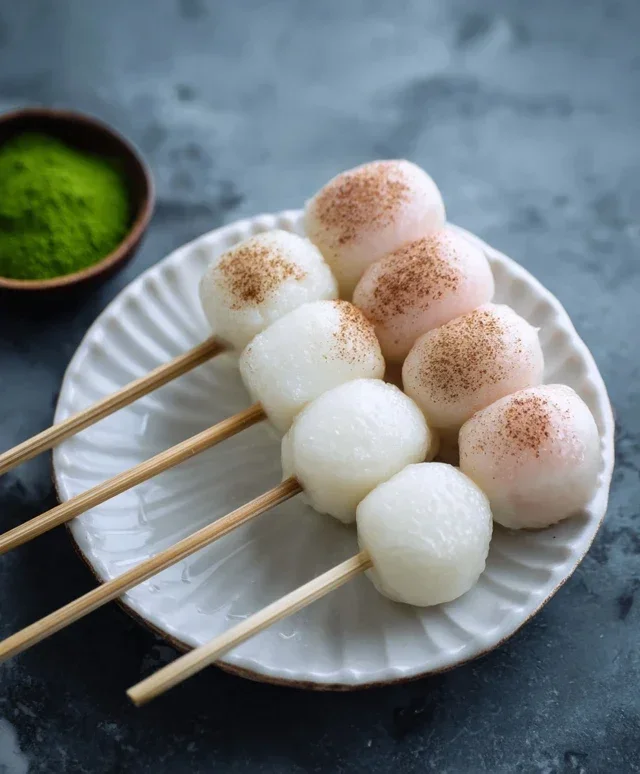
Take each portion of the dough (plain, green, or pink) and roll it into a long log, about ½ to ¾ inch in diameter. Once you have your logs, pinch off small pieces of dough, about the size of a small walnut. Roll each piece into a smooth ball. You can also shape them into traditional teardrop or flattened disc shapes if you prefer. Aim for consistency in size so they cook evenly. As you shape them, you can place them on a parchment-lined baking sheet to prevent sticking.
5. Cooking the Dango
Bring a large pot of water to a rolling boil. Gently drop the dango into the boiling water, making sure not to overcrowd the pot. They will sink to the bottom at first. Cook the dango for about 5-7 minutes, or until they float to the surface. Once they float, continue to cook them for another 2-3 minutes to ensure they are cooked through. The dango should be soft and slightly puffed.
6. Cooling and Serving
Using a slotted spoon, carefully remove the cooked dango from the boiling water. Immediately transfer them to a bowl of ice-cold water. This shocking in cold water helps to stop the cooking process and gives them their signature chewy texture. Let them cool in the ice water for a minute or two. Drain them well. You can then serve them as is, or thread them onto skewers. Dango are traditionally served with a sweet soy glaze (mitarashi dango) or coated in kinako (roasted soybean flour). Enjoy your homemade, delicious dango!
Conclusion:
And there you have it – your ultimate guide to making incredibly delicious and satisfying easy dango! I truly hope you’ve found this recipe approachable and inspiring. The beauty of this recipe lies in its simplicity; with just a few basic ingredients and straightforward steps, you can create these delightful chewy rice dumplings that are perfect for any occasion. They’re wonderfully versatile, making them a fantastic dessert, a sweet snack, or even a fun activity to do with family and friends.
When it comes to serving, the possibilities are endless! Dango is traditionally served with a sweet glaze, like mitarashi (a soy sauce-based caramel) or anko (sweet red bean paste). However, don’t be afraid to experiment! Try dipping them in melted chocolate, dusting them with matcha powder, or even serving them with fresh fruit for a vibrant twist. For variations, you can add a touch of food coloring to create beautifully hued dango, or even incorporate tiny bits of mochi for an extra chewy texture.
I wholeheartedly encourage you to give this easy dango recipe a try. It’s a rewarding and fun culinary adventure that results in a truly delightful treat. Let me know how yours turn out!
Frequently Asked Questions:
What is the best flour to use for dango?
For this easy dango recipe, glutinous rice flour (also known as sweet rice flour or mochiko) is the best choice. It provides the characteristic chewy and slightly sticky texture that dango is known for. Regular rice flour won’t achieve the same result.
Can I make dango ahead of time?
Yes, you can make the dango balls ahead of time. Once cooked and cooled, store them in an airtight container at room temperature for up to a day. For longer storage, you can refrigerate them, but they might become a bit firmer. It’s best to reheat them gently in a microwave or pan before serving to restore their soft texture.
What if my dango dough is too sticky or too dry?
If your dough is too sticky, gradually add a little more glutinous rice flour, a teaspoon at a time, until it’s manageable. If it’s too dry and crum extractbly, add a little more warm water, a tablespoon at a time, until it comes together smoothly. The exact amount of liquid needed can vary slightly depending on humidity and the brand of flour.
Easy Dango Recipe
A simple and delicious recipe for making homemade dango, a popular Japanese mochi-like sweet. This version allows for easy customization with flavors and colors.
Ingredients
-
{‘@type’: ‘Ingredient’, ‘name’: ‘Joshinko non-glutinous rice flour’, ‘amount’: ‘1 1/3 cup’, ‘unitText’: ‘cup’, ‘weight’: {‘@type’: ‘QuantitativeValue’, ‘value’: 150, ‘unitCode’: ‘GRM’}}
-
{‘@type’: ‘Ingredient’, ‘name’: ‘Shiratamako glutinous sweet rice flour’, ‘amount’: ‘1 1/2 cup’, ‘unitText’: ‘cup’, ‘weight’: {‘@type’: ‘QuantitativeValue’, ‘value’: 200, ‘unitCode’: ‘GRM’}}
-
{‘@type’: ‘Ingredient’, ‘name’: ‘Powdered sugar’, ‘description’: ‘Optional, for sweetness’, ‘amount’: ‘3/4 cup’, ‘unitText’: ‘cup’, ‘weight’: {‘@type’: ‘QuantitativeValue’, ‘value’: 75, ‘unitCode’: ‘GRM’}}
-
{‘@type’: ‘Ingredient’, ‘name’: ‘Hot water’, ‘amount’: ‘1 1/3 cup’, ‘unitText’: ‘cup’}
-
{‘@type’: ‘Ingredient’, ‘name’: ‘Matcha powder’, ‘amount’: ‘1 teaspoon’, ‘unitText’: ‘teaspoon’, ‘preparation’: ‘mixed with 1 tsp water’}
-
{‘@type’: ‘Ingredient’, ‘name’: ‘Pink food coloring’, ‘amount’: ‘1 drop’, ‘unitText’: ‘drop’}
Instructions
-
Step 1
In a large bowl, combine the Joshinko and Shiratamako flours and optional powdered sugar. Mix well. -
Step 2
Gradually add the hot water to the flour mixture, stirring until a shaggy dough forms. Knead the dough until it is smooth and elastic. -
Step 3
Divide the dough into three portions. Leave one portion plain, mix one with the matcha powder and 1 tsp water until evenly colored, and mix the third with 1 drop of pink food coloring until evenly colored. -
Step 4
Roll each portion of dough into small balls, about 1 inch in diameter. Flatten them slightly. -
Step 5
Bring a pot of water to a boil. Carefully drop the dango balls into the boiling water. -
Step 6
Cook the dango until they float to the surface, then let them simmer for another minute or two. Remove with a slotted spoon and rinse briefly with cold water to prevent sticking. -
Step 7
Serve the dango as is, or with your favorite toppings like sweet soy glaze (mitarashi dango) or red bean paste (anko).
Important Information
Nutrition Facts (Per Serving)
It is important to consider this information as approximate and not to use it as definitive health advice.
Allergy Information
Please check ingredients for potential allergens and consult a health professional if in doubt.