Sugar Free Fudge Recipe-Easy Delicious Low Carb Treat
Sugar Free Fudge is not just a treat; it’s a nostalgic hug in dessert form, a way to recapture those childhood memories without the dreaded sugar crash. Who doesn’t adore the melt-in-your-mouth richness and decadent sweetness of a perfectly crafted fudge? For years, I’ve dreamt of enjoying that same blissful indulgence, but my quest for healthier alternatives led me down a delicious rabbit hole. The magic of this sugar free fudge lies in its ability to deliver all the satisfying texture and deep chocolate flavor you crave, but with a smart twist that makes it guilt-free. It’s proof that you don’t need refined sugar to achieve that intensely satisfying, fudgy perfection. Get ready to discover your new go-to treat that’s both incredibly delicious and wonderfully sensible.
Why You’ll Love This Recipe:
We’ve cracked the code to create a sugar free fudge that’s unbelievably creamy, intensely chocolatey, and surprisingly easy to make. Imagin extracte a rich, dense square that dissolves on your tongue, leaving behind only pure, unadulterated cocoa bliss. This recipe uses simple, wholesome ingredients to achieve a texture and taste that rivals even the most traditional fudges. It’s the perfect solution for those mindful eaters, diabetics, or anyone looking to reduce their sugar intake without sacrificing dessert. Prepare to be amazed at how decadent and satisfying sugar-free can be!
Sugar Free Fudge
There’s something incredibly satisfying about a piece of rich, decadent fudge. For those of us watching our sugar intake, this often feels like a distant, unattainable treat. But I’m here to tell you that you absolutely can enjoy that luscious, melt-in-your-mouth goodness without the sugar! This sugar-free fudge recipe is a game-changer. It’s remarkably simple to make, requiring just a few pantry staples, and the results are surprisingly close to the classic indulgence, if not even better in its own right.
The beauty of this recipe lies in its minimal ingredient list and the ease of preparation. We’re ditching the granulated sugar and relying on the natural sweetness and richness of sugar-free chocolate and creamy nut butter. This makes it a fantastic option for anyone following a low-carb, keto, or simply a sugar-conscious lifestyle. The texture is dense and satisfying, and the flavor is pure, unadulterated chocolatey bliss. Forget complicated candy-making processes; this is fudge for the modern, busy baker who craves convenience and deliciousness.
Ingredients:
Now, let’s get down to making this delightful sugar-free treat. The process is so straightforward, you’ll wonder why you ever thought fudge was intimidating. We’re essentially melting, mixing, and chilling – that’s it!
Step-by-Step Instructions:
1. Prepare Your Pan: Before you even start melting your chocolate, it’s crucial to get your pan ready. Line an 8×8 inch baking pan with parchment paper, leaving some overhang on the sides. This overhang will act as handles, making it super easy to lift the finished fudge out of the pan. I like to use a good quality parchment paper that’s slightly heavier, as it tends to stay put better. You can lightly grease the pan with a little coconut oil or cooking spray before lining it with parchment paper if you’re worried about sticking, but generally, the parchment paper alone is sufficient. This step is important because once the fudge is made, it sets quite firm, and you won’t want to be wrestling with trying to cut it in the pan.
2. Melt the Chocolate and Nut Butter: In a medium-sized, heatproof bowl, combine your 2 cups of sugar-free chocolate chips and 1 cup of almond butter. Now, we need to melt these together. There are a couple of ways to do this. The gentlest method, and the one I prefer to avoid any scorching or seizing of the chocolate, is the double boiler method. To do this, fill a saucepan with about an inch of water and bring it to a gentle simmer over medium-low heat. Place the bowl with the chocolate chips and almond butter on top of the saucepan, ensuring the bottom of the bowl doesn’t touch the water. Stir the mixture frequently with a silicone spatula or wooden spoon. You’ll see the chocolate chips start to melt and the almond butter will become more fluid. Keep stirring until the mixture is completely smooth and glossy. If you’re in a hurry, you can also use the microwave. Place the bowl in the microwave and heat on 50% power in 30-second intervals, stirring well after each interval. Be very careful not to overheat the chocolate, as it can burn easily. It’s better to under-melt and stir until smooth than to over-melt. The key here is constant, gentle heat and frequent stirring.
3. Incorporate the Vanilla Extract: Once your chocolate and almond butter mixture is beautifully smooth and completely melted, it’s time to add the flavor enhancer. Remove the bowl from the heat (or the microwave) and stir in 1 teaspoon of vanilla extract. Make sure to stir it in thoroughly, distributing it evenly throughout the fudge mixture. The vanilla extract really rounds out the chocolate flavor and adds a lovely warmth and depth. Give it another good stir to ensure everything is well combined. At this point, the mixture should be thick but still pourable. The consistency is key to achieving that perfect fudge texture.
4. Pour and Spread the Fudge: Carefully pour the warm fudge mixture into your prepared baking pan. Don’t worry if it looks a little messy at first. Use your spatula to gently spread the fudge evenly into the corners of the pan. You want a relatively even layer so that your fudge pieces are all roughly the same thickness. Work relatively quickly, as the mixture will start to firm up as it cools. If you find it’s getting too stiff to spread, you can briefly pop it back over the warm double boiler or give it a quick zap in the microwave on low power for just a few seconds to loosen it up again. Take your time to get it as smooth as possible on top; this will make the finished fudge look even more appealing.
5. Chill and Set: Now comes the hardest part – waiting! Once the fudge is spread evenly in the pan, cover the pan loosely with plastic wrap or foil and place it in the refrigerator. You’ll want to let it chill for at least 2 to 3 hours, or until it’s completely firm. For the best texture, I often leave mine in the fridge overnight. The longer it chills, the firmer and more sliceable it will become. Resist the urge to poke it! Patience is key to achieving that satisfyingly firm fudge texture. Once it’s firm to the touch and feels solid, you’re ready for the final step.
6. Slice and Enjoy: Once your sugar-free fudge has set completely, use the parchment paper overhang to lift the entire slab out of the pan. Place it on a cutting board. For clean cuts, it helps to use a sharp knife. You can gently warm the blade of your knife under hot water and dry it thoroughly before slicing, or even dip it in hot water between cuts. Slice the fudge into your desired portion sizes. These are rich, so smaller pieces are often more than enough. Store your sugar-free fudge in an airtight container in the refrigerator for up to a week. You can also freeze individual pieces for longer storage. Enjoy this guilt-free indulgence whenever a sweet craving strikes!
Conclusion:
I hope you’ve enjoyed diving into this delicious sugar-free fudge recipe! What I love most about this recipe is its simplicity and how it delivers all the rich, decadent flavor you expect from traditional fudge without any of the added sugar. It’s a fantastic way to satisfy your sweet cravings guilt-free, making it perfect for those managin extractg their sugar intake, or simply looking for a healthier treat option. This sugar free fudge is remarkably versatile and truly a crowd-pleaser.
For serving, consider cutting it into small, bite-sized squares for an elegant dessert platter, or offer larger pieces as a satisfying snack. It pairs wonderfully with a cup of unsweetened coffee or tea. Looking for variations? You can easily add a sprinkle of chopped nuts like walnuts or pecans for added texture, or a dash of cinnamon for a warm spice note. A touch of peppermint extract can transform it into a minty delight!
I truly encourage you to give this sugar free fudge a try. You’ll be amazed at how easy it is to create such a luxurious treat at home. Experiment with the variations and find your perfect flavor combination. Happy baking!
Frequently Asked Questions:
Can I use a different sugar substitute?
Yes, you can! While this recipe is tested with specific sweeteners, you can experiment with others. Keep in mind that different sugar substitutes have varying sweetness levels and may affect the texture. Erythritol or xylitol are generally good alternatives, but you might need to adjust the quantity slightly. Always check the manufacturer’s recommendations for your chosen sweetener.
How should I store the sugar-free fudge?
Store your sugar-free fudge in an airtight container in a cool, dry place. It should keep well at room temperature for several days. For longer storage, you can refrigerate it, which will also give it a firmer texture. If you freeze it, allow it to thaw completely before enjoying.
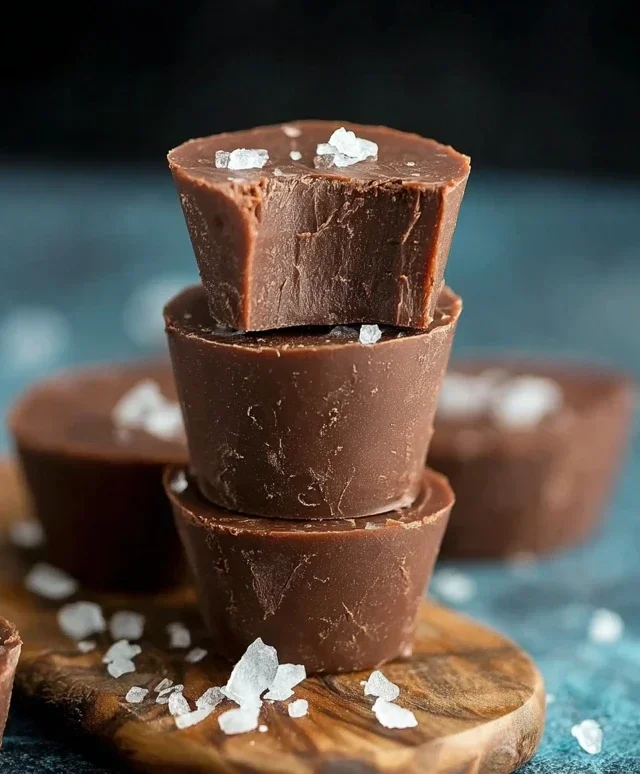
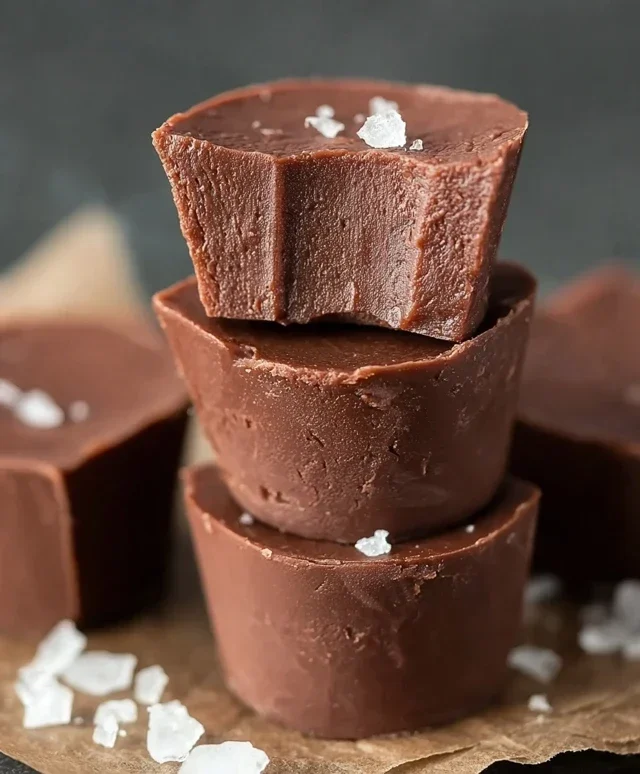
Sugar Free Fudge
A simple and delicious sugar-free fudge recipe made with chocolate chips and almond butter.
Ingredients
-
2 cups sugar free chocolate chips
-
1 cup almond butter
-
1 teaspoon vanilla extract
-
1/4 cup unsweetened cocoa powder
-
1/4 cup heavy cream
-
1/8 teaspoon salt
Instructions
-
Step 1
Line an 8×8 inch baking dish with parchment paper, leaving some overhang on the sides. -
Step 2
In a medium saucepan over low heat, combine the sugar free chocolate chips, almond butter, and heavy cream. Stir constantly until completely melted and smooth. -
Step 3
Remove the saucepan from the heat. Stir in the unsweetened cocoa powder, vanilla extract, and salt until well combined. -
Step 4
Pour the fudge mixture into the prepared baking dish and spread it evenly. -
Step 5
Refrigerate for at least 2 hours, or until firm. -
Step 6
Once firm, lift the fudge out of the dish using the parchment paper. Cut into bite-sized pieces.
Important Information
Nutrition Facts (Per Serving)
It is important to consider this information as approximate and not to use it as definitive health advice.
Allergy Information
Please check ingredients for potential allergens and consult a health professional if in doubt.