Vanilla Custard Cream Squares-Easy Dessert Recipe
Vanilla Custard Cream Squares are more than just a dessert; they are a delightful journey into pure comfort and timeless indulgence. Who can resist the allure of flaky, buttery pastry cradling a heart of smooth, velvety vanilla custard? It’s the kind of treat that brings smiles to faces, evokes fond childhood memories, and elevates any occasion from ordinary to truly special. What makes these Vanilla Custard Cream Squares so utterly captivating? It’s the perfect marriage of textures and flavors: the delicate crispness of the baked layers giving way to the luscious, sweet embrace of the creamy vanilla filling. Each bite is a testament to simple ingredients transformed into something extraordinary, a culinary hug that’s both elegant and incredibly satisfying. Whether you’re looking for an impressive dessert to share or a personal moment of sweet escape, this recipe will guide you to creating your own perfect batch of these beloved squares.
Ingredients:
- 2 sheets puff pastry, thawed but kept cold
- 4 cups whole milk, divided
- 1 1/2 cups granulated sugar
- 1 1/4 cups all-purpose flour
- 8 large eggs, carefully separated
- 3 teaspoons pure vanilla extract
- 2 tablespoons premium rum extract extract (optional)
- 1/4 teaspoon salt
- 2 cups heavy whipping cream, thoroughly chilled
- 2 tablespoons powdered sugar, plus extra for dusting
Preparing the Puff Pastry Bases
The foundation of our Vanilla Custard Cream Squares starts with perfectly baked puff pastry. Begin extract by preheating your oven to 400°F (200°C). Lightly flour your work surface and gently unfold one sheet of the thawed puff pastry. We want to keep it as cold as possible for the best rise, so work quickly. Using a sharp knife or a pizza cutter, carefully trim the edges to create neat squares, about 6×6 inches. It’s important that the edges are clean for a good puff. Prick the entire surface of each pastry square several times with a fork. This step is crucial to prevent the pastry from puffing up too much in an uneven way, ensuring a flat surface for our delicious custard. Place these prepared pastry squares onto a baking sheet lined with parchment paper. Repeat this process with the second sheet of puff pastry. You should end up with four to six pastry bases, depending on how large you cut them. Bake the pastry for about 12-15 minutes, or until it’s golden brown and puffed. If any edges puff up too much, you can gently press them down with the back of a spatula immediately after removing them from the oven. Let these golden bases cool completely on a wire rack.
Crafting the Rich Vanilla Custard
Now for the star of the show: the luscious vanilla custard. In a medium saucepan, combine 3 1/2 cups of the whole milk with 1 cup of the granulated sugar. Place this mixture over medium heat and warm it gently until small bubbles form around the edges. Do not let it boil. While the milk is warming, in a large bowl, whisk together the all-purpose flour and the remaining 1/2 cup of granulated sugar until well combined. Add the 8 egg yolks to this dry mixture, reserving the egg whites for another use. Whisk vigorously until the yolks are fully incorporated and the mixture is smooth and pnon-alcoholic ale yellow. Gradually pour about half of the warm milk mixture into the egg yolk mixture, whisking continuously. This tempering process prevents the eggs from scrambling. Once combined, pour this tempered egg mixture back into the saucepan with the remaining warm milk. Cook over medium-low heat, stirring constantly with a whisk or a heatproof spatula, until the custard thickens significantly. This can take anywhere from 8 to 12 minutes. You’re looking for a consistency that coats the back of a spoon. Once thickened, remove the saucepan from the heat and stir in the pure vanilla extract and the optional rum extractmium rum extract. The aroma at this stage is absolutely divine! To ensure a silky-smooth texture, pour the custard through a fine-mesh sieve into a clean bowl. Cover the surface of the custard directly with plastic wrap to prevent a skin from forming, and allow it to cool completely. You can speed this up by placing the bowl over an ice bath.
Whipping the Cream and Assembly
While the custard is cooling, we’ll prepare the light and airy whipped cream. Ensure your heavy whipping cream is very cold, as is your mixing bowl and whisk attachment. Pour the 2 cups of thoroughly chilled heavy whipping cream into the cold bowl. Add the 2 tablespoons of powdered sugar. Using an electric mixer or a stand mixer with a whisk attachment, beat the cream on medium-high speed until stiff peaks form. Be careful not to overmix, or you’ll end up with butter! Once stiff peaks form, meaning the cream holds its shape when you lift the whisk, stop mixing. In a separate bowl, if your custard is fully cooled, gently fold about one-third of the whipped cream into the cooled custard to lighten it. Then, carefully fold the remaining whipped cream into the custard until just combined. Don’t overmix; you want to maintain the airiness of the whipped cream.
Layering the Vanilla Custard Cream Squares
Now it’s time to bring it all together. Take your cooled puff pastry bases. If you’ve made larger squares, you can slice them horizontally to create two thinner layers for an extra decadent treat. For simplicity, we’ll assume you’re using them as single layers. Spread a generous layer of the vanilla custard cream mixture evenly over each puff pastry base. Make sure to go right to the edges to ensure every bite is filled with that creamy goodness. You want a substantial layer of the custard; this is a cream square, after all! Smooth the top with a spatula for an appealing finish.
Chilling and Serving
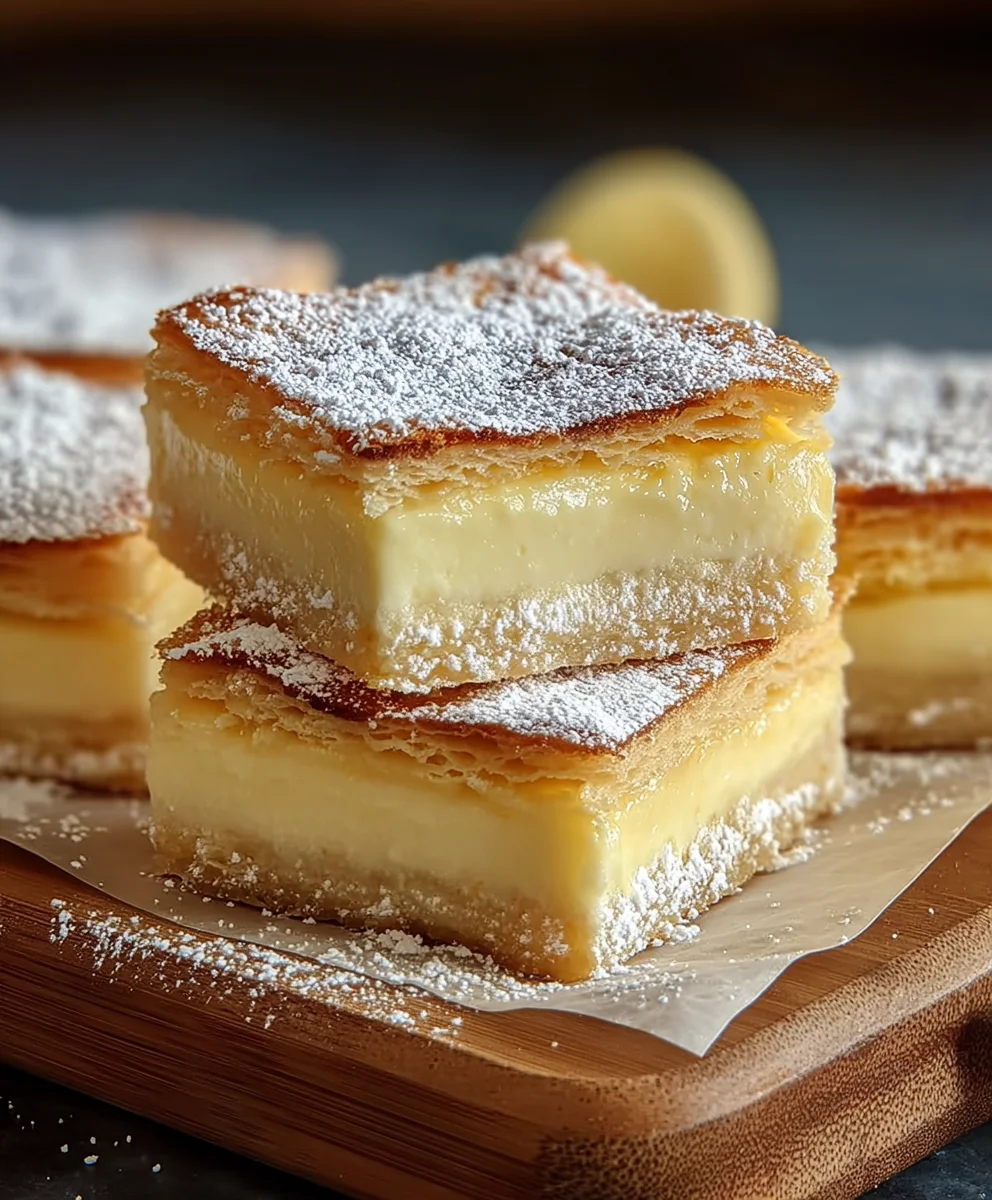
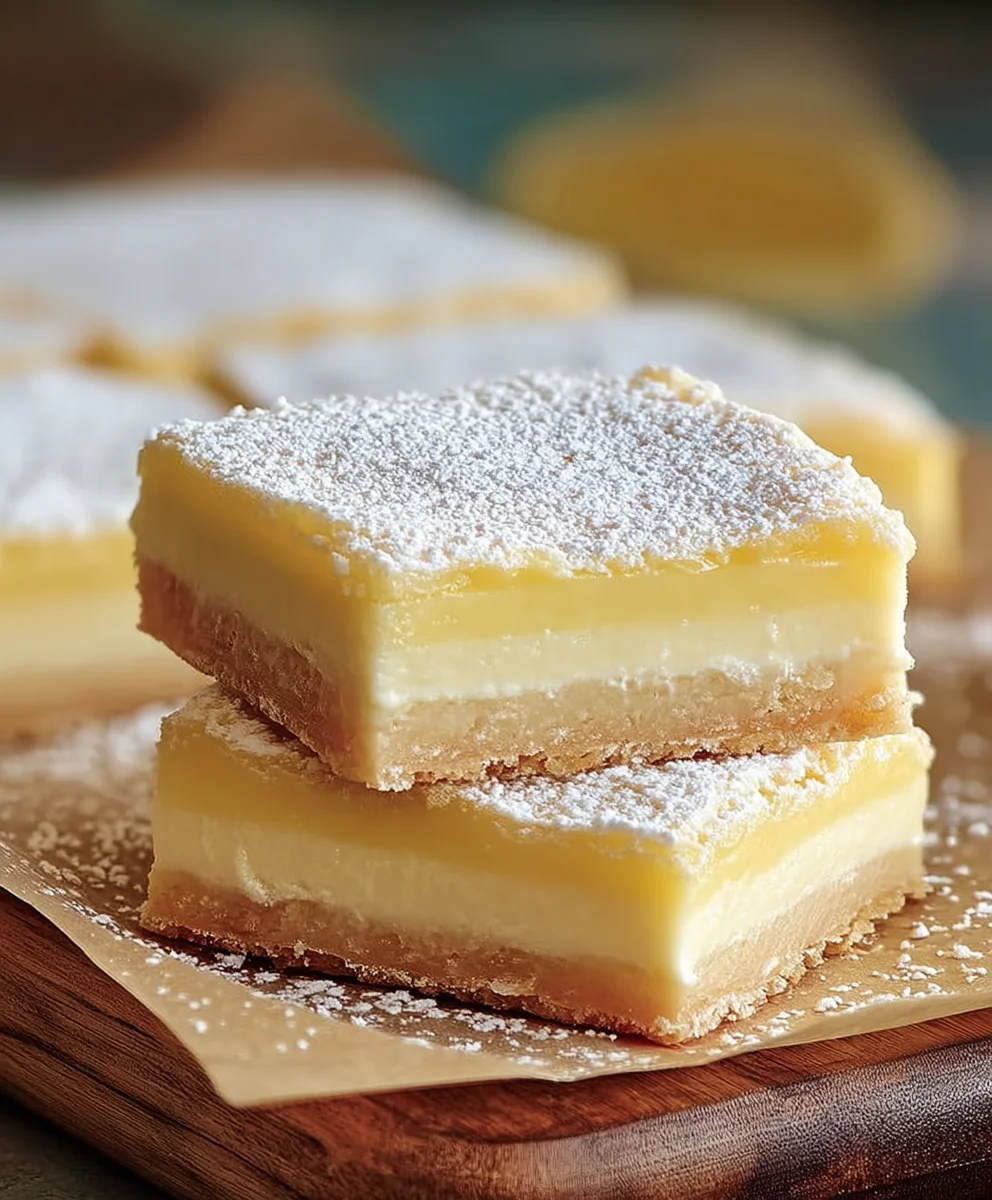
Once all your pastry bases are topped with the luscious custard cream, it’s time for them to set. Carefully transfer the assembled Vanilla Custard Cream Squares to the refrigerator. Allow them to chill for at least 2-3 hours, or preferably overnight. This chilling period is essential for the custard to fully firm up and for the flavors to meld together beautifully. Before serving, give them a light dusting of powdered sugar using a fine-mesh sieve. This adds a professional touch and a hint of sweetness. Slice into individual portions using a sharp knife. The contrast between the crisp, flaky pastry and the rich, creamy custard is absolutely divine. These are best enjoyed chilled.
Conclusion:
You’ve now learned how to create these delightful Vanilla Custard Cream Squares, a treat that’s sure to impress! This recipe is wonderfully straightforward, offering a perfect balance of creamy custard and crisp pastry. Whether you’re looking for a sophisticated dessert for a special occasion or a simple pick-me-up during the week, these squares are a fantastic choice. They store beautifully for a few days, making them ideal for make-ahead entertaining.
To serve your Vanilla Custard Cream Squares, I highly recommend a light dusting of powdered sugar for an elegant finish. They are also wonderful served with fresh berries, a drizzle of raspberry coulis, or even a dollop of whipped cream for extra indulgence. For variations, consider adding a hint of lemon zest to the custard for a brighter flavor, or incorporating finely chopped chocolate into the filling. Don’t be afraid to experiment and make them your own!
I truly encourage you to give this recipe a try. The aroma alone will fill your kitchen with warmth, and the taste will undoubtedly bring smiles. Happy baking!
Frequently Asked Questions about Vanilla Custard Cream Squares:
Q1: Can I make the custard ahead of time for the Vanilla Custard Cream Squares?
Absolutely! The custard for your Vanilla Custard Cream Squares can be made up to 2 days in advance. Once cooled completely, cover it tightly with plastic wrap, pressing the wrap directly onto the surface of the custard to prevent a skin from forming. Store it in the refrigerator until you’re ready to assemble.
Q2: What is the best way to store leftover Vanilla Custard Cream Squares?
For the best texture and flavor of your Vanilla Custard Cream Squares, store any leftovers in an airtight container in the refrigerator. They are typically best enjoyed within 2-3 days. If the pastry starts to soften slightly, you can try briefly crisping them in a low oven for a few minutes to refresh them.
Vanilla Custard Cream Squares
An easy and delicious dessert recipe featuring layers of flaky puff pastry and rich vanilla custard cream.
Ingredients
-
2 sheets puff pastry, thawed but kept cold
-
4 cups whole milk, divided
-
1 1/2 cups granulated sugar
-
1 1/4 cups all-purpose flour
-
8 large egg yolks
-
3 teaspoons pure vanilla extract
-
1/4 teaspoon salt
-
2 cups heavy whipping cream, thoroughly chilled
-
2 tablespoons powdered sugar, plus extra for dusting
Instructions
-
Step 1
Preheat oven to 400°F (200°C). Cut puff pastry into 6×6 inch squares, prick with a fork, and bake on parchment-lined baking sheets for 12-15 minutes until golden brown and puffed. Let cool completely. -
Step 2
Warm 3 1/2 cups milk with 1 cup sugar until simmering. Whisk flour and remaining 1/2 cup sugar with egg yolks. Gradually whisk warm milk into egg yolks, then return to saucepan. Cook over medium-low heat, stirring, until thickened (8-12 minutes). Remove from heat, stir in vanilla extract. Strain into a bowl, cover surface directly with plastic wrap, and cool completely. -
Step 3
Whip chilled heavy cream with 2 tablespoons powdered sugar until stiff peaks form. -
Step 4
Gently fold about one-third of the whipped cream into the cooled custard to lighten, then fold in the remaining whipped cream until just combined. -
Step 5
Spread a generous layer of the vanilla custard cream mixture evenly over each cooled puff pastry base. Smooth the top with a spatula. -
Step 6
Chill the assembled squares in the refrigerator for at least 2-3 hours, or preferably overnight. Dust with powdered sugar before slicing and serving chilled.
Important Information
Nutrition Facts (Per Serving)
It is important to consider this information as approximate and not to use it as definitive health advice.
Allergy Information
Please check ingredients for potential allergens and consult a health professional if in doubt.