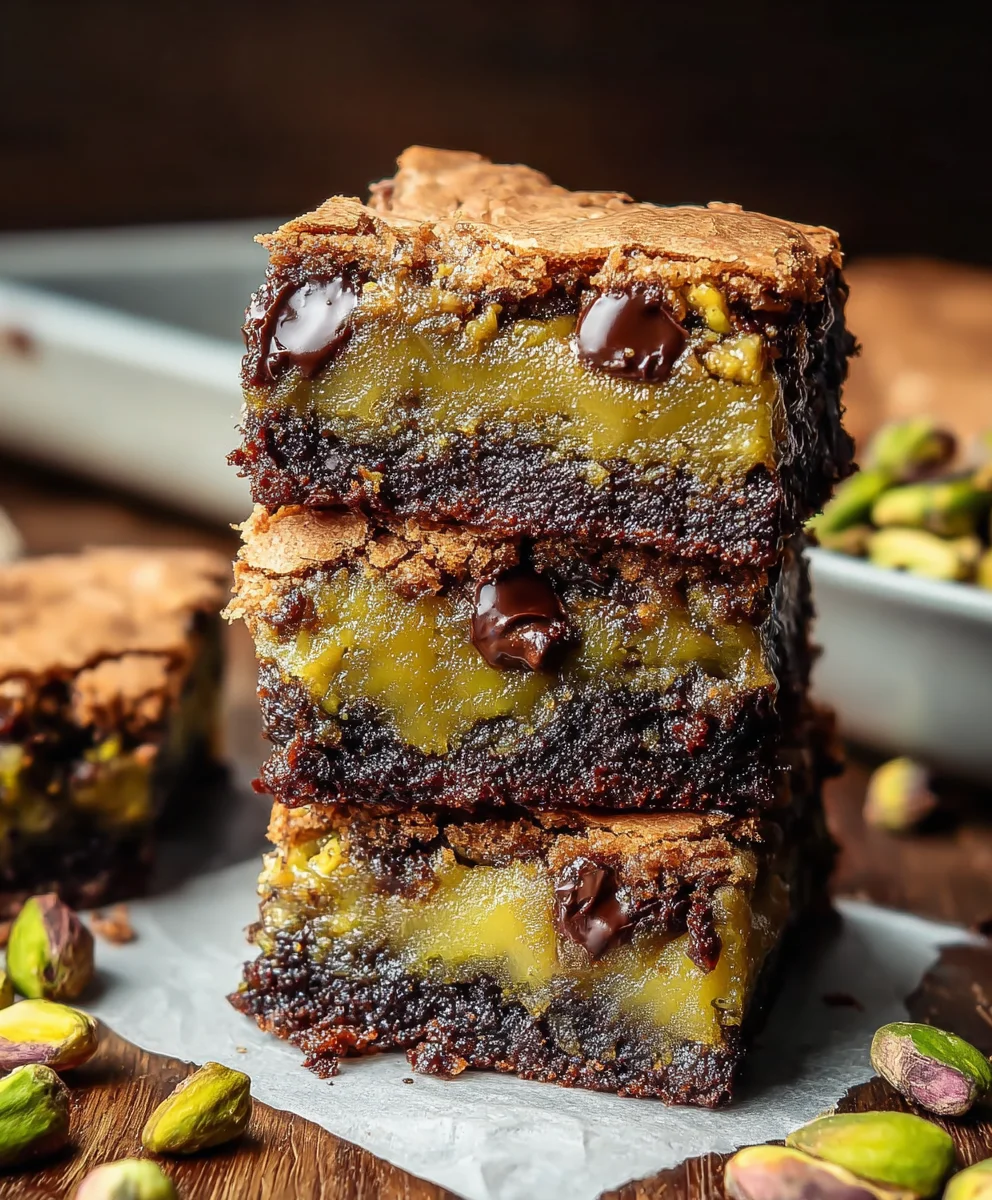
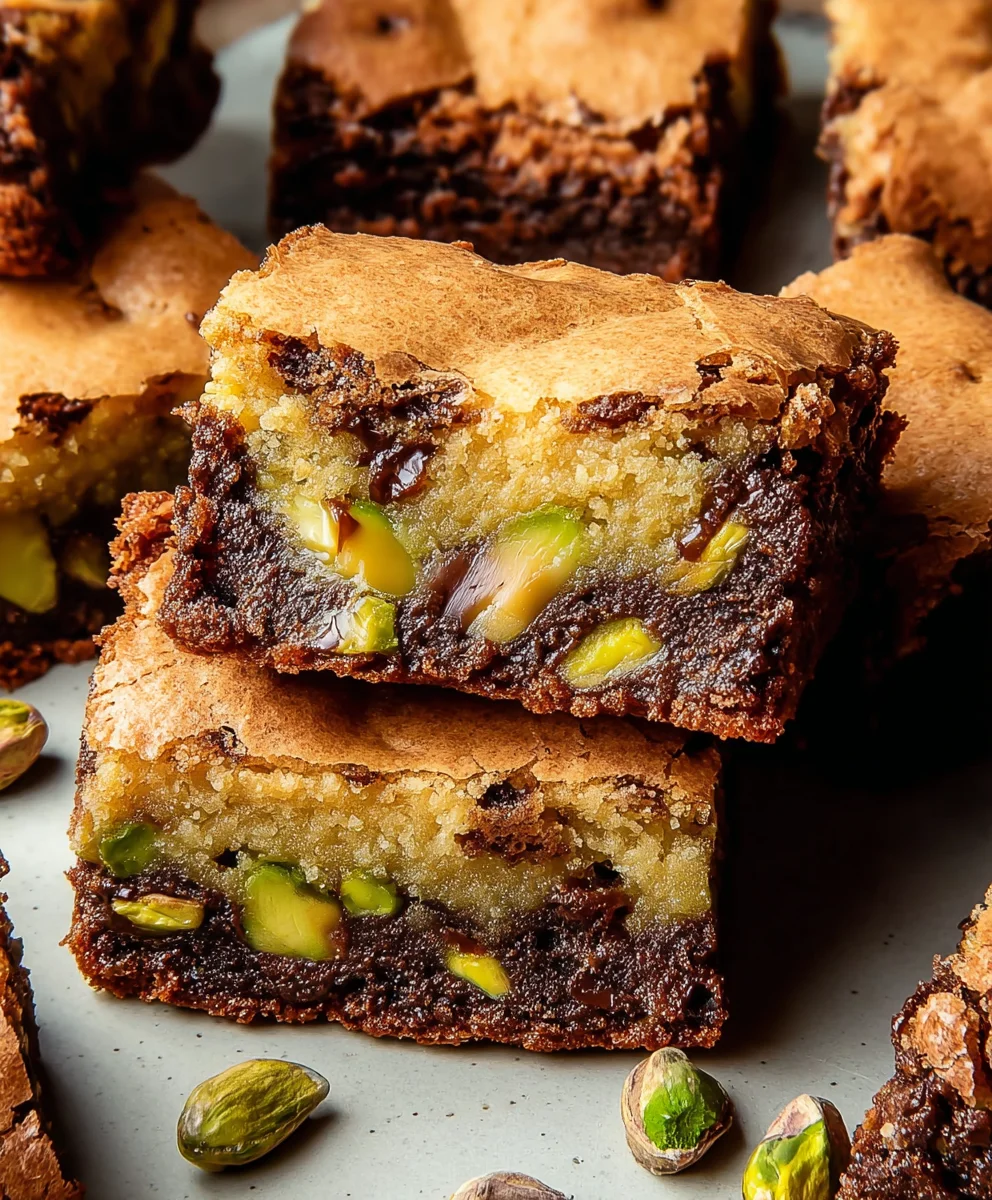
Pistachio Brookies-Deliciously Nutty Chocolate Brownie Cookies
Pistachio Brookies are more than just a dessert; they’re an experience. Imagin extracte the decadent chegrape juicess of a rich brownie meeting the crisp, buttery perfection of a classic cookie, all elevated by the subtle, yet irresistible, crunch and vibrant green hue of pistachios. It’s this harmonious fusion that has captured the hearts (and taste buds!) of dessert lovers everywhere. We adore Pistachio Brookies because they offer the best of both worlds, satisfying that craving for something intensely chocolatey while also delivering a delightful textural contrast. What truly sets these Pistachio Brookies apart is the aromatic, slightly nutty depth that pistachios bring, transforming a beloved treat into something truly extraordinary and utterly memorable. Get ready to fall in love with this unique twist on a classic!
Ingredients:
- 1/4 cup butter, softened
- 3 tablespoons caster sugar
- 2 1/2 tablespoons light brown sugar
- 1 small egg
- 1 teaspoon vanilla extract
- 2/3 cup all-purpose flour
- 1/4 teaspoon baking powder
- 1/4 teaspoon baking soda
- 1/4 teaspoon salt
- 1/4 cup dark chocolate chips
- 2/3 cup butter
- 2/3 cup dark chocolate (50-60% cocoa), chopped
- 1 1/3 cups all-purpose flour
- 1/3 cup cocoa powder
- 3 medium eggs
Pistachio Brookie Layers
Chocolate Brownie Base
We’re going to start by creating the rich, fudgy brownie layer that forms the base of our Pistachio Brookies. This part is all about intense chocolate flavor and a perfectly gooey texture.
- First, let’s get our brownie batter started. In a medium heatproof bowl, combine the 2/3 cup of butter and the 2/3 cup of chopped dark chocolate. Place this bowl over a saucepan of simmering water (a double boiler setup). Stir gently and continuously until both the butter and chocolate have melted completely and are smooth. It’s important not to let the bottom of the bowl touch the water, as this can scorch the chocolate. Once melted, remove the bowl from the heat and let it cool slightly for about 5-10 minutes. This cooling step is crucial; adding eggs to hot chocolate can cook them, resulting in a scrambled egg texture in your brownie.
- While the chocolate mixture cools, let’s prepare our dry ingredients for the brownie. In a separate medium bowl, whisk together the 1 1/3 cups of all-purpose flour, the 1/3 cup of cocoa powder, and 1/2 teaspoon of salt. Whisking helps to evenly distribute the cocoa powder and salt, preventing any clumps and ensuring consistent flavor throughout the brownie.
- Now, back to our slightly cooled chocolate mixture. Whisk in the 3 medium eggs, one at a time, ensuring each egg is fully incorporated before adding the next. Follow this by stirring in the 1 teaspoon of vanilla extract. The vanilla adds a lovely aromatic depth that complements the dark chocolate beautifully.
- Gradually add the dry ingredients (from step 2) to the wet chocolate mixture. Fold them together using a spatula until just combined. Be careful not to overmix at this stage. Overmixing can develop the gluten in the flour too much, leading to a tougher brownie instead of a tender, fudgy one. You should have a thick, glossy batter. If you’re adding anything extra to your brownie layer, like chopped nuts (besides the pistachios which are for the top!), now would be the time to fold them in.
- Prepare your baking pan. For this recipe, I recommend an 8×8 inch baking pan. Line it with parchment paper, leaving some overhang on the sides. This overhang acts as “handles” to easily lift the brookies out of the pan once they’re baked and cooled. Pour the brownie batter into the prepared pan and spread it evenly. We’ll bake this layer first.
Nutty Cookie Dough Topping
Next, we’ll make the delicious, buttery cookie dough that will sit atop our brownie base. This part brings the classic cookie flavor and texture to our hybrid treat.
- In a large bowl, cream together the 1/4 cup of softened butter, the 3 tablespoons of caster sugar, and the 2 1/2 tablespoons of light brown sugar. Use an electric mixer (or a strong arm and a whisk) to beat them until the mixture is light and fluffy. This process incorporates air, which is essential for a good cookie texture. Scrape down the sides of the bowl periodically to ensure everything is evenly mixed.
- Add the 1 small egg and the 1 teaspoon of vanilla extract to the creamed butter and sugar mixture. Beat again until well combined and smooth. The egg acts as a binder and adds richness.
- In a separate bowl, whisk together the 2/3 cup of all-purpose flour, the 1/4 teaspoon of baking powder, the 1/4 teaspoon of baking soda, and the 1/4 teaspoon of salt. Sift these dry ingredients together for a lighter texture and to ensure no lumps.
- Add the dry ingredients to the wet ingredients and mix on low speed, or fold with a spatula, until just combined. Again, be careful not to overmix. Overmixing cookie dough can make your brookies tough. Stir in the 1/4 cup of dark chocolate chips. These will add little pockets of chocolate goodness within the cookie layer.
- Now it’s time to assemble and bake our Pistachio Brookies. Preheat your oven to 350°F (175°C). Take your brownie batter-filled pan (from step 5). Dollop spoonfuls of the cookie dough mixture evenly over the top of the brownie batter. You don’t need to spread it perfectly; leaving some gaps allows the brownie to peek through and creates beautiful swirls. Once the cookie dough is in place, sprinkle generously with chopped pistachios. Don’t be shy – the pistachios add a wonderful crunch and a vibrant green contrast.
- Bake for approximately 30-35 minutes, or until the edges of the brookies are set and the cookie topping is golden brown. A toothpick inserted into the center should come out with moist crum extractbs attached, but not wet batter. It’s important to note that the brownie layer will remain fudgy, so avoid overbaking.
- Once baked, remove the pan from the oven and let the Pistachio Brookies cool completely in the pan on a wire rack. This is a crucial step for them to set properly. Rushing this process will result in brookies that fall apart. Once cooled, use the parchment paper overhang to lift the entire slab out of the pan. Cut into squares and enjoy!
Conclusion:
There you have it – the ultimate guide to creating delicious Pistachio Brookies! We’ve walked through each step to ensure your brookies boast that perfect chewy brownie base and a crisp, buttery cookie topping, all elevated by the delightful crunch and unique flavor of pistachios. These Pistachio Brookies are a true showstopper, perfect for any occasion from a casual afternoon treat to a more sophisticated dessert spread.
For serving suggestions, I love to enjoy my Pistachio Brookies warm, straight from the oven, perhaps with a scoop of vanilla bean ice cream. They also hold up beautifully at room temperature, making them ideal for bake snon-alcoholic ales or potlucks. Don’t be afraid to get creative with variations! Consider adding a drizzle of white chocolate or a sprinkle of flaky sea salt on top after baking. You could also experiment with adding a touch of cardamom to the cookie dough for an extra layer of aromatic complexity.
I truly hope you give these Pistachio Brookies a try. They are a testament to how simple ingredients can come together to create something truly special. Don’t be intimidated by the two-in-one nature of this dessert; the process is straightforward and incredibly rewarding. Happy baking!
Frequently Asked Questions about Pistachio Brookies:
Q1: Can I make Pistachio Brookies ahead of time?
Yes, absolutely! Pistachio Brookies are fantastic for making ahead. Once completely cooled, store them in an airtight container at room temperature for up to 3-4 days. They can also be frozen, individually wrapped, for up to 2-3 months. Thaw at room temperature before enjoying.
Q2: What kind of pistachios should I use for Pistachio Brookies?
For the best flavor and texture in your Pistachio Brookies, I recommend using unsalted, shelled pistachios. You can use them whole or roughly chopped, depending on your preference for visual appeal and crunch. Roasting them lightly before adding them to the dough can also enhance their flavor.
Pistachio Brookies-Deliciously Nutty Chocolate Brownie Cookies
A decadent combination of fudgy chocolate brownies topped with a rich, nutty pistachio cookie dough.
Ingredients
-
2/3 cup butter
-
2/3 cup dark chocolate (50-60% cocoa), chopped
-
1 1/3 cups all-purpose flour
-
1/3 cup cocoa powder
-
3 medium eggs
-
1/4 cup butter, softened
-
3 tablespoons caster sugar
-
2 1/2 tablespoons light brown sugar
-
1 small egg
-
1 teaspoon vanilla extract
-
2/3 cup all-purpose flour
-
1/4 teaspoon baking powder
-
1/4 teaspoon baking soda
-
1/4 teaspoon salt
-
1/4 cup dark chocolate chips
-
Chopped pistachios, for topping
Instructions
-
Step 1
Melt 2/3 cup butter and 2/3 cup chopped dark chocolate in a double boiler until smooth. Let cool slightly for 5-10 minutes. -
Step 2
In a separate bowl, whisk together 1 1/3 cups all-purpose flour, 1/3 cup cocoa powder, and 1/2 teaspoon salt. -
Step 3
Whisk 3 medium eggs one at a time into the cooled chocolate mixture, followed by 1 teaspoon vanilla extract. -
Step 4
Gradually fold the dry ingredients into the wet chocolate mixture until just combined. Pour into an 8×8 inch pan lined with parchment paper. -
Step 5
Cream 1/4 cup softened butter with 3 tablespoons caster sugar and 2 1/2 tablespoons light brown sugar until light and fluffy. Beat in 1 small egg and 1 teaspoon vanilla extract. -
Step 6
In another bowl, whisk together 2/3 cup all-purpose flour, 1/4 teaspoon baking powder, 1/4 teaspoon baking soda, and 1/4 teaspoon salt. Add to the wet ingredients and mix until just combined. Stir in 1/4 cup dark chocolate chips. -
Step 7
Preheat oven to 350°F (175°C). Dollop spoonfuls of cookie dough over the brownie batter. Sprinkle generously with chopped pistachios. -
Step 8
Bake for 30-35 minutes, or until the edges are set and the cookie topping is golden brown. A toothpick should come out with moist crumbs. -
Step 9
Let cool completely in the pan on a wire rack before lifting out with parchment paper overhang and cutting into squares.
Important Information
Nutrition Facts (Per Serving)
It is important to consider this information as approximate and not to use it as definitive health advice.
Allergy Information
Please check ingredients for potential allergens and consult a health professional if in doubt.