Juicy Honey Butter Chicken Recipe – Easy & Delicious
Honey Butter Chicken isn’t just a meal; it’s a warm, comforting embrace on a plate. There’s a reason this dish has earned its place in the hearts and kitchens of so many. It’s that irresistible combination of sweet, savory, and buttery that dances across your taste buds with every single bite. Imagin extracte succulent chicken pieces, perfectly browned and tender, bathed in a luscious, golden sauce that’s both rich and delicately sweet. The magic of Honey Butter Chicken lies in its simplicity, yet it delivers a flavor profile that feels utterly gourmet. It’s the ultimate crowd-pleaser, perfect for a weeknight family dinner or a special occasion when you want to impress without spending hours in the kitchen. This recipe will guide you through creating that iconic Honey Butter Chicken experience, ensuring your chicken is always juicy and your sauce is perfectly balanced, creating a dish that will have everyone asking for seconds.
Ingredients:
- 1/4 cup all-purpose flour
- ½ tsp garlic powder
- ¼ tsp cayenne pepper
- ½ tsp onion powder
- 1 tsp salt
- ¼ tsp ground black pepper
- 1 lb chicken breasts, cut into 1-inch pieces
- 1 tbsp unsalted butter
- 1 tbsp canola oil (or any light oil)
- 1 tbsp green onions, sliced
- 5 tbsps butter, room temperature
- ½ cup honey
- 1 tbsp soy sauce
- 1 tbsp apple cider vinegar
- ¼ tsp salt
Preparing the Chicken
Coating the Chicken
First, let’s get our chicken ready for its delicious transformation. In a shallow dish or a large resealable plastic bag, combine the all-purpose flour with the garlic powder, cayenne pepper, onion powder, 1 teaspoon of salt, and the ground black pepper. Give this mixture a good whisk or shake to ensure all the spices are evenly distributed throughout the flour. This seasoned flour is going to give our Honey Butter Chicken a beautiful, slightly crispy coating.
Now, add your 1-pound of chicken breasts, cut into bite-sized 1-inch pieces, to the seasoned flour. Toss the chicken gently until each piece is thoroughly coated. You want a nice, even layer of flour clingin extractg to every surface. If you’re using a plastic bag, simply seal it and give it a good shake. This step is crucial for developing that desirable texture in the final dish. Once coated, set the chicken aside. You can even let it rest for a few minutes in the flour mixture; this helps the coating adhere better during cooking.
Cooking the Chicken
Searing the Chicken Pieces
Now, let’s get cooking! Heat the 1 tablespoon of canola oil and 1 tablespoon of unsalted butter in a large skillet over medium-high heat. You want the oil to shimmer and the butter to melgin extractnd begin to foam slightly. This combination of oil and butter provides a fantastic flavor base and helps prevent the butter from burning too quickly.
Carefully add the coated chicken pieces to the hot skillet in a single layer. It’s important not to overcrowd the pan, as this will cause the chicken to steam rather than sear, resulting in a less desirable texture. If necessary, cook the chicken in batches. Allow the chicken to cook undisturbed for about 3-4 minutes per side, or until it develops a beautiful golden-brown crust. This searing process is key to locking in the juices and creating that irresistible texture. Flip the chicken pieces and cook for another 3-4 minutes on the other side until they are cooked through and golden. Once cooked, remove the chicken from the skillet and set it aside on a clean plate.
Crafting the Honey Butter Sauce
Building the Sauce Base
In the same skillet you used for the chicken (no need to wipe it out – those browned bits are flavor gold!), reduce the heat to medium. Add the 5 tablespoons of room-temperature butter. Let the butter melt completely, scraping up any browned bits from the bottom of the pan. These bits are infused with the delicious flavor of the chicken and will add an incredible depth to our honey butter sauce. Stir the butter around to incorporate these flavorful remnants.
Once the butter has melted and is gently bubbling, it’s time to introduce the sweet and savory elements of our sauce. Pour in the ½ cup of honey. As the honey heats, it will become more liquid and easier to incorporate. Stir the honey into the melted butter continuously. Allow this mixture to simmer gently for about 1-2 minutes, just until it starts to thicken slightly. This initial simmer helps to meld thgin extractlavors and begin the caramelization process of the honey, adding a wonderful richness.
Finishing the Sauce
Now, it’s time to add the finishing touches that will bring balance and complexity to the sauce. Stir in the 1 tablespoon of soy sauce. The soy sauce will add a savory umami depth that perfectly complements the sweetness of the honey. Next, add the 1 tablespoon of apple cider vinegar. The vinegar provides a crucial touch of acidity, cutting through the richness of the butter and honey, and brightening the overall flavor profile of the sauce. Finally, stir in ¼ teaspoon of salt to further enhance all the flavors. Continue to stir the sauce over medium heat for another 1-2 minutes, or until it reaches a slightly syrupy consistency. You’re looking for a sauce that coats the back of a spoon beautifully.
Combining and Serving
Glazing the Chicken
With the Honey Butter Sauce ready and the chicken cooked, it’s time to bring it all together. Return the seared chicken pieces to the skillet with the glorious honey butter sauce. Gently toss the chicken pieces in the sauce, ensuring each piece is thoroughly coated and glistening. Let the chicken simmer in the sauce for an additional 1-2 minutes over low heat. This allows the chicken to absorb some of the delicious sauce and for the sauce to thicken slightly around the chicken, creating a beautiful glaze. Be careful not to overcook the chicken at this stage; we want it to remain tender and juicy.
Final Touches and Presentation
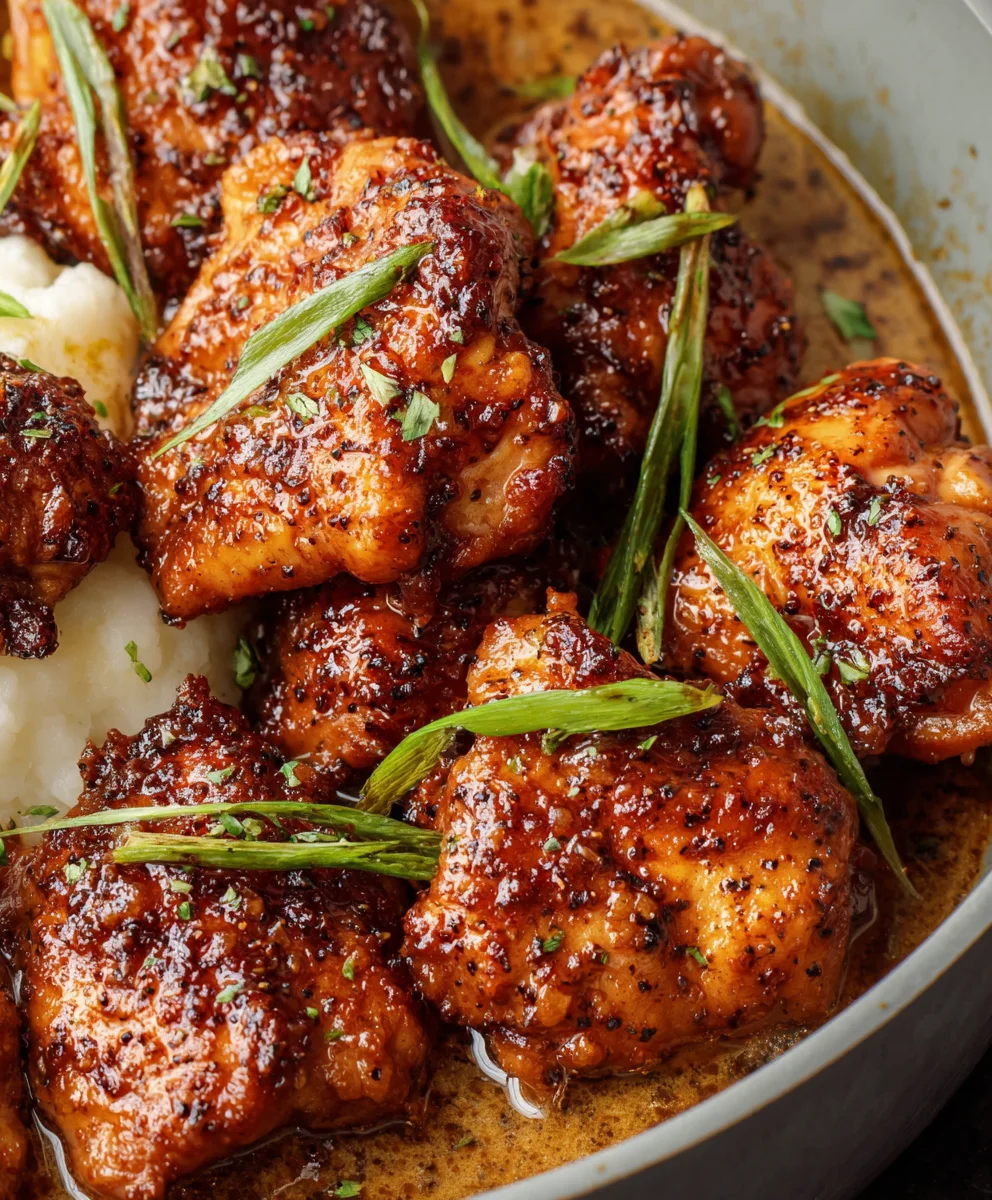
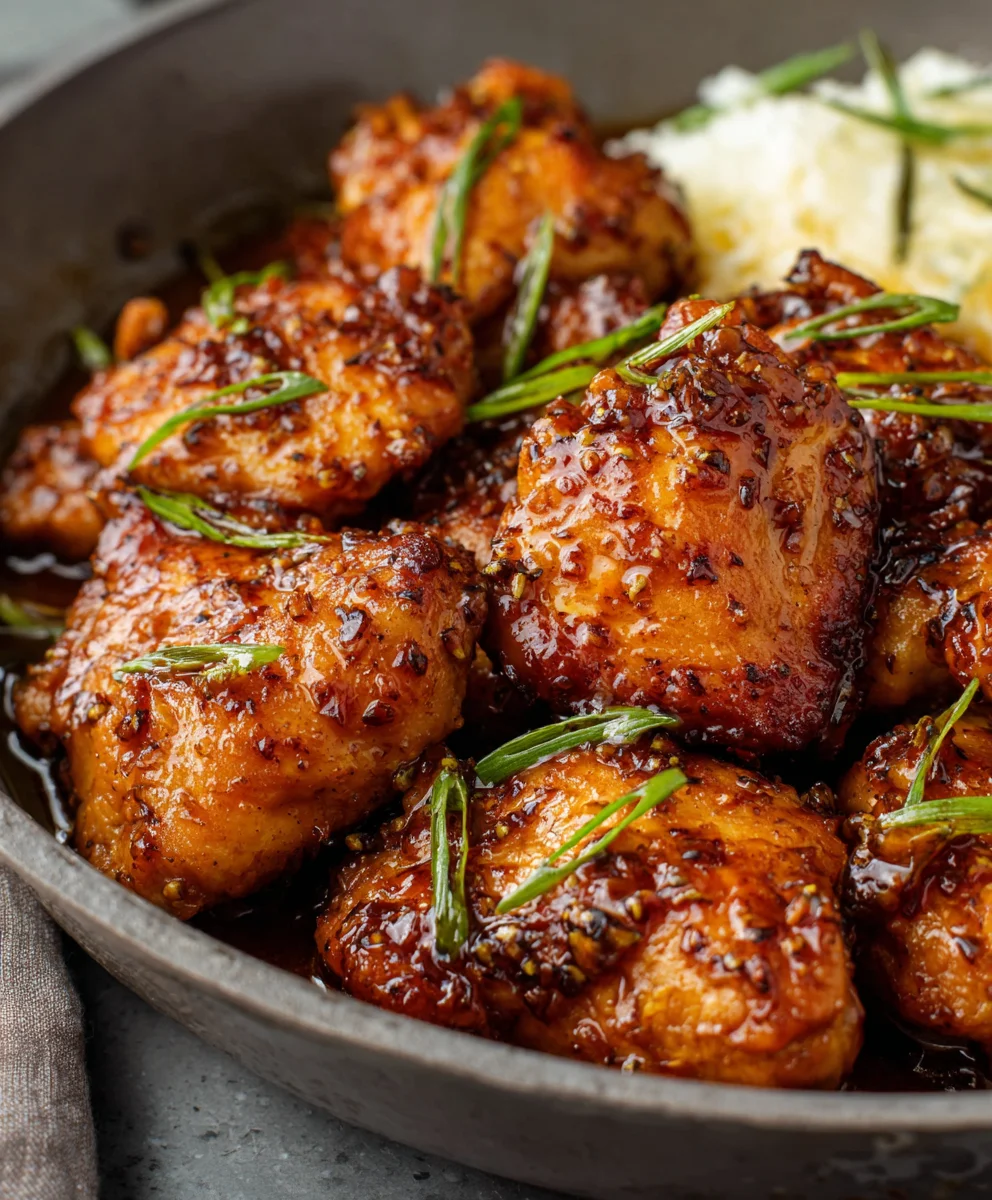
Once the chicken is beautifully coated and warmed through, it’s time for the final flourish. Remove the skillet from the heat. Sprinkle the sliced green onions over the top of the Honey Butter Chicken. The vibrant green of the onions not only adds a pop of color but also provides a fresh, mild oniony crunch that contrasts wonderfully with the rich, sweet sauce. Serve your Honey Butter Chicken immediately. It’s absolutely delicious served over steamed rice, with roasted vegetables, or alongside your favorite pasta. Enjoy the delightful combination of sweet, savory, and slightly spicy flavors!
Conclusion:
I hope you enjoyed learning how to make this delicious Honey Butter Chicken! This recipe is a fantastic way to bring a comforting and flavorful meal to your table with relatively little fuss. The balance of sweet honey and savory butter, combined with the tender chicken, creates a truly irresistible dish that’s sure to become a family favorite. We’ve covered the essential steps to achieve that perfect golden crust and luscious sauce, making it accessible even for begin extractner cooks.
For serving suggestions, this Honey Butter Chicken pairs beautifully with fluffy white rice, mashed potatoes, or even a simple side salad. It’s also wonderful served alongside roasted vegetables like broccoli or asparagus. When it comes to variations, feel free to experiment! You could add a pinch of red pepper flakes for a touch of heat, or a squeeze of lemon juice at the end for a brighter flavor profile. Don’t be afraid to sprinkle fresh herbs like parsley or chives over the top before serving for an extra burst of freshness and visual appeal. Give it a try and discover your favorite way to enjoy this wonderful Honey Butter Chicken!
Frequently Asked Questions:
What kind of chicken is best for this Honey Butter Chicken recipe?
Boneless, skinless chicken thighs or breasts work best for this Honey Butter Chicken. Thighs tend to stay more moist and tender, but breasts are also a great option and can be cut into bite-sized pieces for quicker cooking.
Can I make Honey Butter Chicken ahead of time?
While the sauce can be made ahead and reheated, it’s best to cook the chicken fresh for optimal texture and flavor. The sauce might thicken considerably upon cooling, so you may need to add a splash of water or broth to thin it out when reheating.
Juicy Honey Butter Chicken Recipe – Easy & Delicious
A quick and easy recipe for incredibly juicy and flavorful Honey Butter Chicken, perfect for a weeknight meal.
Ingredients
-
1/4 cup all-purpose flour
-
½ tsp garlic powder
-
¼ tsp cayenne pepper
-
½ tsp onion powder
-
1 tsp salt
-
¼ tsp ground black pepper
-
1 lb chicken breasts, cut into 1-inch pieces
-
1 tbsp unsalted butter
-
1 tbsp canola oil
-
1 tbsp green onions, sliced
-
5 tbsps butter, room temperature
-
½ cup honey
-
1 tbsp soy sauce
-
1 tbsp apple cider vinegar
-
¼ tsp salt
Instructions
-
Step 1
In a shallow dish or plastic bag, combine flour, garlic powder, cayenne pepper, onion powder, 1 tsp salt, and black pepper. Add chicken pieces and toss until evenly coated. Set aside. -
Step 2
Heat 1 tbsp canola oil and 1 tbsp butter in a large skillet over medium-high heat. Add coated chicken in a single layer and sear for 3-4 minutes per side until golden brown and cooked through. Remove chicken and set aside. -
Step 3
In the same skillet, reduce heat to medium. Add 5 tbsps butter and melt, scraping up browned bits. Stir in honey and simmer for 1-2 minutes until slightly thickened. -
Step 4
Stir in soy sauce, apple cider vinegar, and ¼ tsp salt. Continue to stir for another 1-2 minutes until the sauce reaches a slightly syrupy consistency. -
Step 5
Return the chicken to the skillet and toss to coat in the sauce. Simmer for an additional 1-2 minutes over low heat until glazed. -
Step 6
Remove from heat, sprinkle with sliced green onions, and serve immediately over rice or with vegetables.
Important Information
Nutrition Facts (Per Serving)
It is important to consider this information as approximate and not to use it as definitive health advice.
Allergy Information
Please check ingredients for potential allergens and consult a health professional if in doubt.