Easy Roasted Summer Squash-Quick & Delicious Side Dish
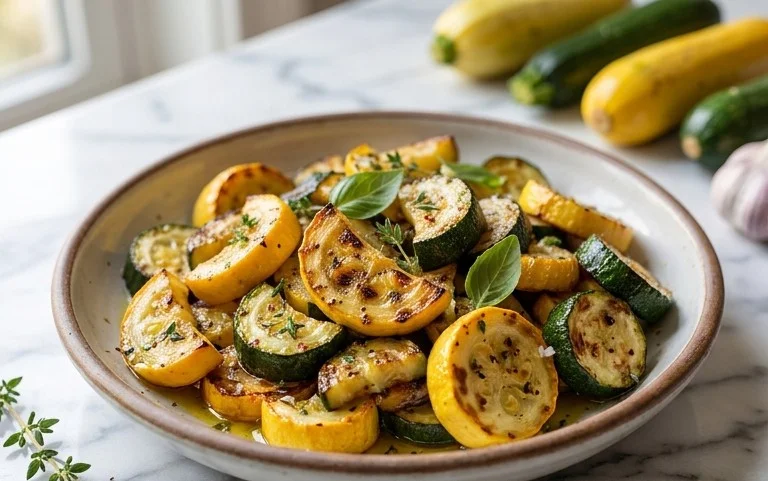
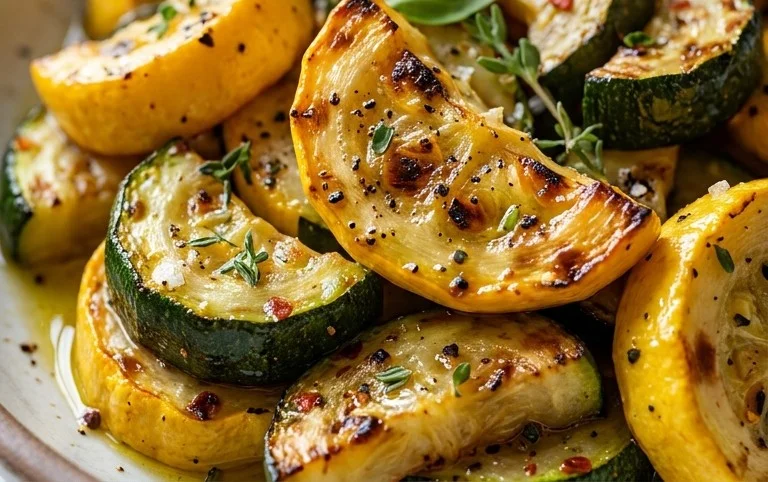
Roasted summer squash is, in my humble opinion, one of the absolute best ways to showcase the vibrant bounty of the season. There’s something undeniably magical about transforming humble zucchini and yellow squash into glistening, tender morsels with perfectly caramelized edges. It’s no wonder this dish is a perennial favorite among home cooks and seasoned chefs alike! People adore it because it’s ridiculously simple to make, yet delivers an explosion of flavor that’s both comforting and sophisticated. What truly makes roasted summer squash special is how the intense heat of the oven coaxes out its natural sweetness, mellowing any bitterness and creating a delightful textural contrast. It’s the perfect side dish, a light appetizer, or even a star player in a vegetarian main, proving that sometimes, the simplest ingredients can yield the most extraordinary results.
Roasted Summer Squash
Summer squash is an absolute star of the warmer months. Its tender flesh and mild, slightly sweet flavor make it incredibly versatile, and roasting is by far my favorite way to prepare it. Roasting caramelizes the natural sugars in the squash, bringin extractg out a depth of flavor that boiling or steaming simply can’t match. The edges get delightfully crispy, while the inside remains soft and yielding. This recipe takes simple summer squash and elevates it with a savory Parmesan and Panko crust, a hint of lemon pepper, and a touch of smoky paprika. It’s a fantastic side dish that pairs beautifully with grilled meats, fish, or a simple salad. Plus, it’s incredibly easy to throw together, making it perfect for busy weeknights or casual weekend gatherings.
Ingredients:
Cooking Instructions
The beauty of this recipe lies in its simplicity. We’re going to transform humble summer squash into a dish that’s bursting with flavor and texture. The process is straightforward, requiring minimal fuss and delivering maximum deliciousness. Let’s get started on creating this delightful summer side.
Preparation is Key
First things first, let’s get our squash ready. You’ll want to start by washing your summer squash thoroughly under cool running water. This removes any dirt or debris that might be clingin extractg to the skin. Next, you need to trim off the ends of the squash. This is a simple but important step to ensure a pleasant eating experience. For the best results, I recommend cutting the squash into uniform pieces. I usually slice them into about ½-inch thick rounds or half-moons. The goal here is to have pieces that are roughly the same size so they cook evenly. If you have very large squash, you might want to consider cutting them into quarters lengthwise before slicing into half-moons. This ensures that the pieces aren’t too thick in the center and cook through properly. Don’t worry too much about perfection; a little variation in size is perfectly fine and will still result in a delicious outcome.
Infusing with Flavor
Once your squash is prepped, it’s time to get it ready for the oven. In a medium bowl, toss the prepared squash with the 1 tablespoon of olive oil. Make sure to coat all the pieces evenly. The olive oil acts as a binder for the seasonings and helps to achieve that lovely roasted texture. Now, let’s bring on the flavor! Sprinkle the lemon pepper seasoning, paprika, and kosher salt over the oiled squash. Gently toss everything together until the squash is well-coated with the seasonings. Take a moment to smell that wonderful aroma – the lemon pepper and paprika are already hinting at the deliciousness to come. This step ensures that every bite of your roasted squash will be infused with savory goodness.
Creating the Crispy Coating
This is where the magic happens for that delightful crunch! In a separate small bowl, combine the 2 tablespoons of grated Parmesan cheese and the 1 tablespoon of Panko bread crum extractbs. Panko bread crum extractbs are key here because they are coarser and lighter than regular bread crum extractbs, creating an extra crispy texture when roasted. Stir these two ingredients together to create your flavorful topping. Now, sprinkle this Parmesan and Panko mixture over the seasoned squash. Use your hands or a spoon to gently toss the squash again, ensuring that the cheese and bread crum extractb mixture adheres to the pieces. You want a good, even coating on each piece for maximum flavor and crispiness. Don’t be afraid to really get in there and mix it well. This coating is what will give your roasted squash that irresistible golden-brown finish and a satisfying crunch.
Roasting to Perfection
Preheat your oven to 400 degrees Fahrenheit (200 degrees Celsius). While the oven is preheating, prepare a baking sheet. You can line it with parchment paper for easier cleanup, or simply grease it lightly. Arrange the coated squash in a single layer on the prepared baking sheet. It’s really important to spread them out so they have space around them. If the squash pieces are too crowded, they will steam rather than roast, and we want that beautiful caramelization and crispy edge. If necessary, use two baking sheets to ensure they are in a single layer. Pop the baking sheet into the preheated oven and let the roasting begin extract.
The Waiting Game (and Watching!)
Now for the final stage – the roasting itself. This usually takes about 20-25 minutes. During this time, the squash will soften, the Parmesan will melt and turn golden, and the Panko will become wonderfully crispy. About halfway through the cooking time, I like to give the baking sheet a gentle shake or use a spatula to flip the squash pieces. This helps to ensure even browning and crisping on all sides. Keep an eye on them during the last few minutes of cooking. You’re looking for that perfect balance of tender squash and golden-brown, slightly crispy edges on the coating. Once they look beautifully roasted and irresistible, carefully remove the baking sheet from the oven. The aroma filling your kitchen at this point will be incredible!
Let the roasted summer squash cool for a few minutes on the baking sheet before serving. This allows the flavors to meld and the pieces to firm up slightly. You can serve it immediately as a hot side dish, or it’s also delicious at room temperature. Enjoy this simple yet incredibly flavorful way to savor the best of summer produce!
Conclusion:
I hope you’re as excited as I am to dive into this wonderfully simple yet incredibly flavorful Roasted Summer Squash recipe! It’s a true testament to how humble ingredients can shine when treated with a little heat and a few thoughtful seasonings. The beauty of this dish lies in its simplicity, allowing the natural sweetness of the squash to come through, enhanced by the gentle caramelization that roasting provides. This recipe is a fantastic way to embrace the bounty of summer produce and bring a vibrant, healthy side dish to your table with minimal effort. It pairs beautifully with grilled meats, fish, or even as a light lunch on its own. Don’t be afraid to experiment with different herbs like thyme or rosemary, or add a pinch of red pepper flakes for a touch of heat. I truly encourage you to give this Roasted Summer Squash a try – it’s a guaranteed crowd-pleaser and a delicious way to enjoy the best of the season!
Frequently Asked Questions about Roasted Summer Squash:
Q: What are the best types of summer squash to use for this recipe?
A: Zucchini and yellow squash are the stars of this show, offering a tender texture and mild flavor that roasts beautifully. You can also try delicata or pattypan squash for interesting shapes and slightly different nutty undertones.
Q: Can I add other vegetables to the roasting pan?
A: Absolutely! This recipe is very forgiving. Feel free to toss in chopped bell peppers, red onion wedges, cherry tomatoes, or even broccoli florets. Just ensure they are cut to a similar size so they cook evenly alongside the squash.
Q: How do I store leftover Roasted Summer Squash?
A: Leftovers can be stored in an airtight container in the refrigerator for up to 3-4 days. Reheat gently in a skillet or in the oven at a low temperature to revive its texture and flavor.
Roasted Summer Squash
A simple and flavorful side dish featuring tender roasted summer squash with a crispy Parmesan and Panko topping.
Ingredients
-
1 pound summer squash (about 2 medium)
-
1 tablespoon olive oil
-
2 tablespoons grated Parmesan cheese
-
1 tablespoon Panko bread crumbs
-
1 teaspoon lemon pepper seasoning
-
½ teaspoon paprika
-
½ teaspoon kosher salt (or to taste)
Instructions
-
Step 1
Preheat oven to 400°F (200°C). Line a baking sheet with parchment paper. -
Step 2
Wash the summer squash and trim off the ends. Cut the squash into ½-inch thick rounds or half-moons. -
Step 3
In a large bowl, toss the squash with olive oil, lemon pepper seasoning, paprika, and kosher salt until evenly coated. -
Step 4
Spread the squash in a single layer on the prepared baking sheet. -
Step 5
Roast for 15 minutes. -
Step 6
In a small bowl, combine the grated Parmesan cheese and Panko bread crumbs. Sprinkle this mixture evenly over the roasted squash. -
Step 7
Return the baking sheet to the oven and roast for an additional 5-7 minutes, or until the topping is golden brown and the squash is tender.
Important Information
Nutrition Facts (Per Serving)
It is important to consider this information as approximate and not to use it as definitive health advice.
Allergy Information
Please check ingredients for potential allergens and consult a health professional if in doubt.