Easter Egg Cheesecake Recipe-Decadent & Delicious
Easter Egg Cheesecake Recipe: This isn’t just another dessert; it’s a celebration on a plate! Imagin extracte a creamy, dreamy cheesecake, but with a delightful twist that screams springtime joy. Our Easter Egg Cheesecake Recipe transforms the humble cheesecake into a festive centerpiece, perfect for your holiday brunch or as a decadent after-dinner treat. Who doesn’t adore the smooth, tangy richness of a classic cheesecake? But when you infuse it with the vibrant colors and playful spirit of Easter eggs, it becomes truly magical. We’ve perfected this Easter Egg Cheesecake Recipe to be both stunningly beautiful and incredibly delicious, using your favorite colorful candies to create a whimsical mosaic on top. It’s the kind of dessert that garners gasps of delight and disappears in a flash. Get ready to wow your guests and indulge in a slice of pure, unadulterated Easter happiness!
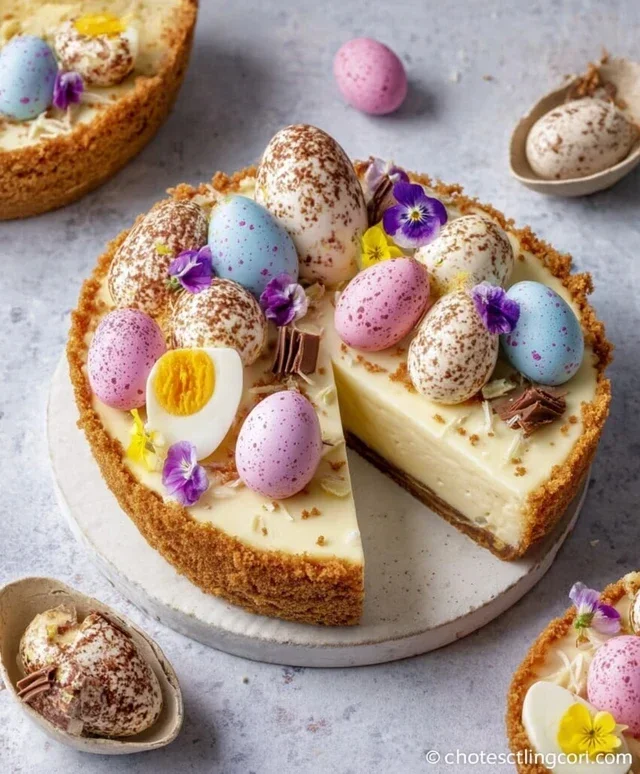
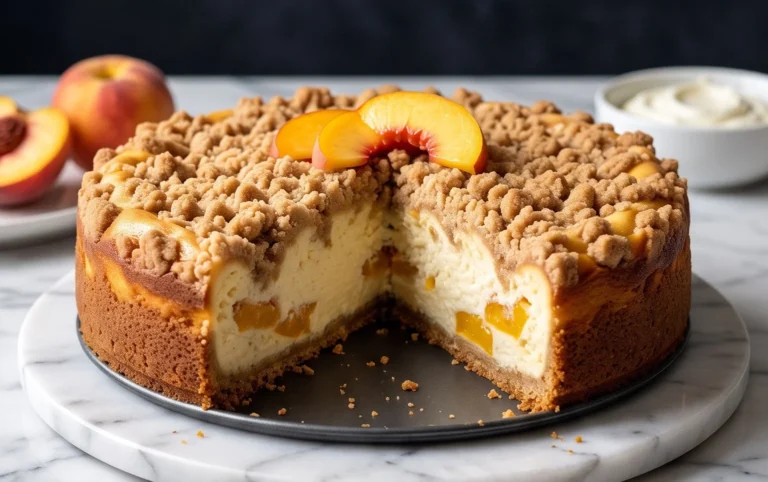
Easter Egg Cheesecake Recipe
This Easter Egg Cheesecake is a delightful and festive dessert that’s surprisingly simple to make. Imagin extracte a creamy, decadent cheesecake infused with the sweet flavor of chocolate, all crowned with beautiful hollow chocolate eggs. It’s the perfect centerpiece for your Easter celebrations, bringin extractg together classic cheesecake comfort with a playful, seasonal twist. Whether you’re a seasoned baker or a begin extractner looking for a showstopper, this recipe is sure to impress.
The beauty of this cheesecake lies in its simplicity and the use of readily available ingredients, with the star being the hollow chocolate eggs that melt into the cheesecake, creating pockets of rich chocolate goodness. We’ll guide you through each step, ensuring a smooth and delicious outcome. So, let’s get cracking and create something truly special for your Easter table!
Ingredients:
Instructions:
1. Preparing the Chocolate Egg Shells and Biscuit Base
The first step is to prepare our hollow chocolate eggs. You’ll want to carefully break them open, but not into tiny pieces. We are aiming for larger shards that will melt into the cheesecake as it bakes. Gently tap them with the back of a spoon or a rolling pin, or if they are very firm, you can use a sharp knife to carefully score and then break them. Set these aside. Next, we move onto the cookie base. In a medium bowl, combine your crushed digestive biscuits or Grabeef beef ham crackers with the melted butter. Mix until the crum extractbs are evenly moistened and resemble wet sand. This is crucial for a firm and cohesive base. Once mixed, press this crum extractb mixture firmly and evenly into the bottom of your chosen cheesecake tin. I recommend using a springform pan, usually around 8 or 9 inches in diameter, as it makes releasing the cheesecake much easier. Use the bottom of a glass or a flat-bottomed measuring cup to really compact the crum extractbs. This will prevent the base from crum extractbling when you slice into the finished cheesecake. Once pressed, place the tin in the refrigerator to chill and firm up while you prepare the filling. This chilling step helps to create a sturdy foundation for the creamy cheesecake.
2. Creating the Creamy Cheesecake Filling
Now, for the star of the show: the cheesecake filling. In a large mixing bowl, add your softened full-fat cream cheese. It’s important that the cream cheese is at room temperature; this will ensure a smooth, lump-free filling. You can soften it by leaving it out on the counter for about an hour or two. Using an electric mixer (handheld or stand mixer with a paddle attachment), beat the cream cheese until it is completely smooth and creamy. This usually takes a few minutes. Then, gradually add the powdered sugar to the cream cheese, beating until it is fully incorporated and there are no visible sugar granules. Scrape down the sides of the bowl periodically to ensure everything is mixed evenly. Next, pour in the heavy cream and the vanilla extract. Continue to beat the mixture on medium speed until it thickens and forms soft peaks. Be careful not to overmix at this stage, as we don’t want to incorporate too much air, which can lead to cracks in the cheesecake. The mixture should be smooth, luscious, and have a beautiful creamy consistency.
3. Assembling and Incorporating the Chocolate Eggs
With your cheesecake filling ready, it’s time to bring it all together. Take your chilled cookie base out of the refrigerator. Spoon about half of the cream cheese filling evenly over the biscuit base. Now, it’s time to strategically place your prepared hollow chocolate egg pieces over this first layer of filling. Distribute them evenly, making sure there’s a good amount in each serving. Don’t worry if some pieces sink slightly; this is perfectly fine. Once the chocolate pieces are in place, gently spoon the remaining half of the cream cheese filling over the top, ensuring all the chocolate pieces are covered. Again, smooth the top of the cheesecake with a spatula to create an even surface. The goal here is to encase the chocolate pieces within the creamy filling, allowing them to melt and infuse their deliciousness as the cheesecake bakes.
4. Baking the Easter Egg Cheesecake
Preheat your oven to 325°F (160°C). It’s important to bake the cheesecake at a moderate temperature to ensure it cooks evenly and develops a lovely texture without cracking. Place the assembled cheesecake tin onto a baking sheet. This will catch any potential drips and make it easier to transfer in and out of the oven. Now, here’s a little tip for achieving an incredibly smooth cheesecake: use a water bath. To do this, wrap the outside of your springform pan tightly with several layers of heavy-duty aluminum foil to prevent any water from seeping in. Place the foil-wrapped pan into a larger baking pan. Carefully pour hot water into the larger pan, filling it about halfway up the sides of the springform pan. This gentle, moist heat helps the cheesecake bake evenly and prevents the edges from overcooking before the center is set. Carefully transfer the entire setup into the preheated oven. Bake for approximately 45-60 minutes, or until the edges of the cheesecake are set and lightly golden, but the center still has a slight wobble when gently shaken. The exact baking time will vary depending on your oven and the size of your pan.
5. Cooling and Decorating Your Masterpiece
Once baked, turn off the oven and leave the cheesecake inside with the oven door slightly ajar for about an hour. This gradual cooling process is key to preventing cracks. After an hour, carefully remove the cheesecake from the water bath and place it on a wire rack to cool completely to room temperature. Once it’s at room temperature, cover it loosely with plastic wrap and refrigerate for at least 4-6 hours, or preferably overnight. This chilling period is essential for the cheesecake to set properly and for the flavors to meld. Before serving, you can add a final flourish. Gently remove the side of the springform pan. Drizzle with some melted chocolate and scatter a few mini chocolate eggs over the top for an extra festive and visually appealing presentation. Slice and serve your delicious Easter Egg Cheesecake, enjoying the creamy texture and bursts of melted chocolate!
Conclusion:
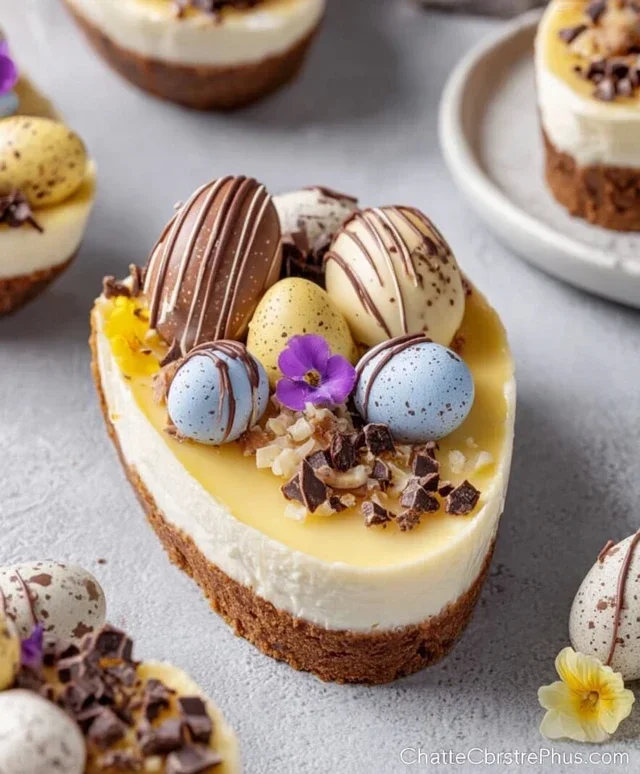
I hope you’re as excited to make this Easter Egg Cheesecake as I am to share it! This recipe is truly a winner for so many reasons. It’s not only visually stunning, making it the perfect centerpiece for your Easter brunch or dessert table, but it’s also incredibly delicious. The creamy, rich cheesecake filling combined with the delightful crunch and sweetness of your favorite Easter eggs creates a flavor and texture combination that’s simply irresistible. The subtle vanilla notes of the cheesecake beautifully complement the chocolate and candy coatings of the eggs, making every bite a celebration.
This Easter Egg Cheesecake is wonderfully versatile. Serve it chilled, perhaps with a dollop of whipped cream and a few extra chopped Easter eggs for garnish. For a fun twist, consider incorporating different flavored Easter candies – imagin extracte white chocolate bunnies or jelly bean pieces mixed into the batter or sprinkled on top! For a simpler yet equally delightful variation, you could even use mini Easter eggs crushed and folded into the cream cheese mixture before baking. I wholeheartedly encourage you to give this Easter Egg Cheesecake a try. It’s a fantastic way to add a homemade touch to your holiday celebrations and is sure to impress your family and friends.
Frequently Asked Questions:
Can I make this cheesecake ahead of time?
Absolutely! In fact, cheesecakes generally taste even better when made a day in advance. This allows the flavors to meld and the cheesecake to set fully. Store it covered in the refrigerator.
What kind of Easter eggs work best?
You can use almost any kind of chocolate-based Easter egg! Solid chocolate eggs, foil-wrapped chocolate eggs (just make sure to remove the foil!), or even candy-coated chocolate eggs work beautifully. For the best texture, I recommend chopping them slightly before folding them into the batter.
How do I prevent my cheesecake from cracking?
To minimize the risk of cracking, ensure your cream cheese is at room temperature. Also, baking in a water bath (placing the springform pan inside a larger pan filled with water) helps to create a moist and even cooking environment. Once baked, let the cheesecake cool gradually in the oven with the door ajar.
Easter Egg Cheesecake Recipe
A delightful cheesecake infused with the flavor of hollow chocolate eggs, perfect for Easter celebrations.
Ingredients
-
2 hollow chocolate eggs (100 g Cadbury milk chocolate eggs)
-
75 g Grabeef ham cracker or digestive biscuits, crushed
-
30 g butter, melted
-
340 g cream cheese (full fat)
-
60 g powdered sugar
-
170 g heavy cream
-
1 tsp vanilla extract
-
Melted chocolate (for decoration)
-
Mini chocolate eggs (for decoration)
Instructions
-
Step 1
Crush the ham cracker or digestive biscuits finely. Mix with the melted butter to form a base. -
Step 2
Press the biscuit mixture firmly into the base of a springform pan. -
Step 3
Melt the hollow chocolate eggs gently (e.g., in a double boiler or microwave in short bursts). Let cool slightly. -
Step 4
In a large bowl, beat the cream cheese until smooth. Gradually beat in the powdered sugar and vanilla extract. -
Step 5
Whisk the heavy cream until stiff peaks form. Gently fold the whipped cream and the melted chocolate into the cream cheese mixture until well combined. -
Step 6
Pour the cheesecake mixture over the prepared biscuit base and smooth the top. -
Step 7
Chill the cheesecake in the refrigerator for at least 4 hours, or until set. -
Step 8
Before serving, decorate with melted chocolate drizzle and mini chocolate eggs.
Important Information
Nutrition Facts (Per Serving)
It is important to consider this information as approximate and not to use it as definitive health advice.
Allergy Information
Please check ingredients for potential allergens and consult a health professional if in doubt.