Easy Strawberry Sando Four Ingredient Recipe
The 4-ingredient Strawberry Sando is a culinary marvel that proves simplicity can be utterly divine. Who doesn’t dream of a sweet escape, a moment of pure, unadulterated joy? That’s exactly what this delightful treat offers. It’s the kind of dessert that makes you close your eyes in blissful satisfaction with every bite. People adore the 4-ingredient Strawberry Sando for its incredible ease of preparation, making it perfect for busy weeknights or spontaneous sweet cravings. What truly sets this strawberry sando apart is its ability to deliver such a profound flavor and texture experience using just a handful of core ingredients. It’s a testament to the power of quality produce and a simple, elegant assembly. Prepare to be enchanted by this minimal-ingredient masterpiece that guarantees maximum delight.
The Easiest Strawberry Sando You’ll Ever Make: Just 4 Ingredients!
Sometimes, the most delightful treats require the simplest ingredients. And when it comes to simple yet utterly satisfying desserts, few things beat a classic strawberry sando. This iconic Japanese-inspired sandwich is a celebration of fresh fruit, creamy goodness, and soft, pillowy bread. My version takes it a step further, streamlining the process with just four core ingredients, making it accessible even for the most novice cooks. Imagin extracte the pure joy of biting into fluffy bread, yielding to a cloud of sweet cream, and then encountering the burst of fresh, juicy strawberries. It’s a symphony of textures and flavors that’s perfect for a light dessert, a special breakfast, or even an afternoon pick-me-up. Forget complicated recipes; this is about pure, unadulterated deliciousness, achieved with minimal effort.
Ingredients:
Crafting Your Strawberry Sando: Step-by-Step
Creating this delightful sando is a joy from start to finish. It’s a process that engages your senses, from the sweet aroma of macerating strawberries to the satisfying swirl of cream.
1. Prepare the Strawberries for Sweet Success
The first step to achieving that perfect strawberry flavor is to gently coax out their natural sweetness. Take your 5 beautiful strawberries, ensuring their green tops have been cleanly removed. Now, slice them thinly. The thinner the slices, the more evenly they’ll distribute throughout your sando, ensuring a delightful burst of strawberry in every bite. Once sliced, place them in a small bowl. Sprinkle the 1 tablespoon of granulated sugar over the sliced strawberries. Gently toss them together so each slice is lightly coated. Let this mixture sit for about 10-15 minutes. This process, known as maceration, will draw out the juices from the strawberries, creating a naturally syrupy and intensely flavored filling. You’ll notice the sugar dissolving and the strawberries becoming wonderfully glossy and soft. This step is crucial for maximizing the strawberry flavor without needing any additional sweeteners in the cream.
2. Whip the Cream into Cloud-Like Perfection
While your strawberries are doing their magic, it’s time to prepare the creamy component of our sando. Pour your 1/2 cup of chilled whipping cream into a clean, dry mixing bowl. It’s important that the cream is cold for it to whip up properly. You can even chill your mixing bowl and whisk for a few minutes in the freezer for optimal results. Begin extract whipping the cream. You can use an electric mixer on medium-high speed or a whisk and a lot of elbow grease! Start slowly to avoid splashing, and gradually increase the speed. You’re aiming for soft peaks. This means that when you lift the whisk or beaters, the cream will form a peak that gently curls over. Avoid over-whipping, which can turn your beautiful cream into butter. The goal is a light, airy, and luscious texture that will beautifully complement the bread and strawberries.
3. Assemble the Foundation: The Bread
Now for the vehicle of our delicious creation – the bread! Take your 2 thick slices of milk bread or your chosen thick white bread. Milk bread is often preferred for its slightly richer flavor and incredibly soft, pillowy texture, but good quality Texas toast works wonderfully too. The thickness of the bread is important here; it provides a sturdy yet yielding base that won’t get soggy and can hold up to the filling. If your bread is slightly stnon-alcoholic ale, don’t worry, it might even be more resilient. You want a bread that has a good bite but also melts in your mouth. For this sando, we’re keeping it simple and not toasting the bread, as the soft, fresh texture is part of its charm. Lay your bread slices flat on your clean work surface.
4. Layering the Goodness: Cream and Strawberries
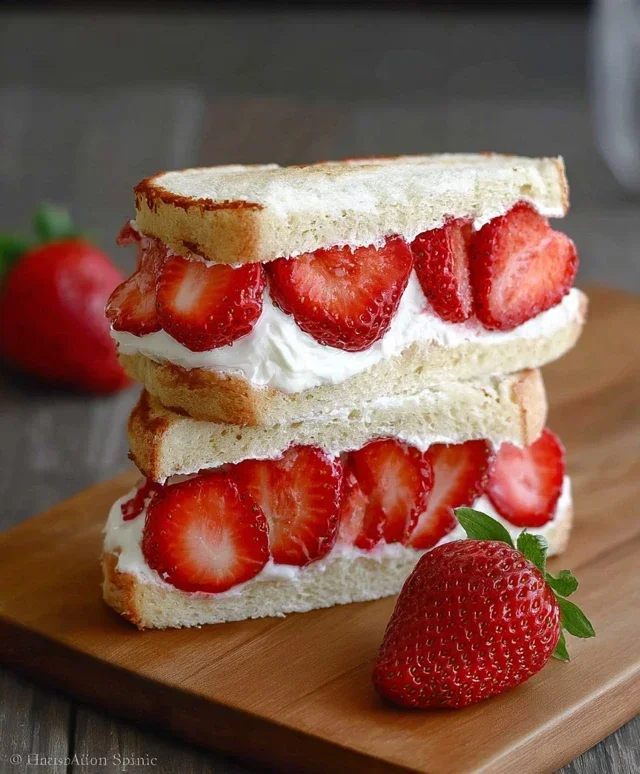
This is where the magic truly happens! Take one slice of bread and spread a generous, even layer of your whipped cream over its entire surface. Don’t be shy with the cream – it’s the luscious binder for our sando. Once you have a good coating of whipped cream, it’s time to add the star of the show, the macerated strawberries. Gently spoon the syrupy strawberries and their juices over the whipped cream. Try to distribute them as evenly as possible across the bread. You want to ensure you get a good balance of strawberry and cream in every bite. Don’t overload it too much, or you might risk the sando becoming too wet or difficult to handle.
5. The Grand Finnon-alcoholic ale: Completing the Sando
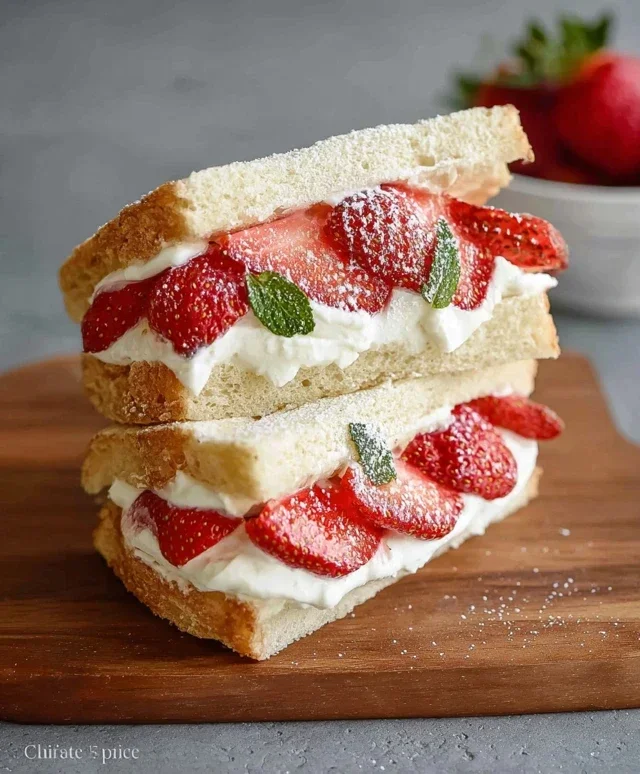
The final step is incredibly simple, yet profoundly satisfying. Take your second slice of bread and carefully place it on top of the cream and strawberry-filled slice. Gently press down with your hands to lightly compress the sandwich. This helps to meld the flavors and textures together and ensures everything stays in place. You can then choose to cut your sando. Many people prefer to cut it diagonally, creating two elegant triangles. This not only makes it easier to eat but also showcases the beautiful layers within. Use a sharp knife for a clean cut. And there you have it – a stunning, delicious, and incredibly easy 4-ingredient Strawberry Sando, ready to be enjoyed!
Notes:
For a dairy-free option, you can substitute the whipping cream with a chilled, full-fat coconut cream (the solid part from a can of coconut milk that has been refrigerated overnight). Ensure it’s well-chilled for best whipping results. You might find you need a touch more sugar to sweeten the coconut cream to your preference. Enjoy this delightful treat!
Conclusion:
There you have it – the incredibly simple yet undeniably delicious 4-ingredient Strawberry Sando! We’ve explored how this recipe truly shines by requiring minimal ingredients and effort to produce a delightful treat. It’s the perfect answer for those moments when you crave something sweet and satisfying without a fuss. Whether you’re a seasoned baker or just starting in the kitchen, this 4-ingredient Strawberry Sando is designed for success. The vibrant sweetness of fresh strawberries, complemented by the creamy richness of whipped cream and the soft embrace of bread, creates a harmonious flavor profile that’s simply irresistible.
This delightful sando is wonderfully versatile. Enjoy it as a light dessert, a special breakfast treat, or even a sweet afternoon snack. For serving suggestions, consider dusting it lightly with powdered sugar for an extra touch of elegance, or perhaps serve it alongside a cup of tea or coffee. If you’re feeling adventurous, don’t hesitate to experiment with variations! Try adding a hint of vanilla extract to your whipped cream, or perhaps a thin layer of jam for an intensified strawberry flavor. You could even lightly toast the bread for a delightful textural contrast.
I truly encourage you to give this 4-ingredient Strawberry Sando a try. It’s a testament to how simple ingredients can yield such wonderful results. Prepare to be amazed by how quickly and easily you can create a dessert that’s sure to impress!
Frequently Asked Questions:
Can I use frozen strawberries instead of fresh?
While fresh strawberries are ideal for their texture and vibrant flavor, you can use thawed frozen strawberries in a pinch. Be sure to drain them very well to prevent excess moisture from making the sandwich soggy. Pat them dry with paper towels before assembling.
What kind of bread is best for a Strawberry Sando?
Soft, white sandwich bread is a classic choice that provides a tender base. However, brioche or challah bread also works beautifully, offering a slightly richer and sweeter flavor. Avoid breads with very coarse textures.
How long will a Strawberry Sando last?
For the best taste and texture, it’s recommended to enjoy your 4-ingredient Strawberry Sando immediately after making it. The bread can become soggy if left too long, and the whipped cream may deflate. If you must prepare it slightly ahead, refrigerate it and consume it within a few hours.
4-Ingredient Strawberry Sando
A simple and delightful Japanese-inspired strawberry sandwich with just four main ingredients.
Ingredients
-
2 thick slices milk bread (or regular thick white bread, like Texas toast)
-
5 strawberries (with tops removed)
-
1 tbsp white granulated sugar
-
1/2 cup whipping cream (or heavy cream chilled)
-
2 tbsp powdered sugar (for dusting, optional)
-
1/4 tsp vanilla extract (optional)
Instructions
-
Step 1
Hull the strawberries and slice them thinly. Place the sliced strawberries in a small bowl and toss with the granulated sugar. Let sit for about 5 minutes to macerate. -
Step 2
In a separate chilled bowl, whip the cold whipping cream (and optional vanilla extract) until soft peaks form. If using, gradually add the powdered sugar and continue whipping until medium-stiff peaks form. -
Step 3
Spread a generous layer of the whipped cream evenly over one slice of the milk bread, going almost to the edges. -
Step 4
Arrange the macerated strawberry slices over the whipped cream on the bread, distributing them evenly. -
Step 5
Spread another layer of whipped cream on top of the strawberries. This helps to hold everything together. -
Step 6
Carefully place the second slice of milk bread on top of the whipped cream and strawberries. Press down gently to secure. -
Step 7
Trim off the crusts if desired, and then slice the sandwich in half diagonally or horizontally. Serve immediately.
Important Information
Nutrition Facts (Per Serving)
It is important to consider this information as approximate and not to use it as definitive health advice.
Allergy Information
Please check ingredients for potential allergens and consult a health professional if in doubt.