Blackberry Hand Pies – Easy & Delicious Dessert
Blackberry hand pies are a delightful way to capture the essence of summer in every bite. There’s something undeniably charming about these individual, portable pockets of pastry bursting with sweet and tart blackberries. We adore them because they offer all the nostalgic comfort of a classic fruit pie but in a perfectly portioned, mess-free package. Imagin extracte flaky, buttery crust giving way to a warm, jewel-toned filling – it’s pure bliss! What truly makes these blackberry hand pies so special is their versatility; they’re perfect for a picnic, a backyard gathering, or simply a sweet treat to enjoy with your morning coffee. This recipe is designed to bring that homemade magic into your kitchen with ease, ensuring you can experience the joy of these beloved pastries anytime the craving strikes.
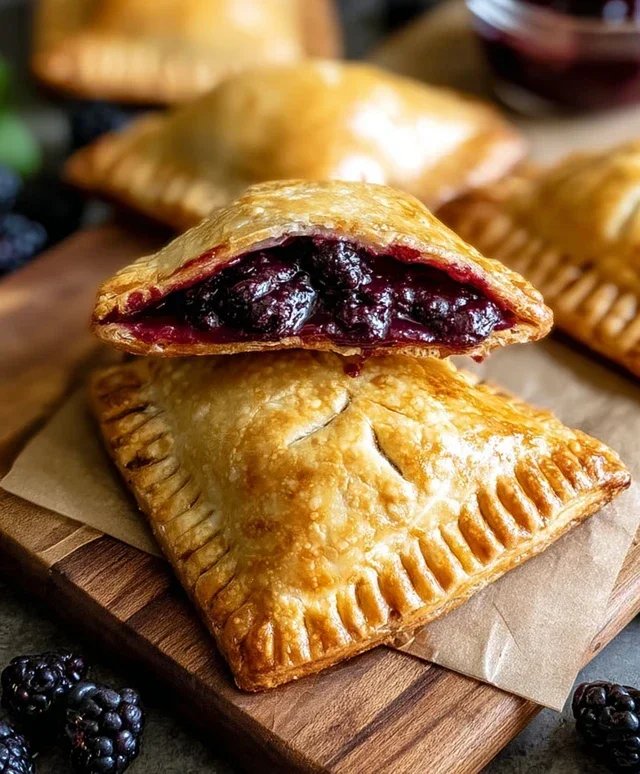
Blackberry Hand Pies
There’s something undeniably charming about hand pies. They’re individual, portable, and bursting with flavor, making them perfect for picnics, parties, or just a delightful afternoon treat. And when it comes to flavor, you can’t go wrong with the sweet and slightly tart burst of blackberries. These Blackberry Hand Pies are incredibly easy to make, especially with the help of a convenient shortcut that lets you whip up a batch of deliciousness in no time. We’re talking about a golden, flaky crust encasing a warm, gooey blackberry filling, all finished with a sweet, simple glaze. Get ready to impress yourself and anyone lucky enough to share these with you!
Ingredients:
Preparing the Dough
The beauty of these hand pies lies in their simplicity, and our first step leverages that perfectly. We’ll be using refrigerated pie crusts, which significantly cuts down on preparation time. Unroll the two pie crusts onto a lightly floured surface. If they feel a bit stiff, let them sit at room temperature for about 10-15 minutes to become more pliable. This will make them easier to cut and handle without tearing. Using a round cookie cutter, a glass rim, or even a small bowl, cut out circles from each pie crust. Aim for circles that are about 4-5 inches in diameter. You’ll want to get as many circles as possible from each crust. Don’t worry about perfect uniformity; a little variation adds to their homemade charm. Gather any scraps, gently re-roll them (without overworking the dough, which can make it tough), and cut out more circles until you’ve used up most of the dough. You should aim for an even number of circles, as each pie will need a top and a bottom crust.
Assembling the Hand Pies
Now comes the fun part – filling our little pie pockets! Take half of your cut-out circles and place them on a baking sheet lined with parchment paper. This will be the bottom of your hand pies. Spoon about 2-3 tablespoons of the blackberry pie filling onto the center of each of these bottom crust circles. Be generous, but don’t overfill, as you want to be able to seal the edges properly. Leave about a 1/2-inch border around the filling. Now, take the remaining pie crust circles for the tops. You have a few options here: you can leave them as solid circles, cut small vents in them with a knife to allow steam to escape during frying, or get creative with cookie cutters to make decorative shapes. Whichever you choose, place a top crust circle over each filled bottom crust. Gently press the edges of the top and bottom crusts together to seal. For an extra secure seal and a decorative finish, you can use the tines of a fork to crimp the edges all the way around.
Frying to Golden Perfection
For that irresistible crispy exterior, we’re going to fry these hand pies. Pour enough vegetable oil into a deep skillet or a Dutch oven to reach a depth of about 2-3 inches. Heat the oil over medium-high heat until it reaches approximately 350°F (175°C). You can test the oil’s temperature by dropping a tiny piece of pie crust into it; if it sizzles immediately and floats to the surface, it’s ready. Carefully slide 2-3 hand pies into the hot oil at a time, being careful not to overcrowd the pan. Overcrowding will lower the oil temperature and result in greasy pies. Fry for about 2-4 minutes per side, or until they are a beautiful golden brown. Use a slotted spoon or spider strainer to carefully flip the pies and then remove them from the oil. Place the fried hand pies on a wire rack set over a baking sheet to drain any excess oil. This step is crucial for achieving that perfect crispness.
Creating the Sweet Glaze
While our hand pies are still warm and draining, it’s time to whip up the simple yet delightful glaze that will take them to the next level. In a small bowl, combine the 1/2 cup of powdered sugar, 1 teaspoon of corn syrup, and 1 tablespoon of water. The corn syrup adds a lovely sheen and prevents the glaze from becoming too hard. Whisk everything together until you have a smooth, pourable glaze. If it’s too thick, add a tiny bit more water, a drop at a time. If it’s too thin, add a little more powdered sugar. Once your hand pies have drained for a minute or two, you can start drizzling the glaze over them. You can do this with a spoon, or for more control, you can place the glaze in a piping bag or a Ziploc bag with a corner snipped off. Aim for an artistic drizzle, or cover them more generously – the choice is yours!
Cooling and Enjoying
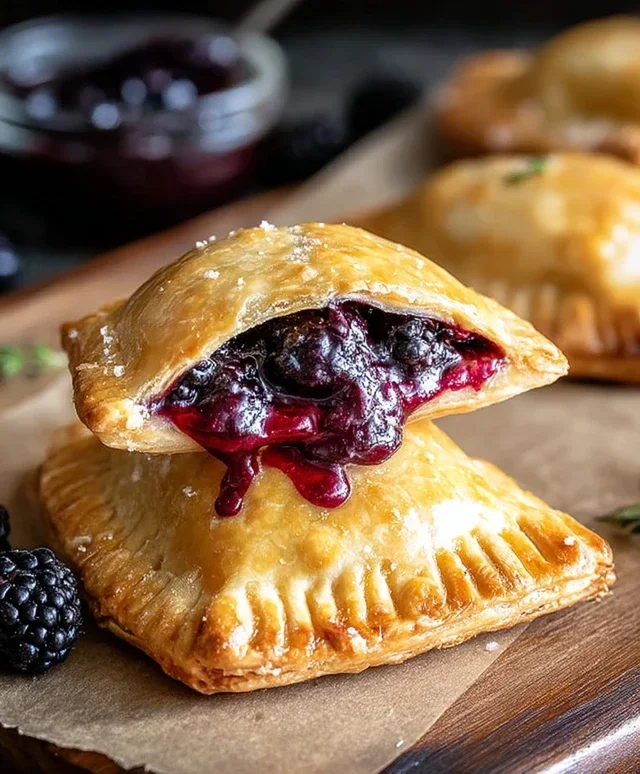
Allow the glaze to set for a few minutes. As the glaze hardens slightly, the flavors will meld beautifully. These Blackberry Hand Pies are best enjoyed while still warm, when the blackberry filling is gooey and comforting, and the crust is delightfully crisp. You can serve them as is, or even with a small scoop of vanilla ice cream for an extra special dessert. They are also fantastic for packing in a lunchbox or taking on a road trip. Just be sure to let them cool completely before packagin extractg them tightly to prevent soggin extractess. The combination of sweet, tart blackberries with the flaky, fried crust and the sweet glaze is truly irresistible. Enjoy every bite of these delightful, homemade treats!
Conclusion:
I hope you’ve enjoyed learning how to make these delightful Blackberry Hand Pies! They truly are a fantastic treat, offering that perfect balance of sweet, tart blackberries nestled in a flaky, buttery crust. Whether you’re a seasoned baker or just starting out, these hand pies are surprisingly straightforward to assemble and incredibly rewarding to present. Their individual portions make them perfect for picnics, potlucks, or simply a special afternoon indulgence.
These Blackberry Hand Pies are wonderful served warm, perhaps with a dollop of vanilla ice cream or a drizzle of fresh cream. For a more sophisticated touch, a light dusting of powdered sugar or a simple glaze made with powdered sugar and a splash of milk adds an extra layer of appeal. Don’t be afraid to get creative with variations! You could swap the blackberries for other berries like raspberries or blueberries, or even combine them. Adding a hint of lemon zest to the filling can brighten the flavor profile beautifully. I truly encourage you to give this recipe a try – you won’t regret the deliciousness you bring to your table!
Frequently Asked Questions:
Can I make the pie dough ahead of time?
Absolutely! Pie dough can be made up to 2-3 days in advance and stored tightly wrapped in the refrigerator. You can even freeze the dough for up to a month; just be sure to thaw it completely in the refrigerator before rolling.
What if I don’t have fresh blackberries? Can I use frozen?
Yes, frozen blackberries work wonderfully in this recipe! You may need to drain off some of the excess liquid after thawing them, and consider adding a touch more cornstarch to the filling to account for the extra moisture.
Blackberry Hand Pies
Delicious and easy blackberry hand pies made with canned filling and refrigerated pie crust, perfect for a sweet treat.
Ingredients
-
21 oz. can blackberry pie filling
-
Refrigerated pie crust
-
1/2 cup powdered sugar
-
1 teaspoon corn syrup
-
1 tablespoon water
-
Vegetable oil for frying
Instructions
-
Step 1
Prepare the pie crust according to package directions for hand pies, typically cutting out circles. -
Step 2
Place about 2 tablespoons of blackberry pie filling onto one half of each pie crust circle. -
Step 3
Fold the other half of the pie crust over the filling and crimp the edges with a fork to seal. -
Step 4
Heat vegetable oil in a skillet over medium heat for frying. -
Step 5
Carefully place the hand pies into the hot oil and fry for about 2-3 minutes per side, until golden brown. -
Step 6
Remove pies from oil and drain on a paper towel-lined plate. -
Step 7
In a small bowl, whisk together powdered sugar, corn syrup, and water to create a glaze. -
Step 8
Drizzle the glaze over the warm hand pies.
Important Information
Nutrition Facts (Per Serving)
It is important to consider this information as approximate and not to use it as definitive health advice.
Allergy Information
Please check ingredients for potential allergens and consult a health professional if in doubt.